Beginner’s WordPress Class at Coloft, Santa Monica


Mastering the use of WordPress is just one step in making your online presence effective and successful. Your website is going to be in a state of refinement until you’ve really figured out what works and what doesn’t. However, those folks that aren’t designers or developers tend to leave a lot of important decisions about how their website functions up to the developer of whichever theme they’ve purchased, and that’s not always a good thing. For example, just because every theme has a carousel on the homepage, doesn’t mean it’s an effective strategy for your website. Theme developers are trying to sell you a theme, so their objectives are different than yours when presenting a theme demo. Oftentimes people buy into the beautiful presentation of a theme without fully thinking through how it will affect their business goals. Your job is to create a website that has your own objectives in mind – you are going to be guiding your visitors on a path that you have determined.

If you’ve used WordPress even just a little bit, you’ve probably come up against the fact that it’s really hard to add extra space into the editor. You can only hit “return” a couple of times before it starts eating those extra line spaces you’re trying to create.
So if you want to create extra empty space in your page or post – anything beyond a paragraph break or two, you’ve probably pulled your hair out. This guide will show you the reliable ways to work with spacing in WordPress.
Hitting the Enter or Return key in the WordPress editor will create a new paragraph. This will leave a blank line before starting a new line.
If you don’t want to skip a line, you can use a line break instead. To do that, hold down the Shift key while pressing Enter/Return. This will start a new line without making a new paragraph.
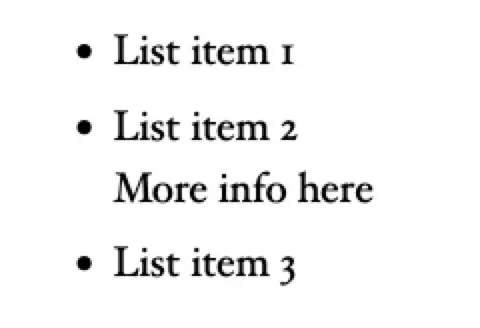
If you hit Enter while in a list, you will create a new bullet point. If you don’t want to do that, but just have a line break within the same list item (see item 2 in the screenshot below), hold down Shift and press Enter.
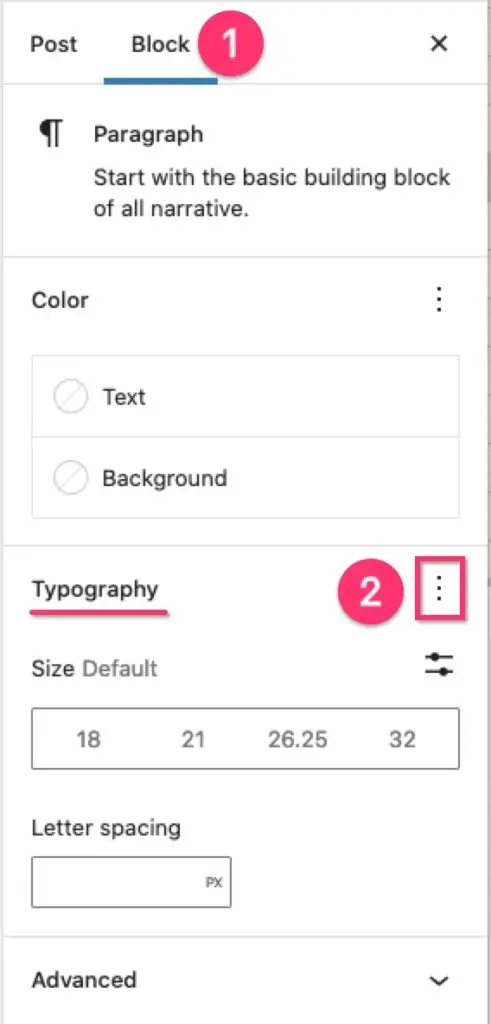
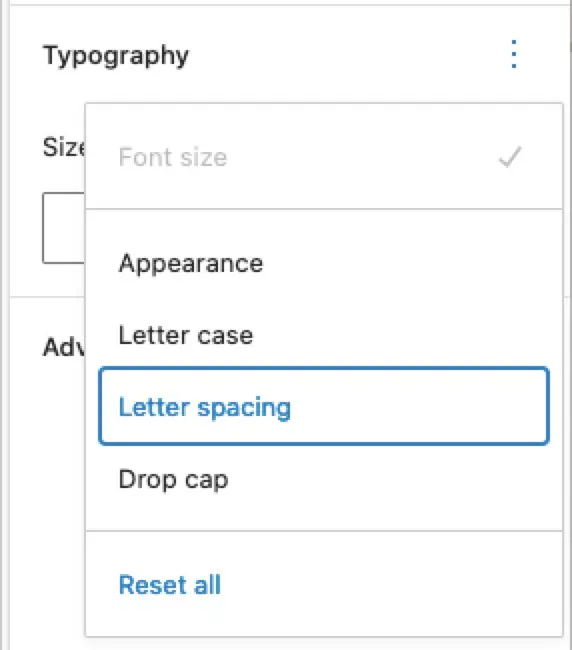
To add spacing between letters in the Block Editor:
Note that this applies to all the text in the block.

If you want to apply the spacing to specific words within the block, you have to edit the HTML directly.
style="letter-spacing:1em"> Your text here</span><span style="letter-spacing:1em"></span> – this closes the style and ends the spacing. 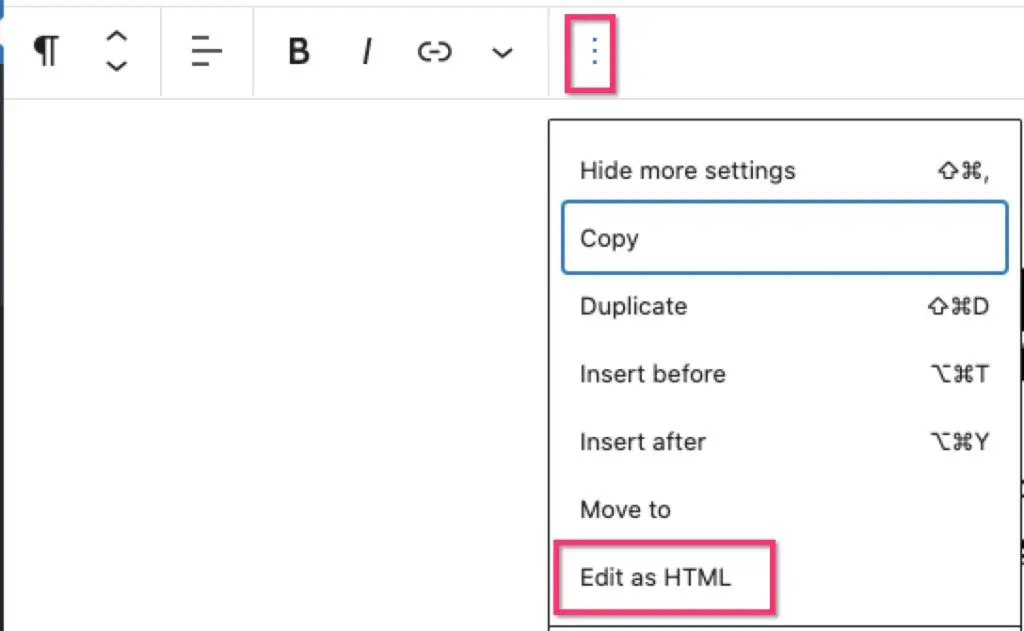


There isn’t a way to do this without editing the HTML (that I have found). Possibly some plugins that extend the editor might have this feature, but since it probabbly shouldn’t be used much, adding one of those plugins just for this, would be overkill.
style="word-spacing:1em"> Your text here</span><span style="word-spacing:1em"></span> – this closes the style and ends the spacing. 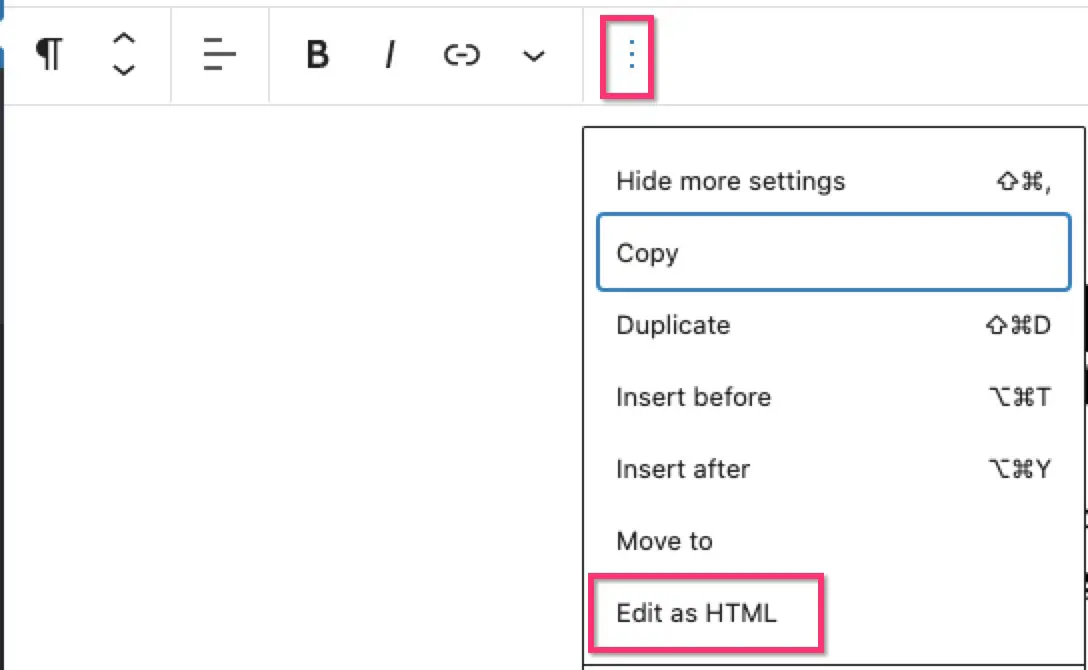


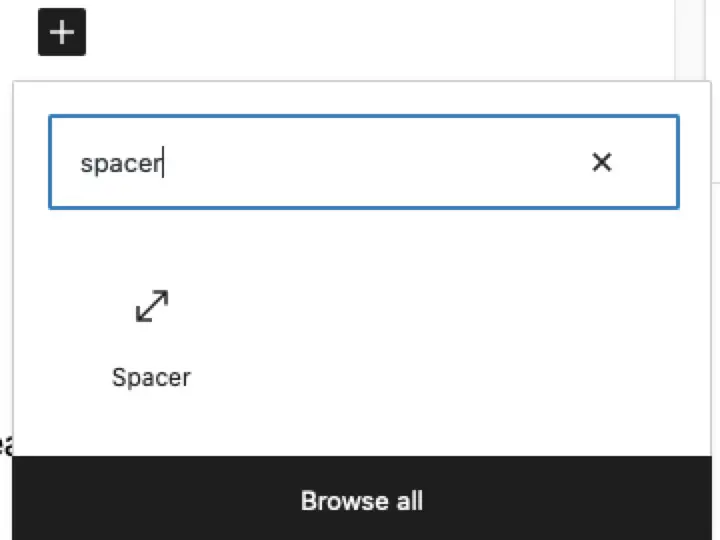
The Block editor makes it quite easy to add vertical space between blocks. There is a block called Spacer which is there by default.
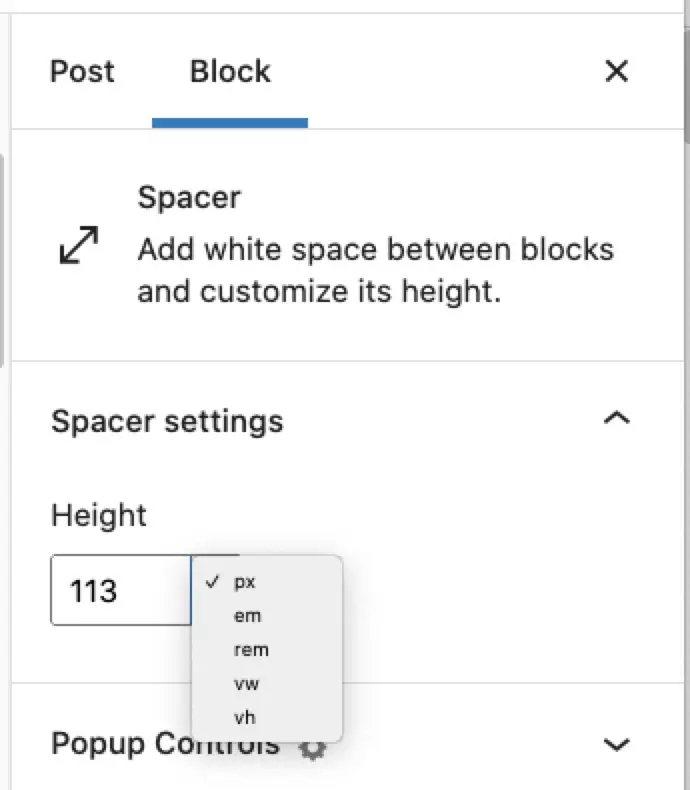
Simply add it and then choose how much space you want to add.
You can choose any of the following units to set the space in:
For full explanations of these units, please see this guide.
Pixels is the simplest and one we are all mostly familiar with. The problem is that this won’t scale with different device sizes. For example, if you add 200 pixels of space, it may look fine on desktop, but may be too much for mobile.
So using one of the other relative units may be a better choice.
You can also click on the block and drag the edges to expand or reduce the size of the block.

There’s several workarounds you can use if you happen to know HTML but that horrifies many non-techie WordPress users. Well the best way I have now found is an awesomely simple and to-the-point plugin called Spacer.
I recently had the honor of presenting at WordCamp Orange County 2013. I was asked to give a “WordPress 101” talk which may sound simple, but is deceptively so! It’s actually quite a challenge. I teach WordPress every day so the material is second nature, but in a presentation you only have about 30 minutes, so it’s impossible to convey all the information that WordPress 101 could potentially encompass.
My approach was not to go the mechanical nuts n’ bolts route of “this is how you install WordPress, here’s how you make a post” etc. Instead I focused on the understanding of basic concepts in WordPress which are absolutely necessary – differences between posts and pages, understanding what menus are and how they work, how themes work, the difference between a plugin and a widget etc. These are all areas that I see beginners grapple with understanding at first. If you don’t get these core concepts down, you’ll have problems with WordPress.
You may have noticed your Twitter feed stopped showing up on your WordPress site just recently. This is because Twitter changed their API. An API is something that various web services like Twitter provide in order to allow developers to tap into the service and work with information from it. So a WordPress plugin that pulls information from Twitter needs to utilize their API. When Twitter changes their API as they did recently, that will affect the plugin.
Hopefully the Twitter plugin you have been using has a developer that stays on top of such changes and provides an update to the plugin. With this recent Twitter update however there’s some steps that you as the site owner need to take to make sure the plugin will work. You basically have to create your own Twitter app – but don’t worry, it’s not as scary as it sounds.
Here are my current favorite Twitter plugins that have been updated to work with the new Twitter API.
WordPress shortcodes are a powerful feature that theme and plugin developers use to give users advanced tools at their disposal, but they continually confuse people. They are infinitely easier than writing actual HTML and CSS but can still freak out the typical user.
Using only the WordPress editor, one’s options for laying out a page or post would be limited to one block of text, perhaps interspersed with an image, video or maybe a photo gallery. What if you want to create a more visually interesting layout? Such as splitting your content area into columns, for example? Or including buttons, highlights and other fancy visual styles?
To write that kind of HTML and CSS would be quite tedious and beyond the abilities of most users. It would also create a lot of messy code in your WordPress editor, muddying the lines between content (which is primarily what you should be editing in WordPress) and code.