How To Make Your WordPress Site Conversion Friendly: Part 2 – Effective WordPress Sidebars
Sidebars are one of the best places to put your calls to action. Widgets make your life easy and almost every theme has ’em! But we need to exercise some self-restraint when working with sidebars to make them effective.
Control Your Sidebars!
The reason you need to control your sidebars is so that you can tailor the content based on the area of the site the user is in. Some themes may have already baked in a way for you to choose different sidebars on different pages so that you can have different widgets accordingly. But many have one sidebar that will display the same set of widgets on every area of the site. If you want to get really refined about the conversion process you’ll need more control.
If your theme does not give you a way to choose a different sidebar per page, you need to go grab yourself one of the plugins listed.
What Should Go In Sidebars?
Sidebars often become the dumping ground for all the stuff you want people to see but can’t fit anywhere else. But less is more in this case, and more is just…..diluting and confusing. So try to keep sidebars lean and mean. The very top of your sidebar should house the most important elements. What those elements are will vary according to your business, what you are selling (if anything) and what your conversions are (see part 1). Here are some ideas.
I wrote a post for Torque Mag ( an excellent WordPress news resource ) recently on the nature of the relationship between WordPress developers – those who create themes and plugins, and users of WordPress – those regular folks who have no interest in code and just want to create and manage their sites. As …
WordCamp Los Angeles is taking place September 21st & 22nd – two days of awesome WordPress fun, learning and connecting. If you haven’t bought your ticket yet, I recommend you do so ASAP since they are likely to sell out. As I write this there are only 60 remaining. You also want to make sure you can snag a T-shirt in the correct size. That’s right, in addition to 2 days of presentations and workshops, your $40 ticket also includes lunch and free T-shirt! Can’t say fairer than that. This is the cheapest, most value-packed tech conference around. If you are a WordPress user anywhere near the LA area, attendance is a must! You’ll have tons of fun, learn more than your head can hold, and will connect with other users, developers, designers etc. WordCamps really embody the spirit of the community – everyone freely shares ideas and you can ask all your burning WordPress questions.
Coloft is an awesome co-working space in Santa Monica. In addition to providing the physical space where entrepreneurs can work together, they also foster community and creativity. One of the value-adds they provide is Coloft Academy – an ongoing series of extremely affordable classes on everything from productivity, business strategy, design and marketing. I am going to be teaching a Beginner’s WordPress class as part of the Academy series.
Part 1 – Defining Your Conversions and Calls To Action
Mastering the use of WordPress is just one step in making your online presence effective and successful. Your website is going to be in a state of refinement until you’ve really figured out what works and what doesn’t. However, those folks that aren’t designers or developers tend to leave a lot of important decisions about how their website functions up to the developer of whichever theme they’ve purchased, and that’s not always a good thing. For example, just because every theme has a carousel on the homepage, doesn’t mean it’s an effective strategy for your website. Theme developers are trying to sell you a theme, so their objectives are different than yours when presenting a theme demo. Oftentimes people buy into the beautiful presentation of a theme without fully thinking through how it will affect their business goals. Your job is to create a website that has your own objectives in mind – you are going to be guiding your visitors on a path that you have determined.
If you’ve used WordPress even just a little bit, you’ve probably come up against the fact that it’s really hard to add extra space into the editor. You can only hit “return” a couple of times before it starts eating those extra line spaces you’re trying to create.
So if you want to create extra empty space in your page or post – anything beyond a paragraph break or two, you’ve probably pulled your hair out. This guide will show you the reliable ways to work with spacing in WordPress.
Adding a blank or empty line in WordPress
Hitting the Enter or Return key in the WordPress editor will create a new paragraph. This will leave a blank line before starting a new line.
If you don’t want to skip a line, you can use a line break instead. To do that, hold down the Shift key while pressing Enter/Return. This will start a new line without making a new paragraph.
Add a line break in a WordPress list
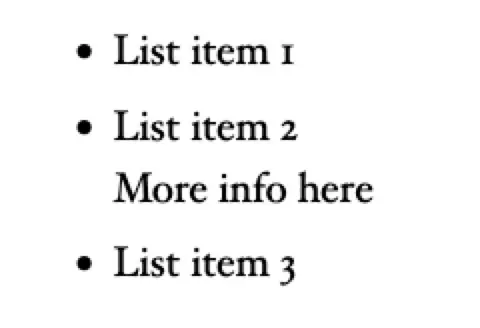
If you hit Enter while in a list, you will create a new bullet point. If you don’t want to do that, but just have a line break within the same list item (see item 2 in the screenshot below), hold down Shift and press Enter.
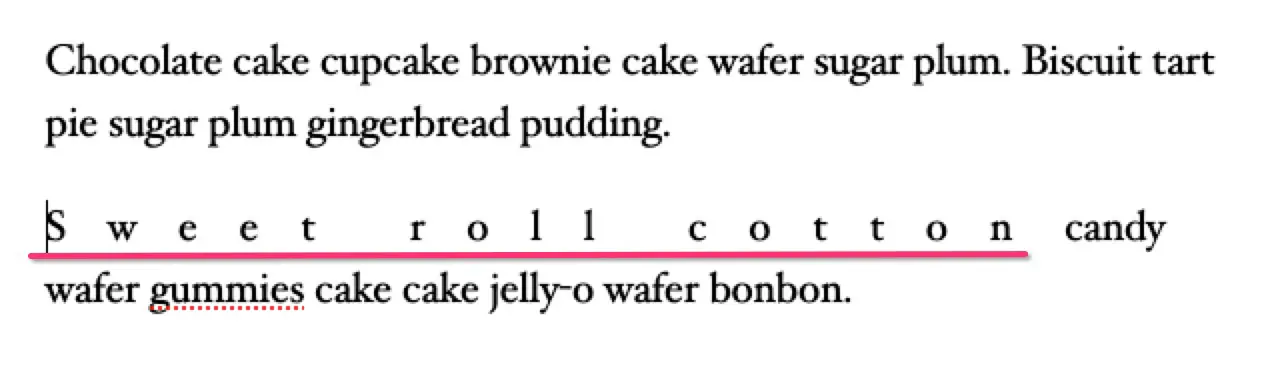
How to add space between letters in WordPress
To add spacing between letters in the Block Editor:
Click on the text you want to change. In the right panel, make sure the Block options are showing.
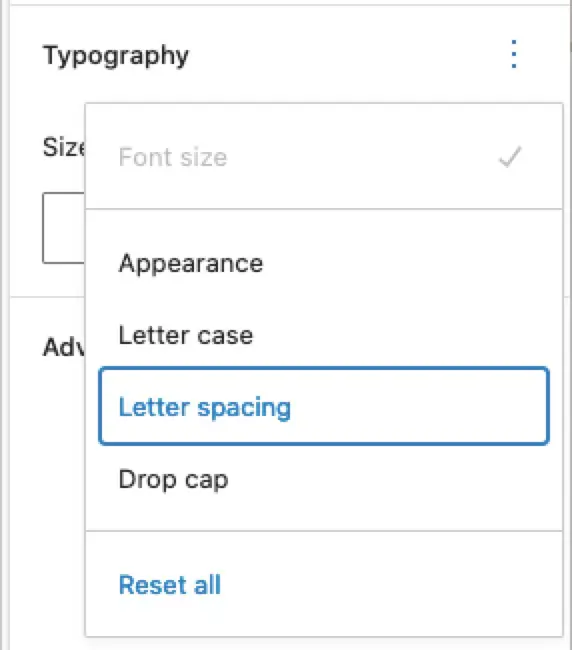
Click the 3 dots next to Typography
Click letter spacing
Choose the unit of spacing and set the value.
Note that this applies to all the text in the block.
If you want to apply the spacing to specific words within the block, you have to edit the HTML directly.
Select the block that contains the text
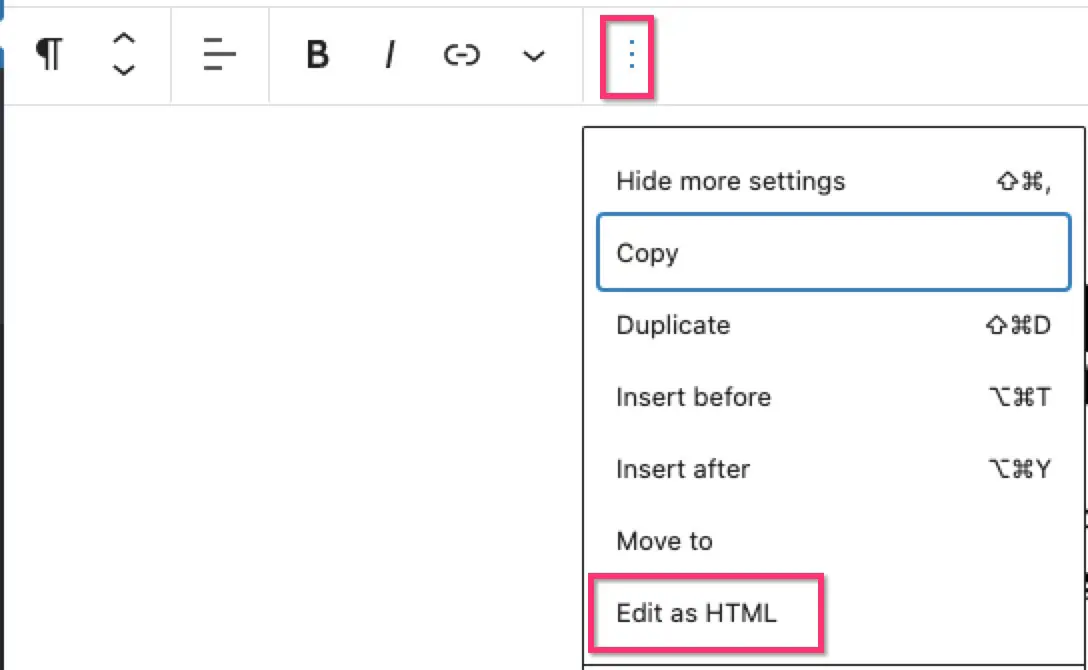
In the top toolbar, click the 3 dots and select Edit as HTML
The code we will add is: <span style="letter-spacing:1em"> Your text here</span>
Look for the text you want to change. Immediately before it, paste: <span style="letter-spacing:1em">
After the text you want to change, paste </span> – this closes the style and ends the spacing.
When you are done editing the HTML, click the 3 dots again and select Edit Visually.
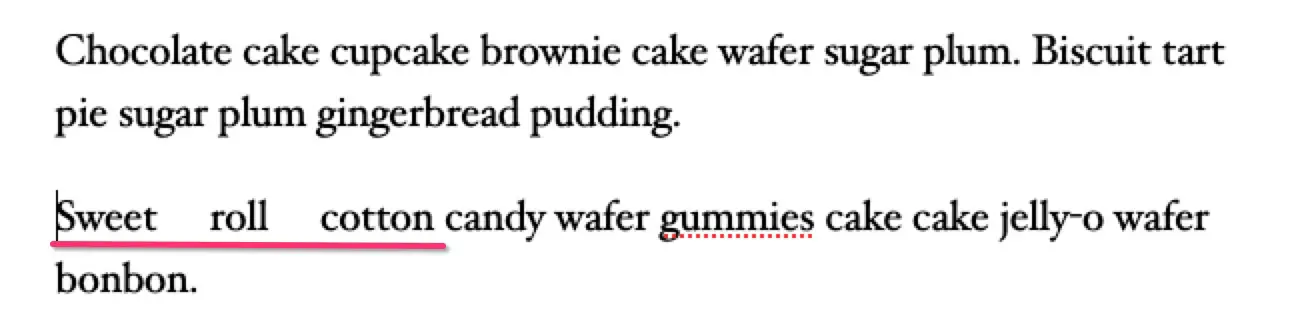
How to add space between words in WordPress
There isn’t a way to do this without editing the HTML (that I have found). Possibly some plugins that extend the editor might have this feature, but since it probabbly shouldn’t be used much, adding one of those plugins just for this, would be overkill.
Select the block that contains the text
In the top toolbar, click the 3 dots and select Edit as HTML
The code we will add is: <span style="word-spacing:1em"> Your text here</span>
Look for the text you want to change. Immediately before it, paste: <span style="word-spacing:1em">
After the text you want to change, paste </span> – this closes the style and ends the spacing.
When you are done editing the HTML, click the 3 dots again and select Edit Visually.
How to add spacing between blocks in Gutenberg / block editor
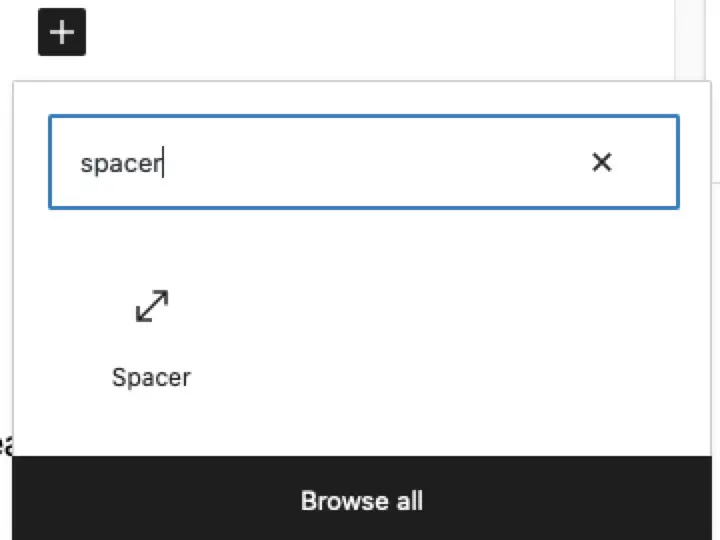
The Block editor makes it quite easy to add vertical space between blocks. There is a block called Spacer which is there by default.
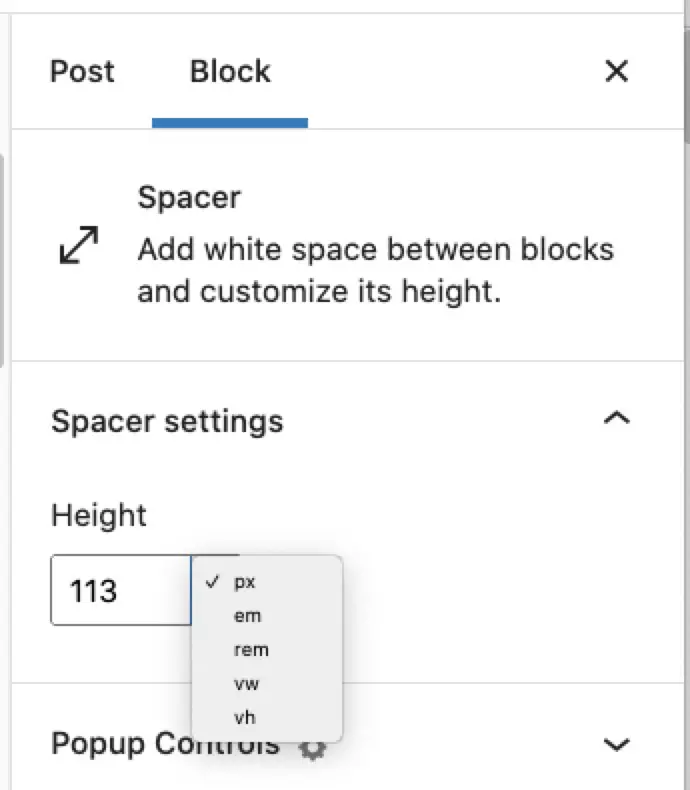
Simply add it and then choose how much space you want to add.
You can choose any of the following units to set the space in:
Pixels is the simplest and one we are all mostly familiar with. The problem is that this won’t scale with different device sizes. For example, if you add 200 pixels of space, it may look fine on desktop, but may be too much for mobile.
So using one of the other relative units may be a better choice.
You can also click on the block and drag the edges to expand or reduce the size of the block.
Adding space in the Classic Editor
There’s several workarounds you can use if you happen to know HTML but that horrifies many non-techie WordPress users. Well the best way I have now found is an awesomely simple and to-the-point plugin called Spacer.


 WordCamp Los Angeles is taking place September 21st & 22nd – two days of awesome WordPress fun, learning and connecting. If you haven’t bought your ticket yet, I recommend you do so ASAP since they are likely to sell out. As I write this there are only 60 remaining. You also want to make sure you can snag a T-shirt in the correct size. That’s right, in addition to 2 days of presentations and workshops, your $40 ticket also includes lunch and free T-shirt! Can’t say fairer than that. This is the cheapest, most value-packed tech conference around. If you are a WordPress user anywhere near the LA area, attendance is a must! You’ll have tons of fun, learn more than your head can hold, and will connect with other users, developers, designers etc. WordCamps really embody the spirit of the community – everyone freely shares ideas and you can ask all your burning WordPress questions.
 Coloft is an awesome co-working space in Santa Monica. In addition to providing the physical space where entrepreneurs can work together, they also foster community and creativity. One of the value-adds they provide is