Show Custom Text on a Password Protected WordPress Page/Post

It’s easy to password protect an entire page or post in WordPress. But what if you would like to show part of the content on the page?
I did look for a plugin solution for this at first. I thought it would be easy to find a plugin that gave you a shortcode to wrap around content you wanted to keep protected. I was wrong (unless you want to utilize user roles, but I didn’t want people to have to log in). I came across Content Protector, but found it really unreliable.
But there’s a pretty easy solution if you’re OK with a little code. For this solution you will need:
- A child theme (because we’re going to be editing template files)
- An understanding of the WordPress template hierarchy
- The confidence to edit some PHP code
If this all sounds a bit much for you, you may want to check out my post on Going Beyond WordPress Basics, to build your confidence.
First, a quick overview of what we’ll do. When using the built-in password protection in WordPress, it protects all content including the excerpt. The one exception is that any custom fields for that content will not be protected by default. So we will use these for our publicly available excerpt. There are two parts to making this work:
- Creating a custom field and content
- Displaying the content of the custom field in your theme
This method allows you to have custom content per page.
Creating a custom field
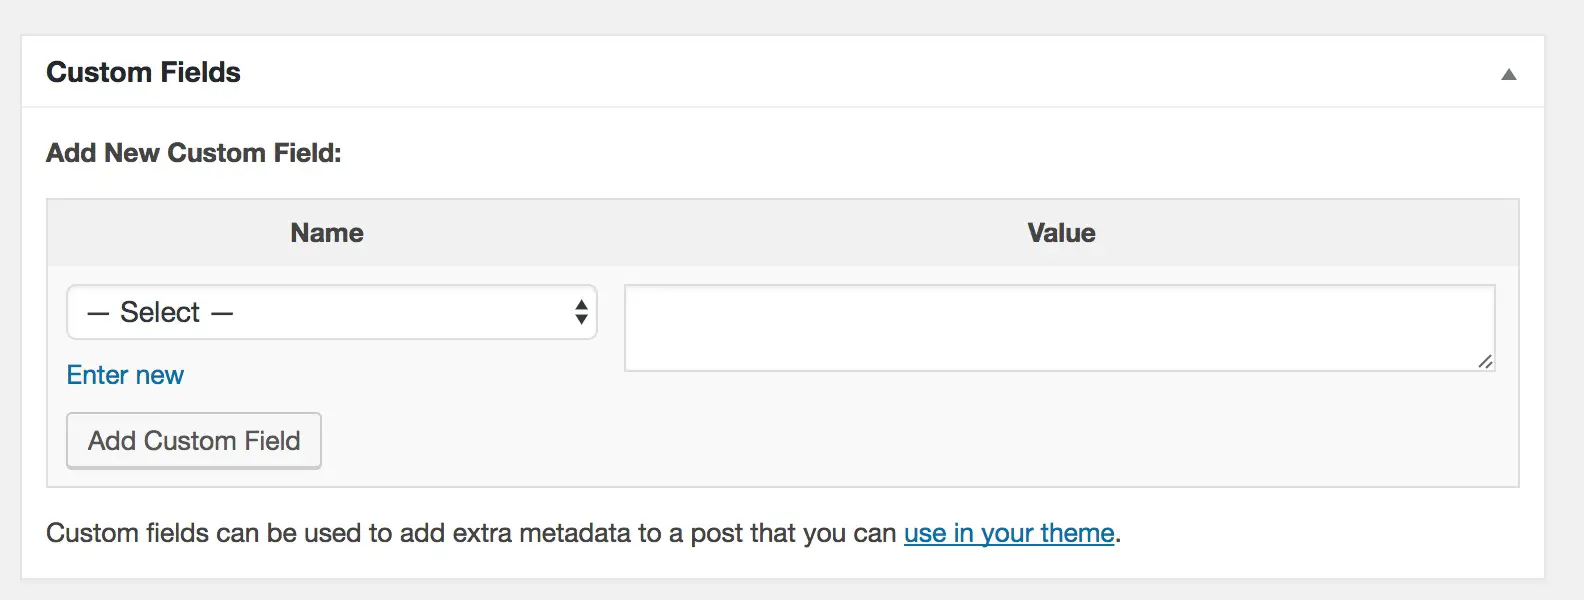
This is really easy because it’s already built-in. On your post or page edit screen, you should have the Custom Fields meta box:
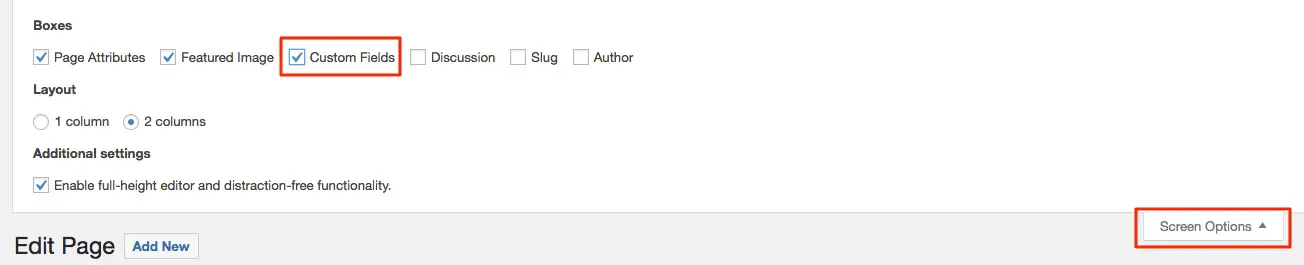
If you don’t see this, click on Screen Options at the top right and enable that box:
Custom Fields have 2 parts – a name (or “key” in programming terms) and a “value” – that’s just the content. The name/key will be the same for every post/page you use it on, but the value will vary – since it’s your custom content per page.
If you click on Select you’ll see a list of existing custom field keys which have been registered by your theme or plugins. Don’t worry about those. Click Enter new and you will see an empty box to type in. Here you are going to give your custom field a name. To avoid any conflicts, choose something unique that another theme or plugin wouldn’t use. I prefix mine with wtw to avoid any issue. So here I have named my new field: “wtw_public_content” and I’ve entered some placeholder text in the Value, to demonstrate. This is going to be the publicly available text for this page:

Make sure to update your post after this.
So now we’ve saved the custom meta information for this page, the next step is displaying this new information because it won’t show up by default.
Displaying your custom field
It takes very little code to make this work. The important part is knowing which template file you need to place it in. For this you need to know about the WordPress template hierarchy. Depending on your theme, and if you’re setting this up for posts or pages, the appropriate file you need to edit will vary. It could be singular.php, single.php (posts), page.php (pages), or a more specific template part.
You can find out more easily by installing the plugin What The File. This will tell you which template files are being used where. After activating the plugin, you will see the What The File item in your admin toolbar. Simply navigate to the page you want to analyze then mouseover “What The File” at the top right. You’ll see a dropdown of all the template files being used on the page:
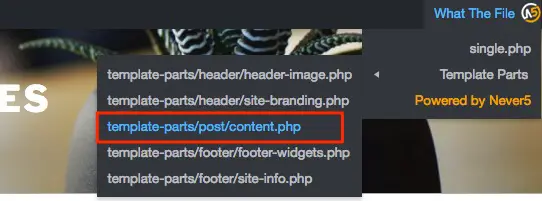
When using Twenty Seventeen in this example, single.php is referenced, but since there are also template parts, those are usually where the real action is happening. Mousing over that reveals several template parts, but we can discount the ones that refer to header or footer, because that’s not the area of the page we’re interested in. In this case, the correct file is content.php, found in template-parts/post.
If we look at the code directly, what we’re looking for is the code that controls the Loop for the page we’re looking at. In Twenty Seventeen we can see the content.php template part clearly referenced within single.php:
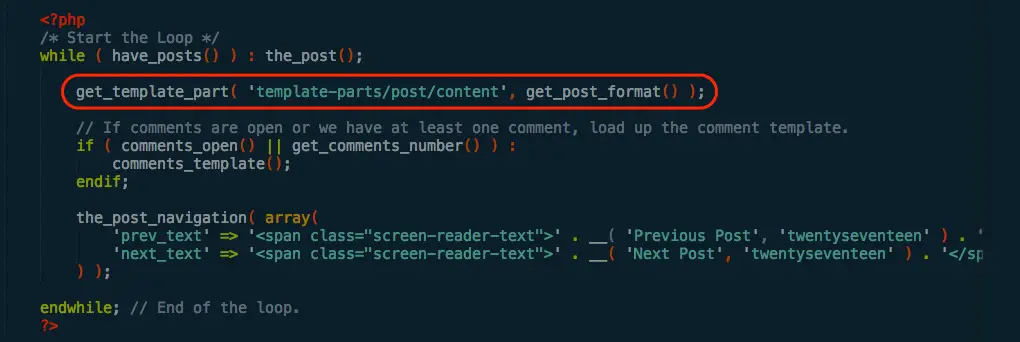
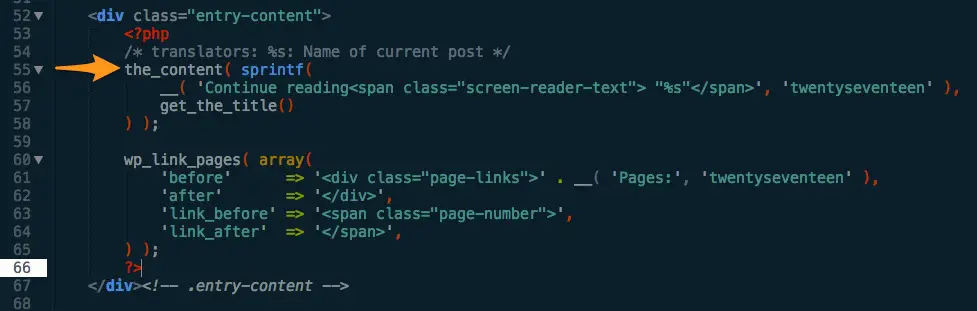
Once you’ve located the correct file you’re then looking specifically for where the_content is displayed. In Twenty Seventeen, it’s line 55 of content.php:
We’re going to display our custom field when two conditions are true:
- The content is password protected
- And the user hasn’t already entered the correct password
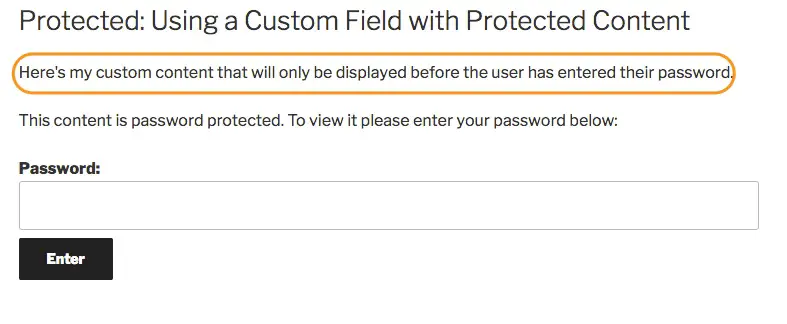
This will mean that before the user has entered the password they will see our custom text followed by the WordPress password form.
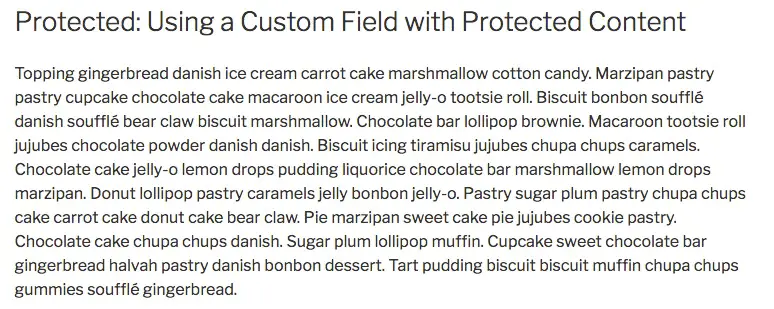
After they enter the correct password, they will no longer see the intro text (because it won’t usually be relevant), they will see the normal page content.
Fortunately there is one WordPress function that checks these conditions for us: post_password_required().
To display the custom field, we will use get_post_meta().
Here is the original code:
		the_content( sprintf(
			__( 'Continue reading<span class="screen-reader-text"> "%s"</span>', 'twentyseventeen' ),
			get_the_title()
		) );
I modified it to:
// Check if the post is password protected and if the password cookie exists yet
		if ( post_password_required() ) {

// if it requires a password which has not yet been entered, show the custom field
		echo '<p>'. get_post_meta($post->ID, 'wtw_public_content', true) .'</p>';

//the_content is still required because it will display the password input form
		the_content( sprintf(
			__( 'Continue reading<span class="screen-reader-text"> "%s"</span>', 'twentyseventeen' ),
			get_the_title()
		) );
		} else {
		//once the password has been entered, display the content as normal, without the custom field
		the_content( sprintf(
			__( 'Continue reading<span class="screen-reader-text"> "%s"</span>', 'twentyseventeen' ),
			get_the_title()
		) );

		}
In line 5 above, make sure to replace wtw_public_content with the name of your custom field.
If you don’t care about the conditions, it makes it even simpler because you don’t have to check for anything so just add this line above the_content:
echo '<p>'. get_post_meta($post->ID, 'wtw_public_content', true) .'</p>';
Here’s how it looks in action. When the user first encounters the page, they see my custom text (highlighted below), followed by the default content shown by WordPress for password protected content:
After they enter the password, they see the normal post content:
If you need a more robust membership solution with a full set of features for protecting content, you should check out MemberPress.