Getting The Word Out With Jetpack: Sharing, Subscribers, Social Media Networks
This is a guest post from my friend and super-talented WordPress developer, Suzette Franck. I’ve mentioned the Jetpack plugin before and in this post Suzette will take you deeper into it’s social marketing features.
****
Let’s face it, no matter how pretty your blog or website is, people come back for fresh, compelling, unique and informative content. While there are various services that will accomplish the same functionality, never before has posting to all the networks simultaneously been make simpler than with the magic of the plugin Jetpack. Jetpack is chock full of goodies like the Publicize, Sharing and Subscriptions features that can help the most amount of people see your unique content in your social network. Support for posting to Facebook, Twitter, Tumblr, LinkedIn, and Yahoo, as well as share buttons for the major networks are all included in this no cost but priceless plugin.
What is Jetpack?
Jetpack (latest version is 2.0) is a free add-on suite of plugins once only available to WordPress.com users made available for your self-hosted blog. If your blog is hosted at WordPress.com, you do not need this add-on to access these features, but if you are self-hosting your blog, for example, at Media Temple, WPEngine, HostGator, Blue Host, etc. you will need to download, install, and activate this plugin to have it provide the features we will be covering, Also, you will be required to have a WordPress.com account, so that all of your subscriptions and stats can be accessed centrally right form the WordPress.com dashboard. I will walk you through the installation and configuration process and get you up and running in no time posting your unique content to your followers.
Installing and Connecting Jetpack
Let’s get started. If you have not already done so, login to the dashboard of your site and then you go to Plugins –> Add New and search for Jetpack by WordPress.com, install the plugin and click activate to activate the plugin. Once the plugin is activated, you will see the following message:
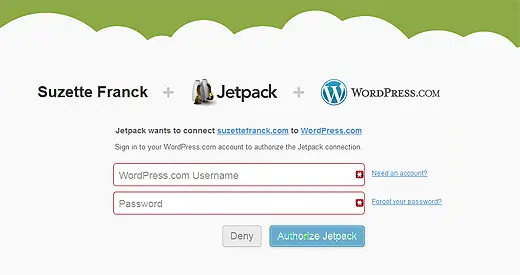
Click on the [Connect to WordPress.com] button and then enter in your WordPress.com username and password, then click [Authorize Jetpack].
Once successfully connected, you will see the following banner at the top of the page:
Once the Jetpack plugin has been installed and connected to WordPress.com, you will have the Jetpack side menu, from which you can view stats as well as perform a variety of other functions and configurations. I encourage you to look through and play with these features, as there are too many to cover in this article.
Sharing
Sharing buttons allow your visitors to interact with and share your article on their favorite social network, which helps to get the word out about your content. This is free advertising, and you should always encourage your visitors to share the article by making it very easy and fun to do so, and luckily, Jetpack Sharing Buttons allow you to do just that.
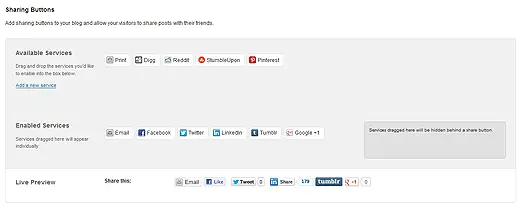
To access the Sharing settings, go to Settings – > Sharing, and scroll to the middle of the page where Sharing Buttons is indicated.
You will see a number of icons under Available Services. To activate the sharing button for that service, just simply drag the button down to the Enabled Services area or to the right, under the area indicated as, “Services dragged here will be hidden behind a share button”.
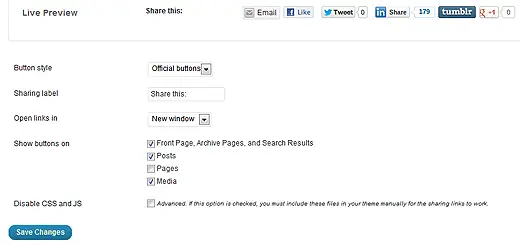
Below the gray box, you will notice the Live Preview area, that shows you the way that the buttons will be rendered on your blog. There are also a few additional settings that can be specified here, feel free to configure as you would like and then click on [Save Changes]:
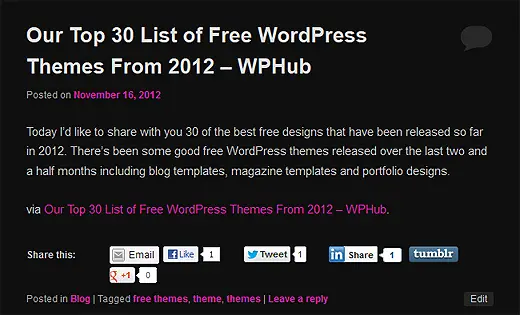
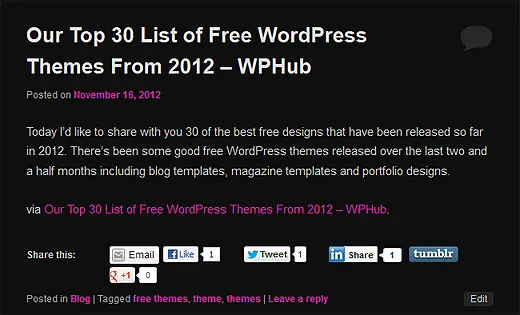
Now view one of your posts on the blog and you should see the buttons added at the end of the post/page, depending on where you have indicated them to show up:
Subscriptions
A great feature that was added a few versions ago to Jetpack is the Subscriptions feature, which shows up as a Subscriptions Widget and also as a few additional options at the bottom of the Comments Form, if you have enabled this in the Settings – > Discussion.
View of Comments Form with follow options enabled at bottom of blog post:
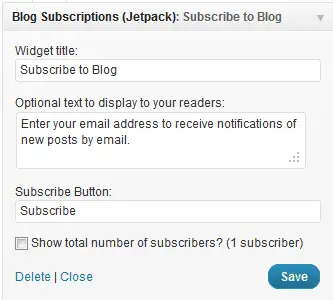
Subscriptions allows website visitors to be notified via email when a new post has been added to your blog. In addition to the Comments Form, there is also a Subscription widget which can be added to your side-bar enabled theme:
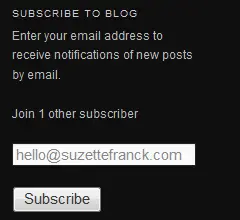
View of live widget on blog sidebar:
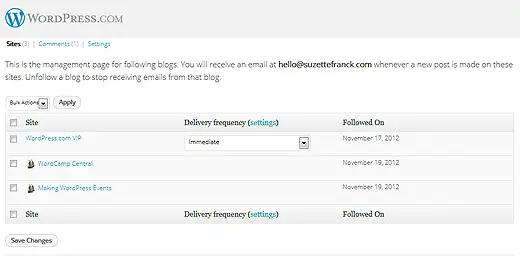
One of the benefits of subscribing to blogs through WordPress.com is that all of your blog subscriptions can be managed centrally through your WordPress.com account, where you can specify email frequency and email type.
Publicize Feature – we’ve saved the best for last
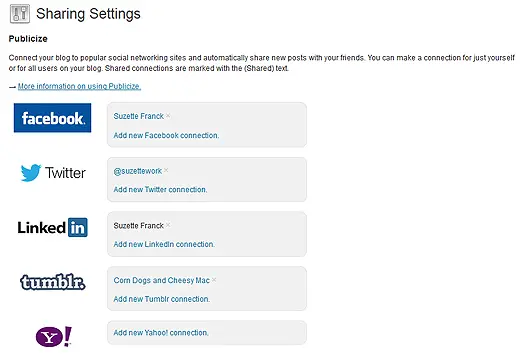
My favorite new feature, Publicize was just added with Jetpack 2.0. Now your WordPress blog posts can now be automagically posted to your social networks which include: Twitter, Facebook, LinkedIn, Tumblr, and Yahoo. There are several services which can do this currently, such as Twitterfeed.com but there has not been a single plugin that have I found to be this comprehensive including posting to all of the major networks at the same time. Total time saver!
To use this feature, go to Settings – > Sharing and you will be presented with the following connection screen:
To add a connection to the selected service, click on the appropriate link and follow the instructions to connect your external accounts.
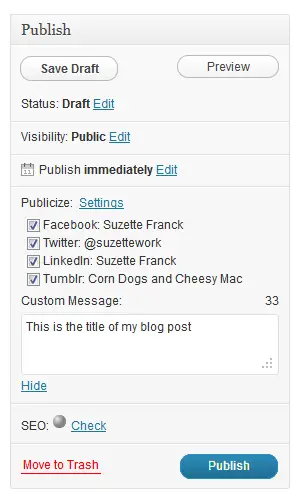
Once there is at least one account connected, when you publish a new blog post, you will notice the following Publicize options near the blue [Publish] button, click on edit link to expand to the below view:
Once you click on [Publish], the post will be posted to all of the selected networks. This feature does not work to republish with changes, and only will send out the post once to each selected network and there is no undo, so make sure you click carefully!
Also, it is on this panel that you can schedule posts to be published in the future by clicking on the Edit link next to Publish immediately and changing the date and time. If you specify a future date, the post will be publicized to your networks at the time you specify. This trick can come in handy when you can spend some time and put in a month’s worth of blog posts that will automatically appear on the date and times that you specify. Another great time saver!
Wrap-up
Jetpack is an amazing suite of add-on features that perfectly compliment your blog and allowing maximum reachability to your audience. Though some developers have complained of the bloat or unnecessary applications of Jetpack, there are many social media features as well as performance enhancements that outweigh the negative. Ease of publishing to social networks for you and your visitors will insure that everyone gets the most out of your amazing content and receive updates in a timely manner, and email subscriptions help to strengthen and reinforce your relationship with your visitors and keep them coming back for more.
My hope is that this article has made you curious about Jetpack and I encourage you to test out all of the current and future applications of Jetpack as they are released.
-Suzette Franck
[email protected]
http://www.suzettefranck.com








I have a slight issue with Publize: even if you have not used it when publishing a post. You can't go back an retrospectively, check the check boxes. I now need to find a way to get my latest post on LinkedIn .