A Guide to Moving WordPress Sites

If you work with clients using WordPress in any capacity, or even if you are a solo site owner, at some point, you will probably need to move a site from one server to another (also known as migrating).
In this guide I’ll show you 3 methods of migrating a WordPress site.
Migrations are required in numerous situations, such as when you’re switching webhosts, when turning a development site into a live site, or when making a test site. Even restoring a site from a backup has some similar steps.
Understanding how this process works will greatly empower you. There are a few moving parts but it’s completely possible to do, even if you are not a developer, and you will feel like a champ. I’d suggest practicing on a test site before handling anything that’s important 🙂
Things to know before you start
Always work with a safety net. Make a backup of your site before you do anything. That way you know if anything goes wrong, you have it to fall back on. Not that I expect you to need it, but it will give you confidence to know that it’s there.
Moving a site around involves both those parts:
- the database
- the files on the server
I’d suggest reading this post to gain an understanding of how the filesystem and database work together.
This guide is intended for single WordPress sites. Multisite has some specific nuances and may require some different steps. The Pro version of Duplicator plugin mentioned below, can handle multisites. Also see this guide for manual migration steps.
In this post I’m only focusing on the mechanics of moving WordPress itself. If you are changing your domain name, there could be additional steps to consider, like setting up redirects from the old to the new domain, resubmitting your sitemap to Google etc.
And if you are moving from one hosting company to another, but keeping the same domain, you will also have to deal with DNS changes, possibly moving your email hosting etc.
Table of Contents
First step: spring cleaning
Before moving a site you should clean it up, there’s no point moving old, unused plugins or themes for example. So do an audit:
- Delete unused plugins
- Besides your active theme, keep one default theme and delete the rest.
- Check if the site is using a caching plugin – you won’t want to move cache files, especially if changing the domain name. Deactivate it and delete its cache and configuration files. In fact, it’s probably easier to simply delete the plugin and reinstall it after you’ve moved the site.
Method 1: Duplicator Plugin
- Requires using FTP
- Does not require a WordPress install at the destination
- Need to create a database manually in cPanel
- More reliable, especially for large sites
Duplicator has been one of my go-to tools for years. I wrote this guide explaining how to use it to make your own testing site.
To use this method, you do need to have FTP access and be comfortable uploading files that way. I highly recommend getting familiar with this process if you are not already. It will give you even more power and control over your WordPress site if you can grasp this.
I find this method to be the most reliable, even when moving large sites.
Create and download your site archive
Install and activate the Duplicator plugin
Go to Duplicator > Packages > Create New
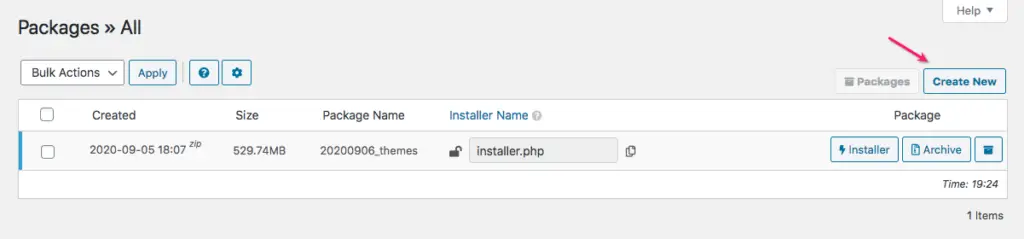
A Package is an archive of your site that contains both database and files.
In most cases, you can leave the defaults for Step 1 and proceed to Next.
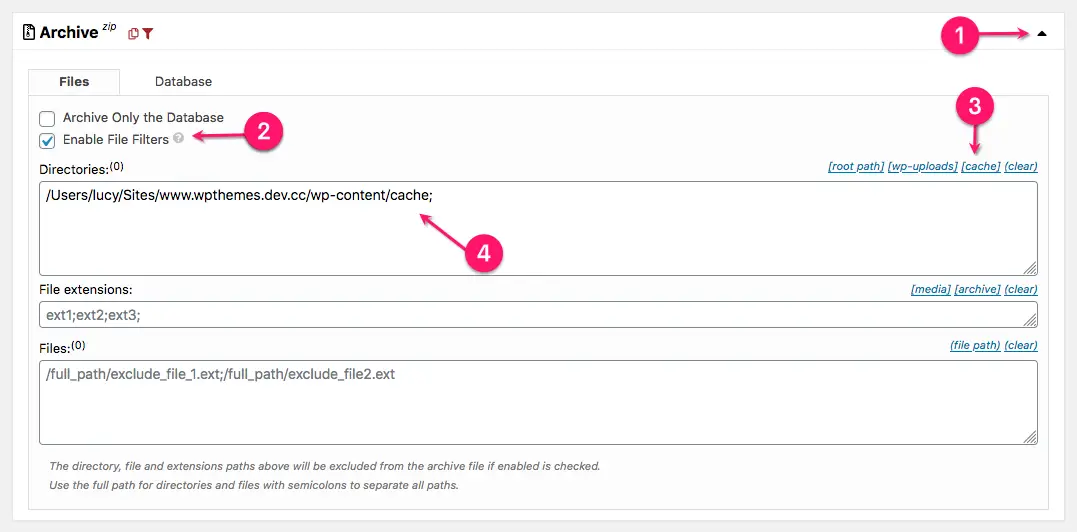
However, in some cases you may want to exclude some files from being migrated. Most commonly this would be the cache folder, or it might be other unneeded files:
- Expand the Archive tab.
- Click the box for Enable File Filters.
- Select the cache option
- the path will be pre-filled for you.
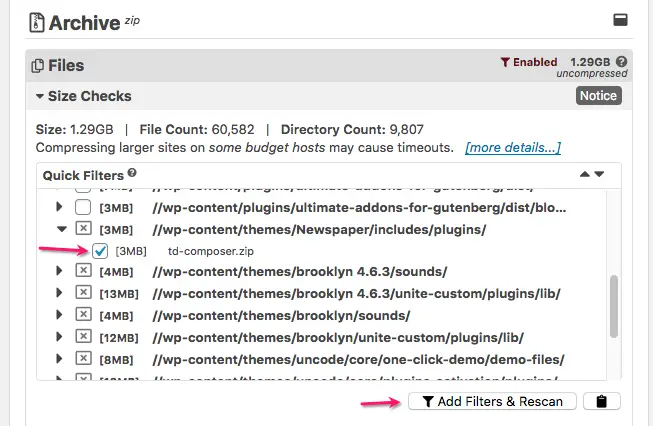
After clicking Next, Duplicator will then scan your site to check for any possible issues that could affect the Package creation process.
Folders with a grey x indicate folders that contain large files. Click to expand the folder and see the large files. Check the boxes for any you want to exclude. Then select Add Filters & Rescan.
Even if Duplicator shows a file size warning, it won’t stop you from proceeding. Generally speaking, if any issues are encountered during the process, they are usually related to hosting limitations and large sites. If you have issues with the Build process you may need to exclude more files, or speak with your host about any limitations Duplicator points out.
Then click Build at the bottom to proceed. The build process can take a few minutes for a large site.
Once finished you’ll see a screen where you will then download the installer file (a PHP file) and the archive (a zip file).
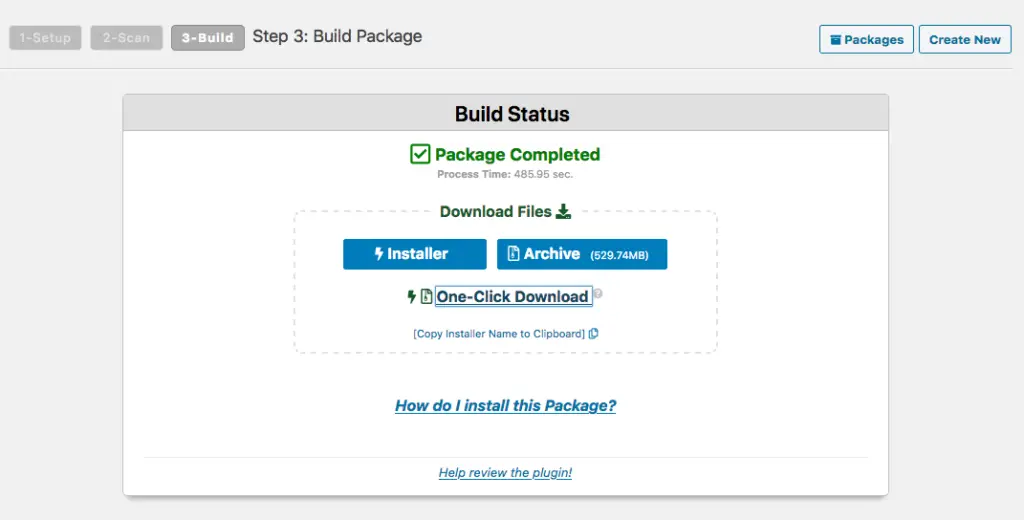
Save these files to your computer in a place that’s easy for you to find, such as a dedicated folder on your desktop.
Prepare the destination
Create the new database
Since you’re not going to install WordPress in the usual way at the destination, no database will exist yet. So you have to manually create a new database into which your site’s information will be migrated. This might sounds tricky but it’s easier than you might think.
If you are using a cPanel-based host or a similar hosting control panel, you should have a MySQL database wizard. If you don’t, check with your host about how to proceed.

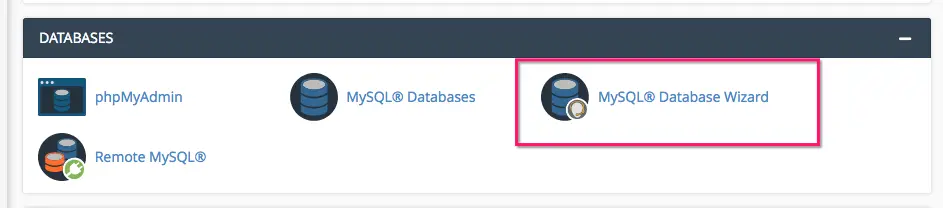
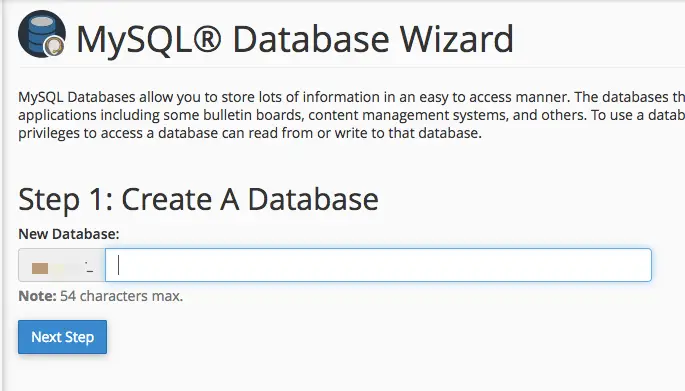
This wizard will take you through the process of setting up a new database, a database user and password. This information is eventually going to be added to your wp-config.php file, so save it temporarily since you’ll need it later.
However you don’t personally have to memorize this info. It’s a set it and forget type of thing. So you can and should use a very strong password. The user and db name can be the same.
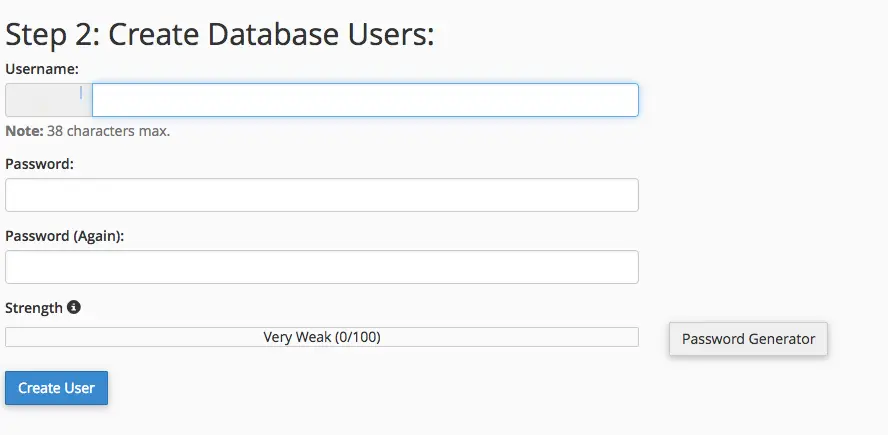
Save the information somewhere temporarily since you’ll have to input it into Duplicator.
Check All Privileges on Step 3:
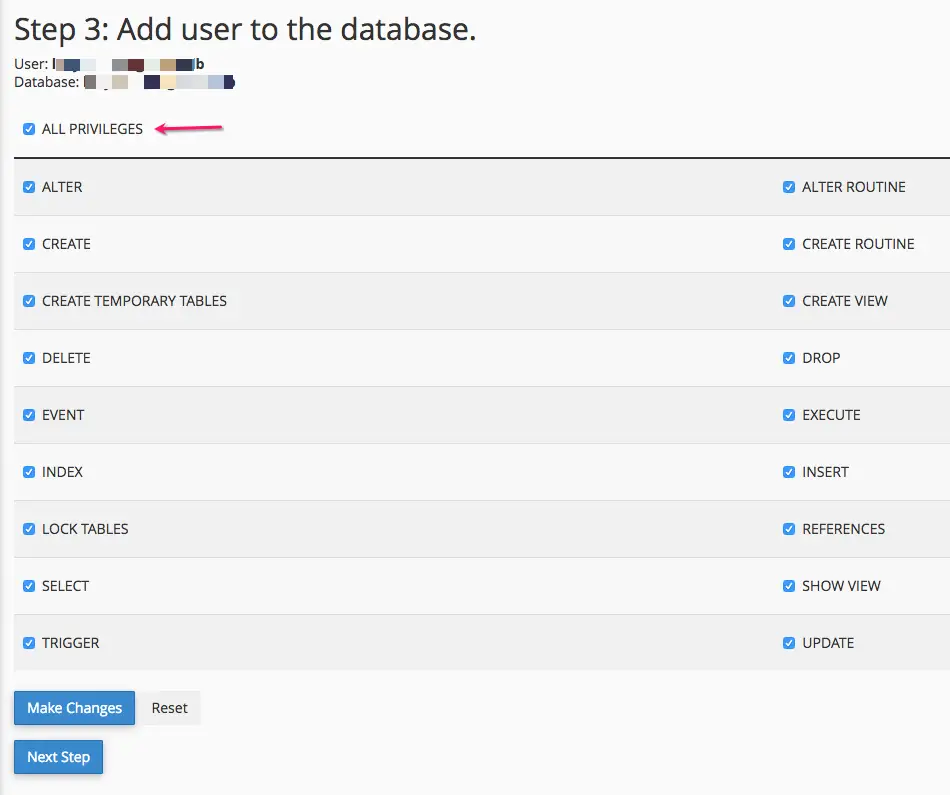
After clicking Next Step you should see a summary of the new database you’ve created. Now you’re done with this part of the process.
Back to the migration
Using FTP, upload both the zip and installer files into the empty folder where you want your site to live.
It’s important that it’s empty and that you’ve not installed WordPress there.
After the files have finished uploading, navigate to the installer.php file in your browser: www.example.com/installer.php
Replace www.example.com with your own domain and the path to the installer file (if it’s in a sub-folder).
From here you will follow the prompts and Duplicator will magically create your site.
On the first screen you shouldn’t need to make any adjustments and you can proceed to clicking Next.
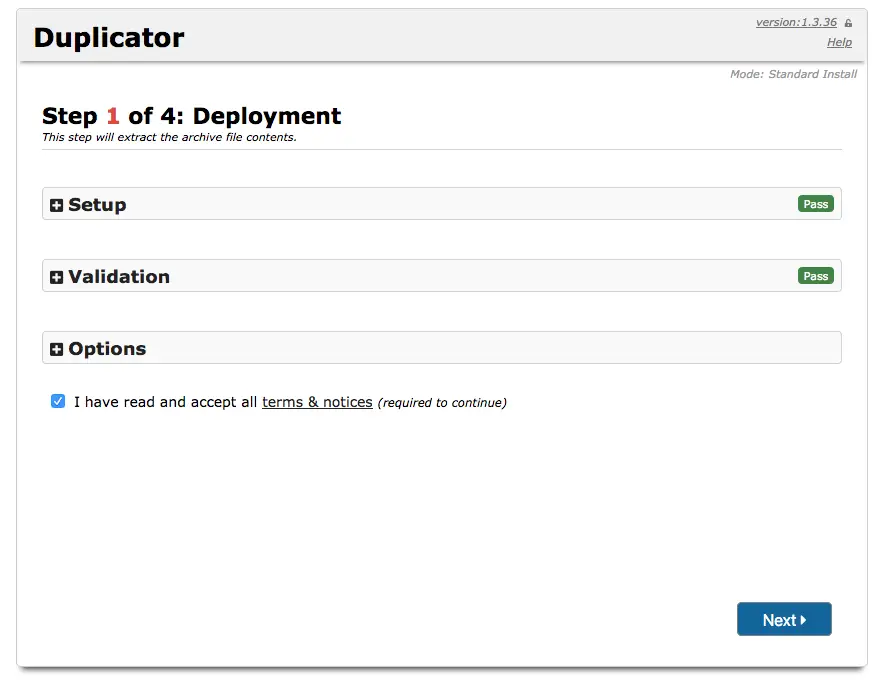
Duplicator will then extract the archive which could take a few minutes for a large site.
On the next screen you have to input the database name, user and password that you set up previously.
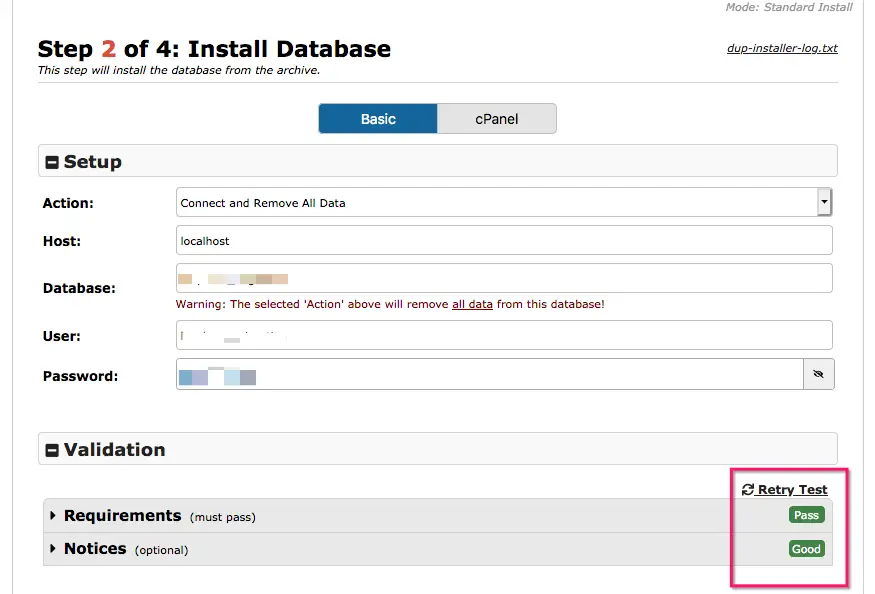
Make sure you use the test connection link to validate that everything is ok. Then click Next, and OK on the confirmation popup.
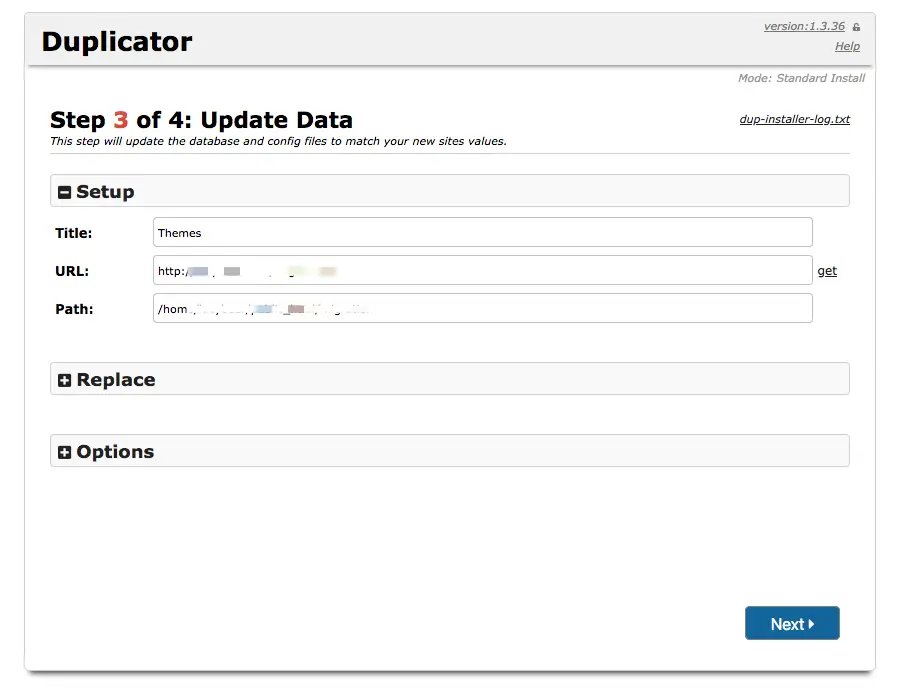
On Step 3 you only need to verify that the URL and path are correct. If you are moving to a different domain, Duplicator will automatically detect references to the old domain and will replace them with the new one automatically. You don’t have to touch the Replace section.
Note: If you are moving your site to a new host, but will ultimately be keeping the same domain, you may need to use a temporary domain provided by your host first, so that you can see and check your site on the new sever, before it goes live.
On some rare occasions I have hit a snafu at this step where I kept seeing a 403 error. This was related to some security rules set by the host who easily resolved it and I was able to continue the process after that.
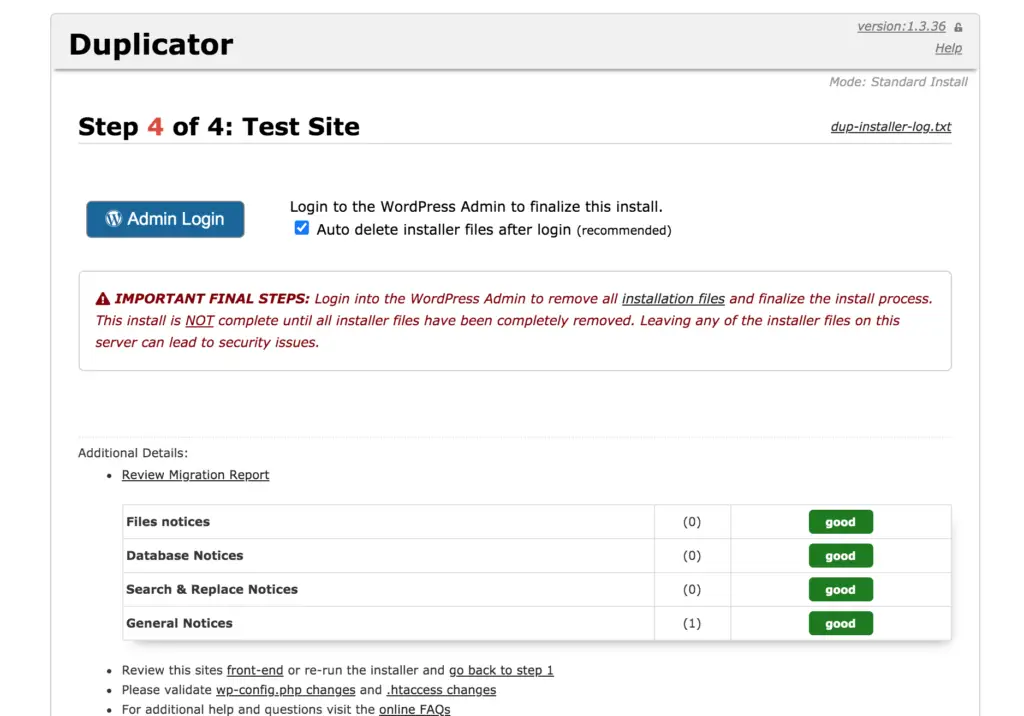
Now you can log in using the same user/password from your original site, since now you have a fully working clone!
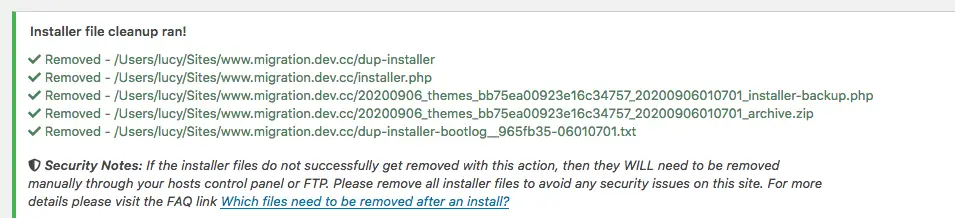
After logging in, make sure you pay attention to this message and ensure that the files were successfully cleaned up (in most cases the cleanup is automatically completed successfully):
Method 2: All in-one WP Migration plugin
- Requires a WordPress installation at the destination
- Large sites will require a paid add-on
- Could hit more hosting limitations
- Easier process with fewer technical steps
- Great method for small sites
Prepare the destination
With this method you are moving your site from one WordPress installation to another.
So your first step is to install WordPress on the server you are migrating to. The admin access you set up will only be needed temporarily. Ultimately this installation (including whatever username you created) will be replaced with the site you are migrating.
Once WordPress is installed, install and activate the All-in-One WP Migration plugin.
Create the site export file
Now go to the site you are planning to move. Install and activate the All-in-One WP Migration plugin.
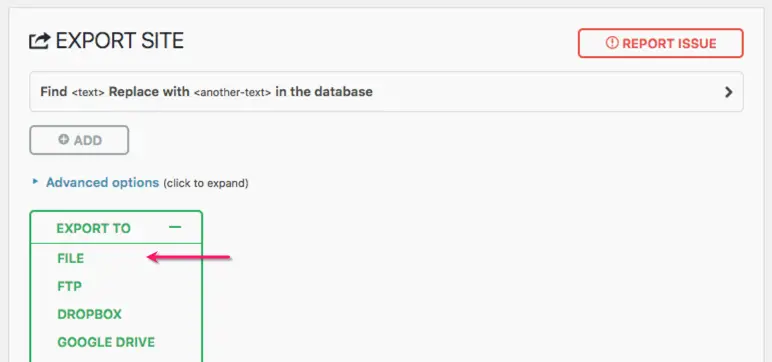
Go to the Export screen. In most cases you don’t need to configure any settings, just click on Export to, and choose File.
You do not have to touch the find and replace field. The plugin will take care of updating URLs at the Import stage.
This will give you a proprietary .wpress file to download. Save that on your computer, somewhere easy for you to find.
Import your site
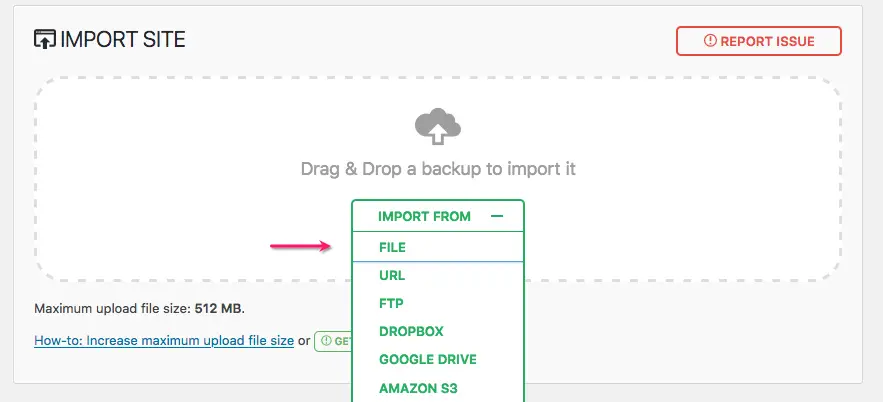
Now go to the destination site – that’s the temporary WordPress installation you created. Go to the Import screen in the All-in-One Migration settings.
You can either:
- Drag and drop your .wpress file onto the upload box, or
- Click on Import from, and then choose File and navigate to where you saved it.
If you are trying to move a large site, this is the step that could be an issue.
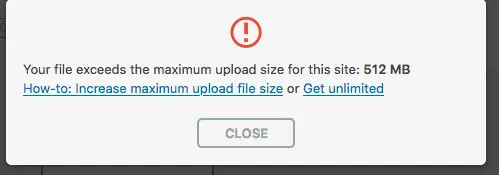
The free version of the plugin limits import files to a max of 512MB.
If your file is larger than that, you will need to purchase the unlimited extension. I tested this with a 2GB file to import and it worked very smoothly.
While importing, the plugin automatically takes care of updating references to your previous domain to the one you are importing into.
Once complete, you’ll then use the original login information from the site you moved, to access your new site!
Free or paid?
Besides the import file size limitation, there are a couple of other limitations in the free version, most notably the lack of custom exclusions. As we discussed in the first method, you wouldn’t want to export, for example, cache files. While the free version does have a few handy preset exclusions options, you can’t customize it to exclude cache folders.
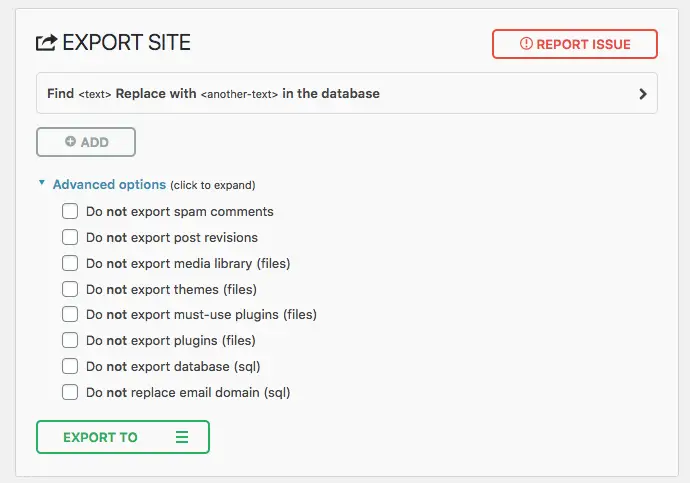
The free version of the plugin will work well for many cases. There are a couple of limitations to be aware of:
- The file size limitation mentioned above
- Lack of custom exclusions when exporting
The default exclusion options offered in the free version are useful but the lack of customizable ones is a tough limitation. For example, you won’t be able to exclude your cache folder in the free version.
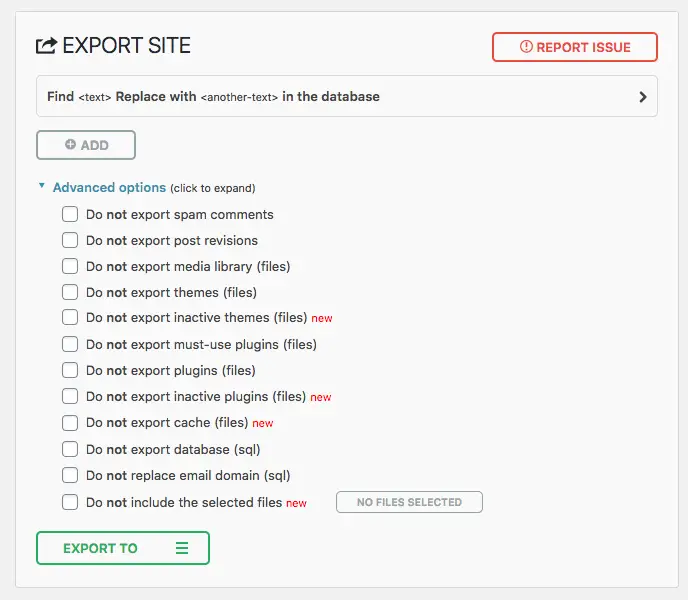
The Unlimited extension resolves both issues. You will likely find it worthwhile if you are working with clients and likely to be moving a lot of sites in various scenarios. In the screenshot below, all the choices marked “new” are the ones available in the Unlimited extension:
Method 3: Manual WordPress migration
Sometimes automated tools don’t work as expected, especially on shoddy hosts that lack resources. So it’s always good to know how to do things manually, just in case!
The broad steps are:
- Download all the files
- Export the database
- Upload the files at the new host
- Import the database
- Do a search and replace to update all old domain references
In this case I’m assuming you’re just moving between typical shared hosts. If you are migrating to or from a managed WordPress host like WP Engine, Kinsta, etc you should first check their documentation for any specific advice. Since their environments are highly customized you may have to do things a bit differently.
Download all the files
There are 2 ways you can approach this migration:
- Install WordPress at the destination first.
If you do this, the database will be created for you, and you won’t have to move the WordPress core files from your original site. - Start with a blank slate without installing WordPress.
This way you’ll move all the WordPress core files and you will create your database manually on your new hosts.
The first way is probably a bit easier, but I’ll explain the different steps needed for both.
Do you have WordPress installed at the destination?
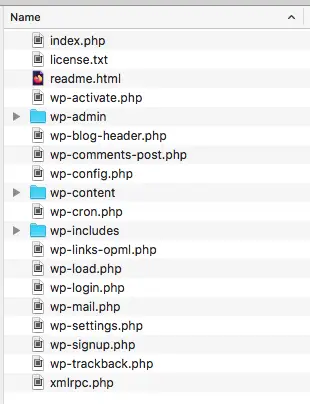
- If yes, you only need to download the folders which contain the files specific to your site:
- wp-content/uploads
- wp-content/plugins
- wp-content/themes
- any custom files/folders you’ve created for file storage or any other purpose
- If you don’t have WordPress installed at the destination, you’ll need to download all the WordPress core files as well
Create a folder on your desktop or somewhere easily accessible on your computer, to store all the files you’re going to download.
Using your FTP program, select the files/folders you need and drag them into your migration folder. It could take some time to download if you have a large site. So be patient.
Skip host specific files like php.ini, cgi-bin, ftpquota, error logs etc.
wp-config.php
One of the main functions of this file is to connect to the database. When you move your site, chances are you will have new database info. But, you may want to transfer any customizations to this file you may have done. If you are moving from a managed host, or one that has customized this file for you, you shouldn’t move it as-is. So download this file and keep it on hand to refer to.
htaccess
It’s worth downloading this as a backup if you have customized it manually with some specific redirects, for example.
Export the database
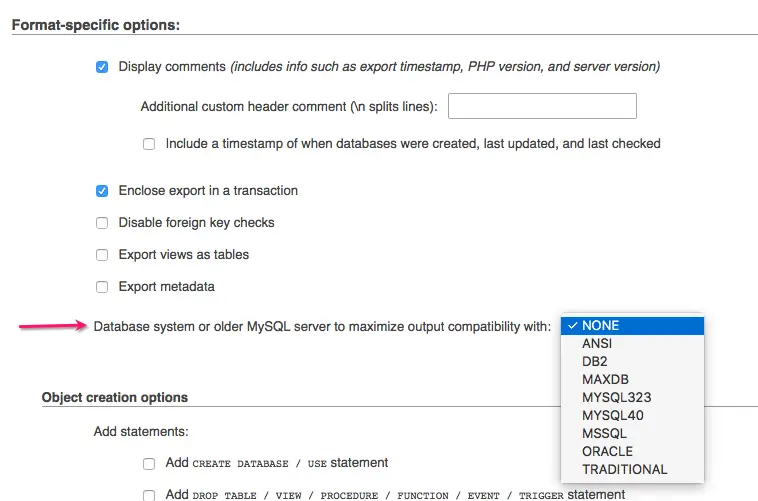
First check the version of MySQL that you are running on your old site and on the new server. Ideally they are the same. Issues can occur if you are importing into an older version. So try to update your new server first. You can use the Site Health tool in WordPress to find which version you’re using, or just ask your host.
You can export it with a plugin. If you are using any kind of backup plugin, that should do it. I also recommend Migrate DB.
Or you can use phpMyAdmin in cPanel.

Click on your database and go to Export.
Usually you can choose the Quick option.The default export format should be SQL. Then click Go. Save this file on your computer.
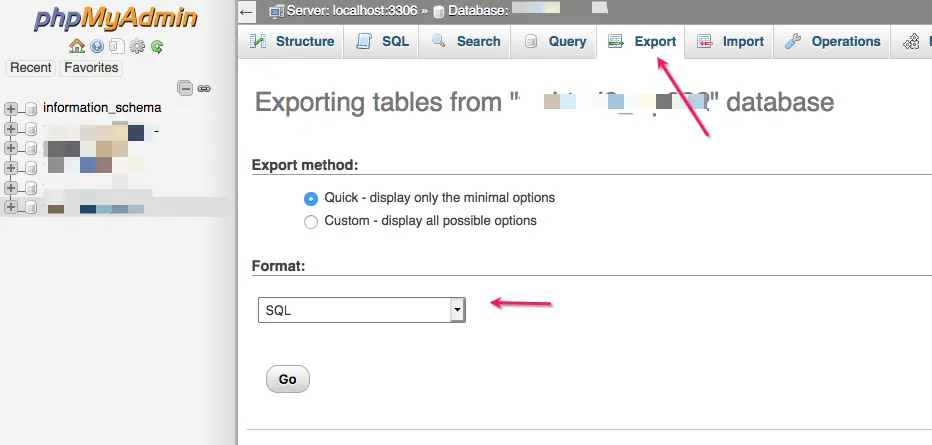
If you’ve discovered you’re importing into an older version you can choose the Custom method and select the version you need.
Upload the files to your new server
Via FTP, transfer all the files you previously downloaded, to your new server, in the folder you want your site to live. This will take some time for large sites.
If you installed WordPress at the destination, don’t upload your previous wp-config file because a new one will have been created when you installed WordPress.
Make a database on the new server
If you installed WordPress using the one-click installer from your new host, your database already exists and the wp-config.php already has the correct info, so you can skip this step.
Otherwise, while you’re waiting for the files to upload, you can create a new database for your site. Follow the same steps as described in the “Create the new database” section of Method 1 above. Keep the database name, user and password handy.
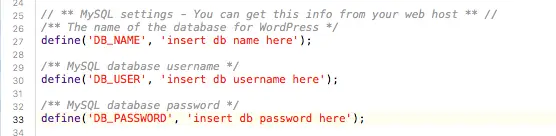
Once the files have uploaded, edit the wp-config file to make sure the database user and password matches what you’ve created on the new host:
Import the database to your new server
If you have installed WordPress already, or if you are overwriting an existing WordPress site, you will have to delete the existing tables from the database before importing yours. This is called “dropping” tables.
You’ll use phpMyAdmin again, on the new host.
- Click on the existing database from the left hand column.
- On the right you will see a list of the existing tables. At the bottom, check the box to select all the tables.
- In the with selected dropdown, choose Drop.

On the next screen confirm your selection. Then you will be able to proceed with importing your own database.
Click on the database you created and go to Import:

At the top, click the Browse button to locate the sql file that you downloaded previously.
In many cases it doesn’t make any difference either way, but it’s usually recommended to uncheck Allow the interruption of an import in case the script detects it is close to the PHP timeout limit.
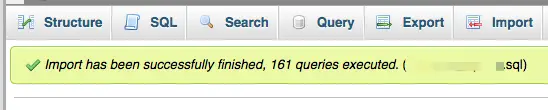
Then click Go. You’ll see a notice like this when it’s complete:
Sometimes you might hit issues on this step if you are importing a huge database.
Check the size of the database file and the upload sizes on the destination host. If it’s too big you may have to export the database in pieces, or find out from the host if there’s a way to increase the upload size. If all else fails they may be able to do it via SSH for you.
Edit domain name in database
If you are moving to a different domain name, you won’t be able to access your site until you have edited the domain name in your database: https://wordpress.org/support/article/changing-the-site-url/#changing-the-url-directly-in-the-database
You will also have to do this step if you are moving your site to a new server but will be using the same domain name. If you want to check your site in its new location and make sure everything’s working, you’ll have to use a temporary URL provided by your host.
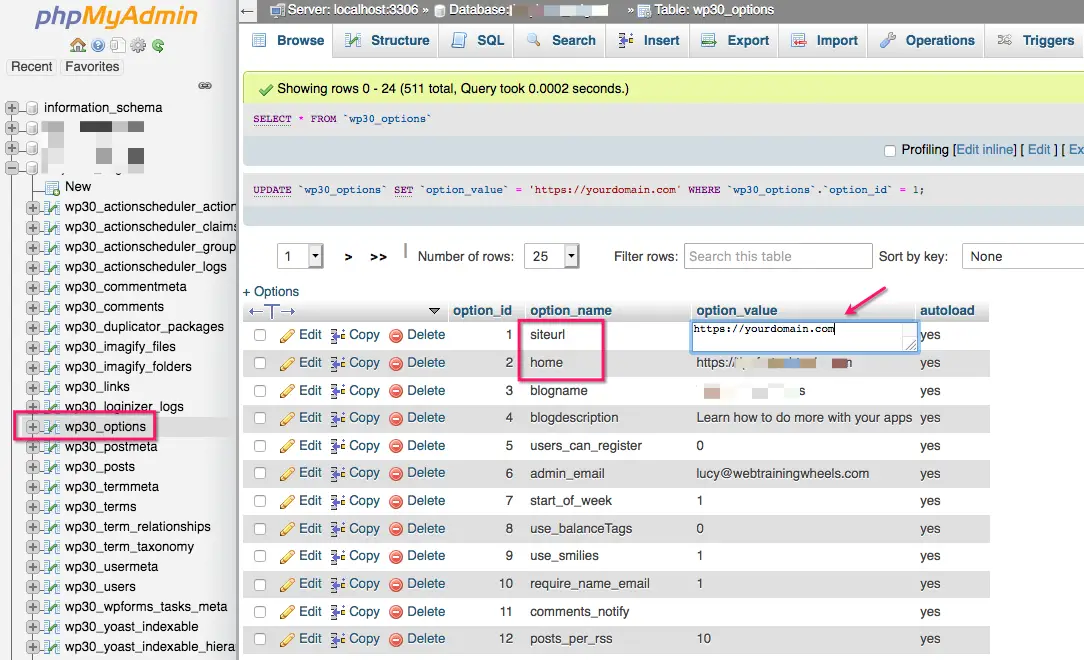
Click on the wp_options table from the list on the left.
wp_ is the default prefix used by WordPress for the database tables. But in some cases it might have been modified – for example if you used a security plugin. Or some hosts have customized their WordPress installer to use non-standard prefixes.
If your tables are not using wp_, you will have to edit the wp-config.php file with the correct info:

On the right, in the option_name column, look for the option_values siteurl and home. There you will see the old domain name. Siteurl is usually the first row. Sometimes you have to go to the second page to find home.
For each of siteurl and home, double-click on the option value and replace it with the new domain name.
Now you will be able to access and log into your migrated site!
If everything looks fine you can update your DNS to point to the new server.
Update all domain references
There may still be references to the old domain lurking in your database somewhere. To update them all safely, install the Migrate DB plugin.
Go to Tools > Migrate DB
You will land on the Migrate tab. Choose Find & Replace.
There are 2 fields, the URL and the filepath. The first is crucial, the second can be treated as optional.
The fields on the left side, under Find, is where you should type your old domain. On the right side, under Replace, enter the new one.
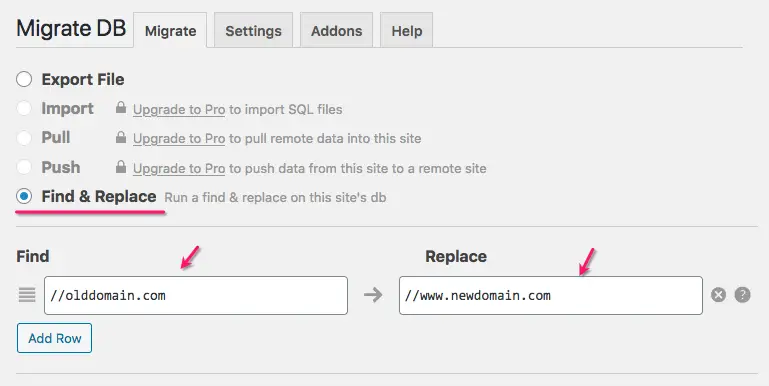
Click Find & Replace at the bottom of the screen.
Everything should be fine now, but go through your site and check it. Pay special attention to content in widgets to ensure domain references were updated correctly.
Congrats, you’ve successfully migrated your WordPress site!