How to Sync WooCommerce Products Between Sites
When you are working with a WordPress development or staging site in conjunction with a live site, there are often times when you just want to migrate a couple of products, for example, from staging to live, without re-migrating the whole site. Or you may be looking for a way to keep products synchronized between your sites.
While there are some tools, like WP Migrate DB (pro), that let you sync databases pretty easily, that can be overkill for some situations, and they tend to be more developer-centric.
Table of Contents
An easy and free way to copy products to another site or sync products between WordPress sites is the Distributor plugin from 10up.
10up is an enterprise level agency that builds WordPress sites for the likes of the White House, GoDaddy and other huge companies. They make various tools that they use in their own process, available for the community.
How to use the Distributor plugin
The Distributor plugin isn’t in the usual WordPress repository, but you can download it here: https://distributorplugin.com/
You have to give your email address to receive a registration key, but it’s free.
Distributor works whether you are syncing products between different sites, or whether you need to synchronize content on your multisite.
If you are on a multisite, the plugin will automatically detect other sites in the network and make them available for pushing/pulling WooCommerce products.
When syncing products between different sites, you will need to install Distributor on both sites that you want to synchronize.
- Download the zip file from https://distributorplugin.com/
- In your WordPress site, go to Plugins > Add New > Upload plugin and upload the zip file.
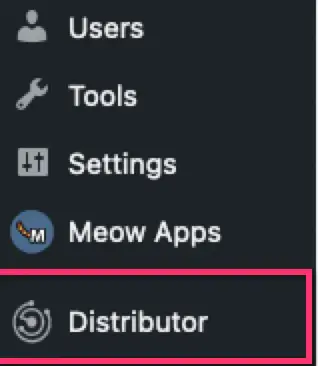
- You will then see the Distributor menu on the left side. Go to the Settings tab.
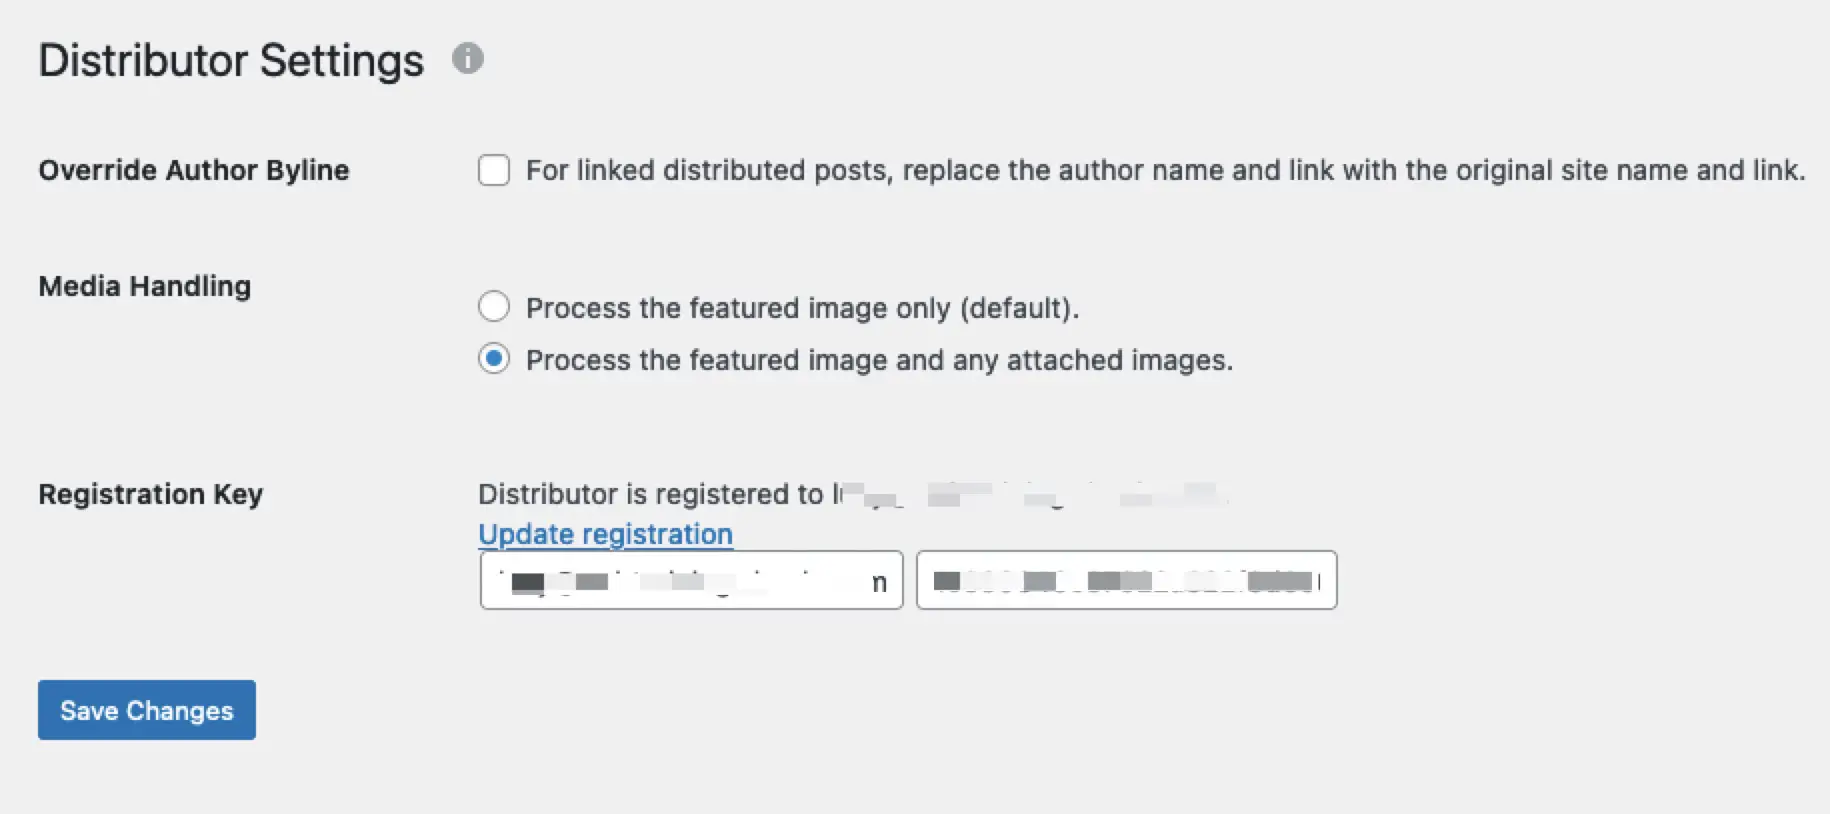
- Enter your email and registration key to make sure you get plugin updates. You can also configure some basic settings here, regarding the author bylines and media handling.
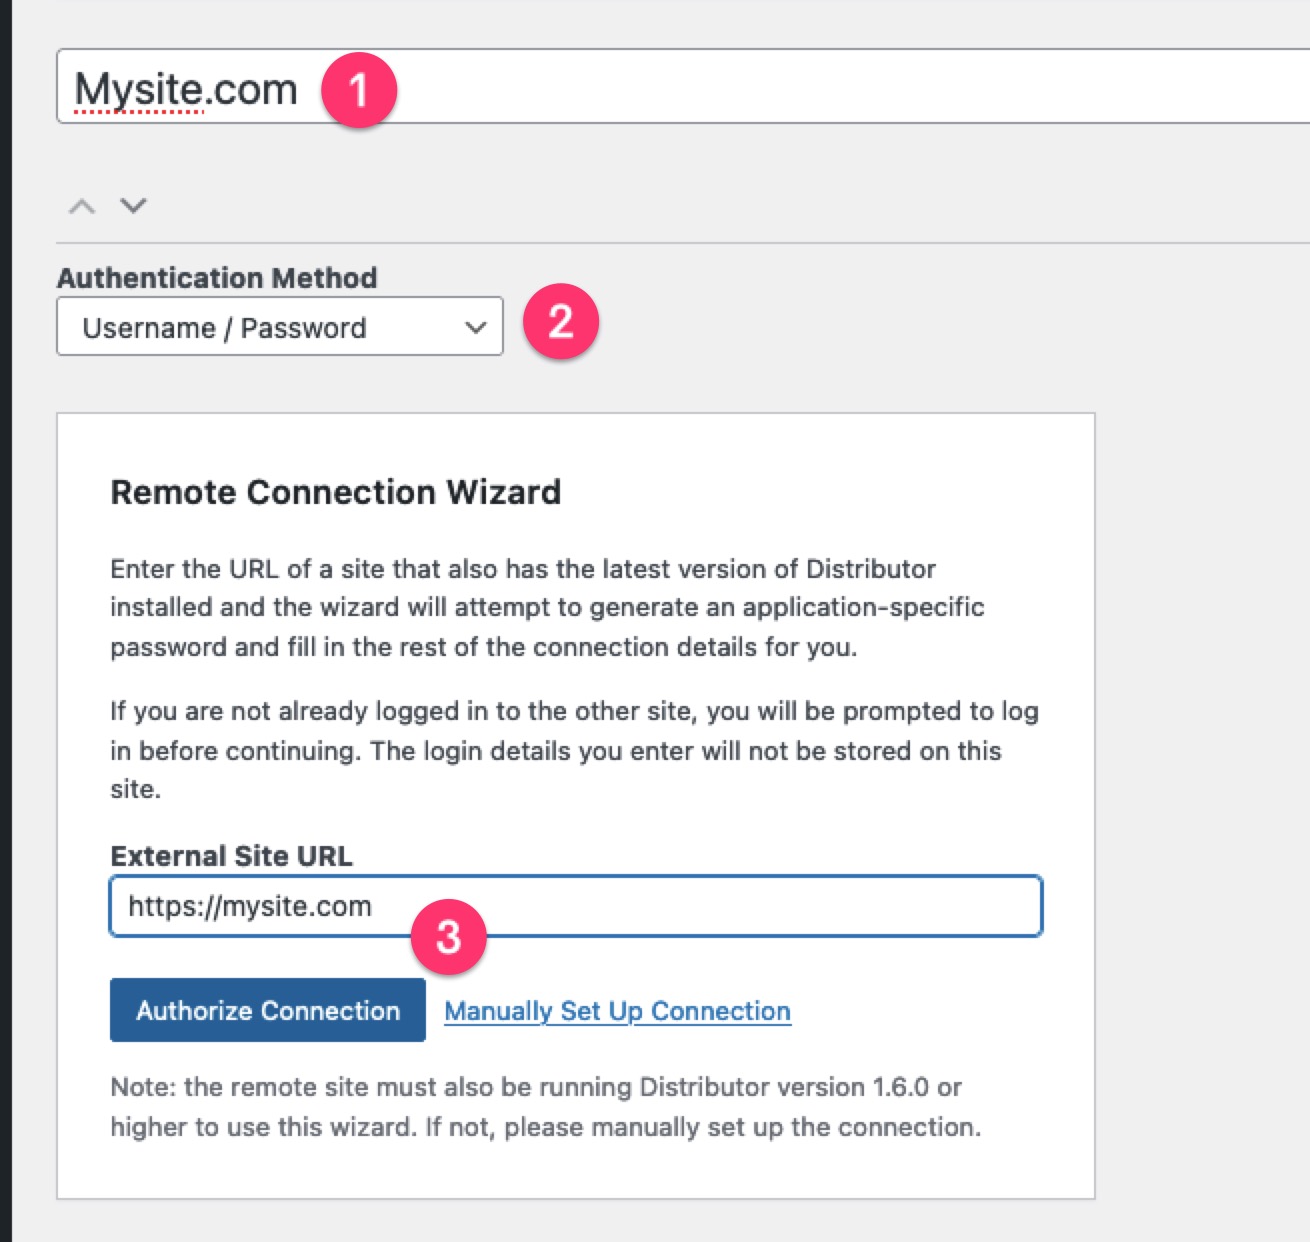
Then you need to set up the other site(s) as External Connections.
- Give it a name, usually the name of the site works best
- Choose the authentication method, I typically use username/password
- Enter your site URL and click Authorize Connection
- You will then be taken to the login page for your specified site and prompted to authorize the connection on that site.
- Then you’ll follow the same process in the External Connections settings, using the other domain.
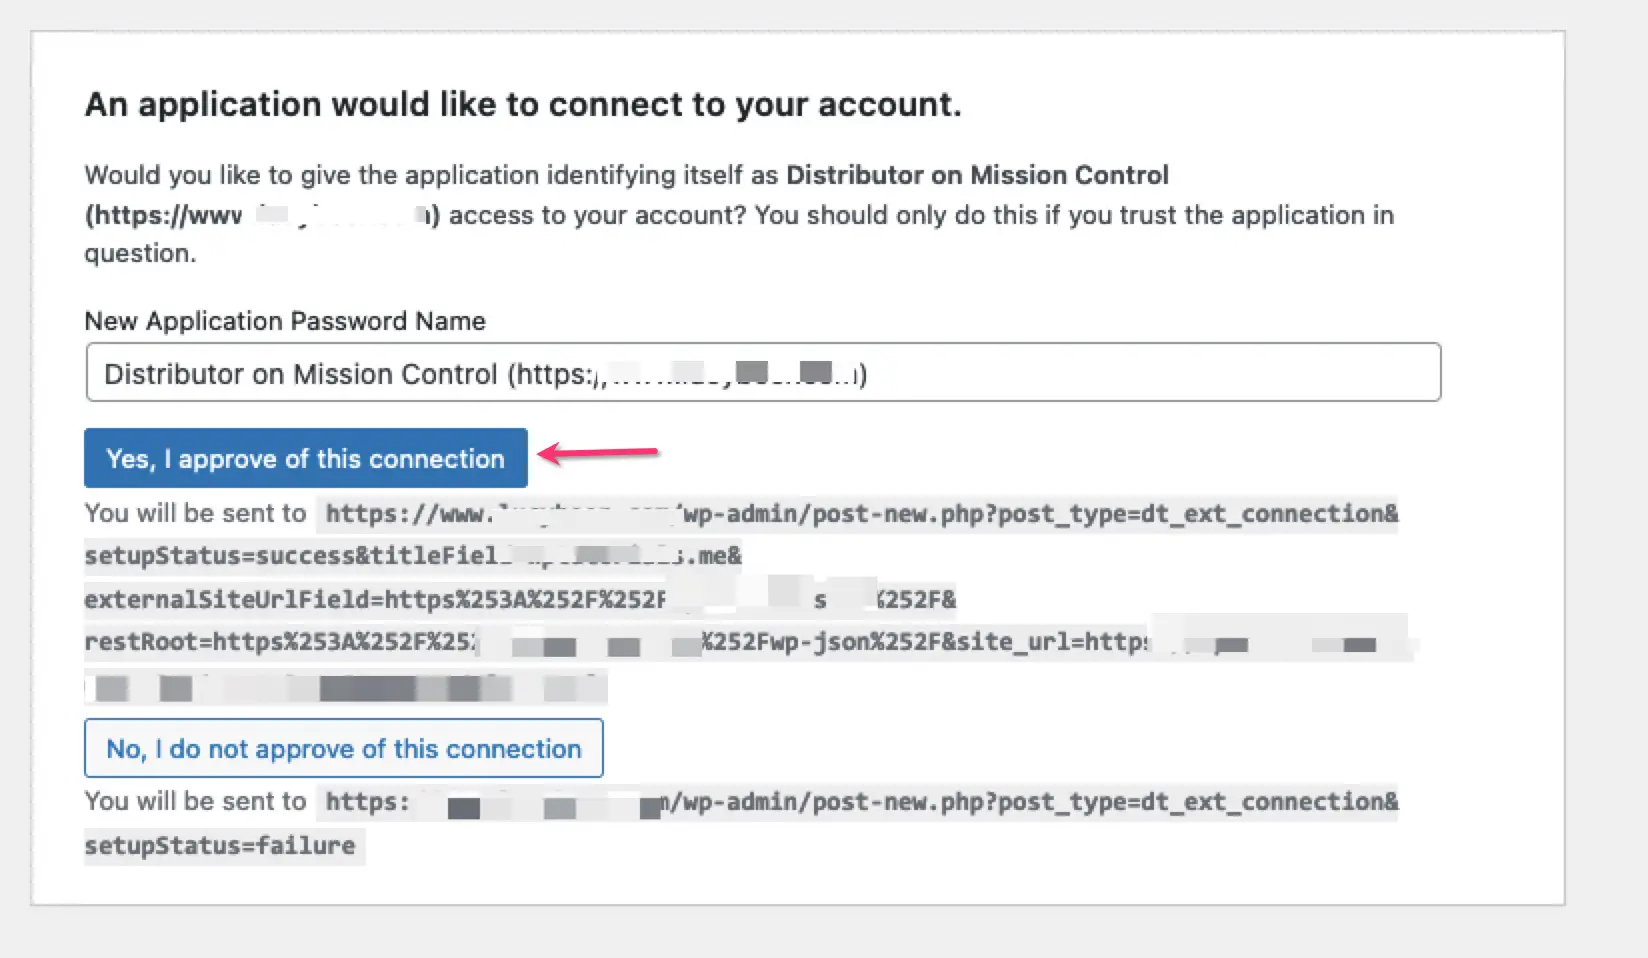
- You will need to authorize the connection between the two sites. Click Yes, I approve of this connection.
- On the next screen you can confirm which user roles you’d like to be able to push/pull.
Now you’re ready to start syncing products!
Pulling Products
Go to the Pull Content menu and you will see a list of content from the external site. You can filter it by content type, to just show products:
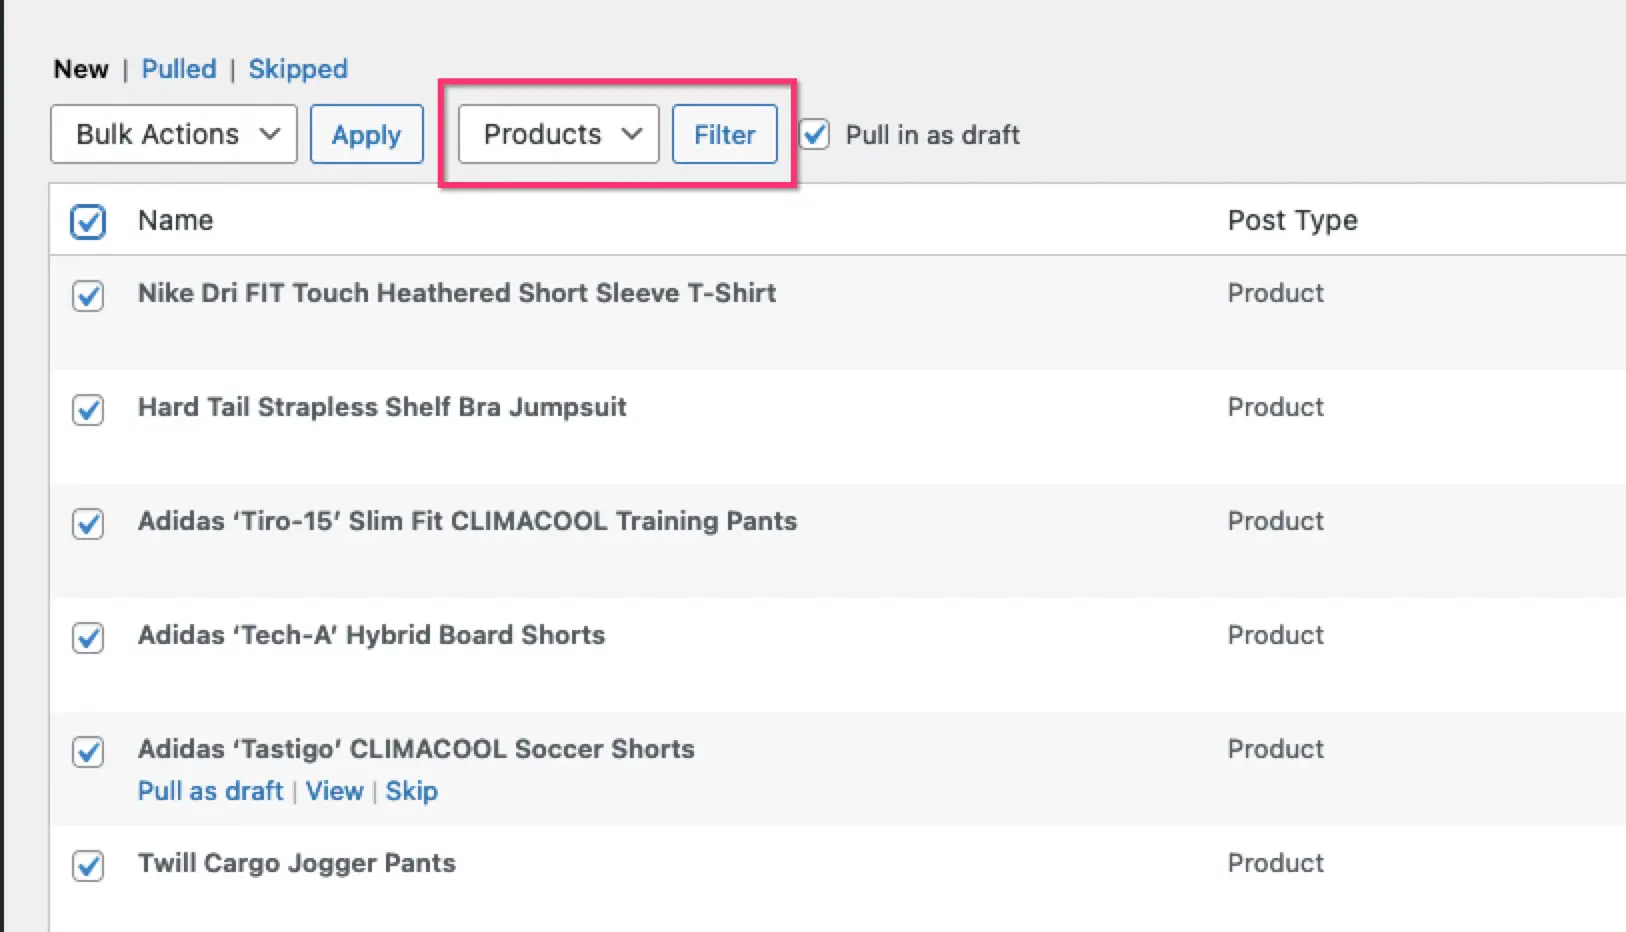
I use Pull as Draft, but that’s optional.
Click pull as draft, and magically that products appears in your site!
Distributor offers true synchronization if you want it. Meaning that if you update that post on its source site, the pulled version will update as well.
However, if you are just using that post as a starting point and want to edit it separately, you just need to unlink it:

Pushing Products
On the flip side, you can also push content from your original site to the external one.
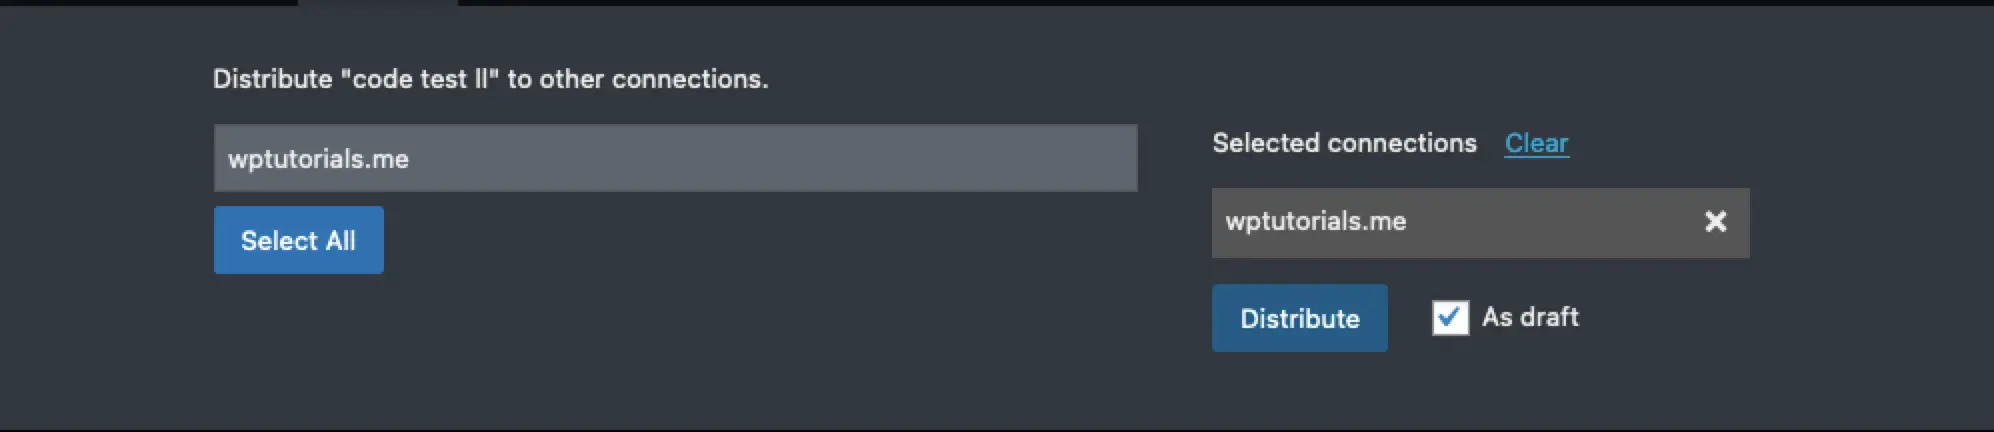
Go to the Edit screen for any post and click the Distributor tab in the sidebar. Then click Distribute Post.
Choose which site (if you have more than one) and click Distribute. And again, like magic it appears in your external site.
Distributor makes the process of syncing content between WordPress sites or within multisites really easy!
Other Solutions
Native WordPress Import/Export
If you don’t need to fully synchronize your products between sites, but just need to do a one-time transfer of content, there is another free method. You can use the built-in export/import feature of WordPress.
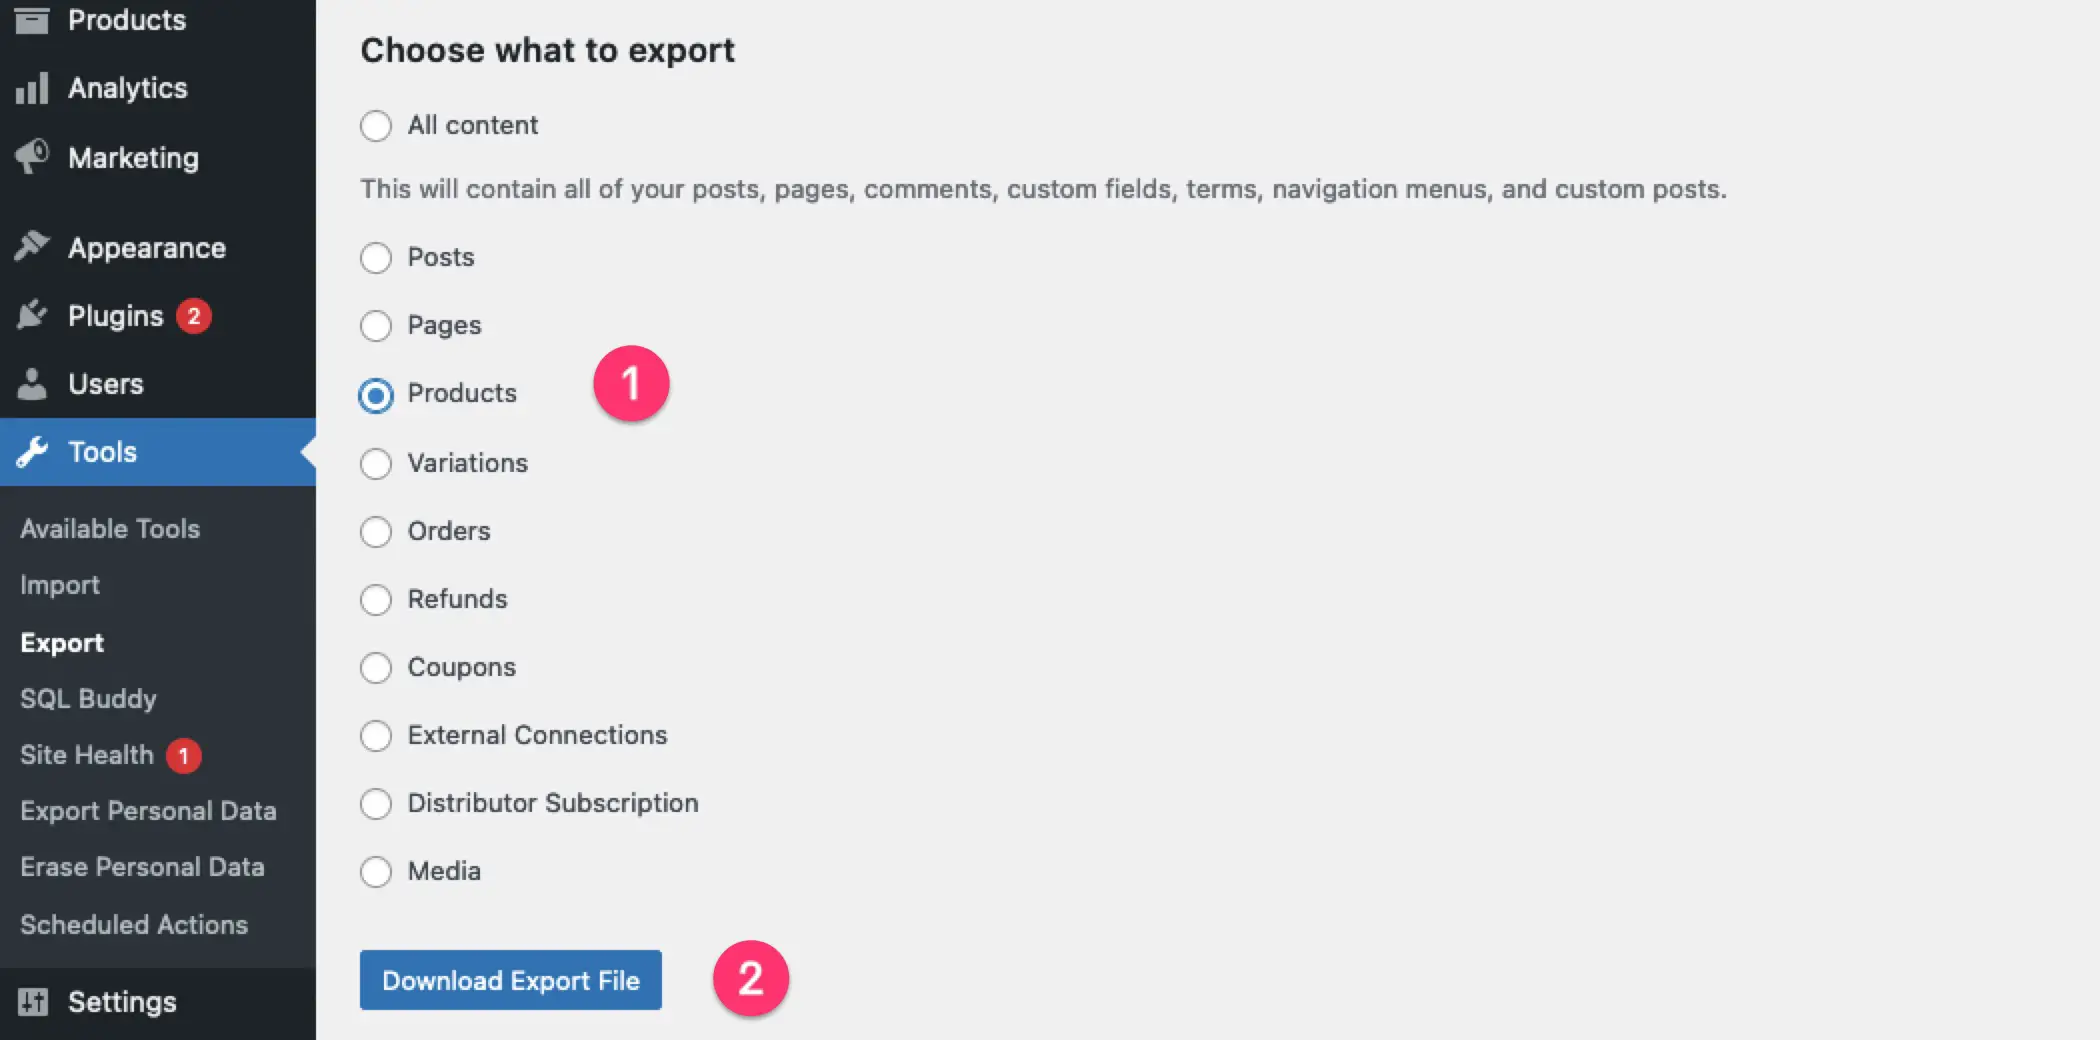
- Go to Tools → Export
- WooCommerce products are stored as post types. Select Products. You’ll see that you can also use this method to transfer other WooCommerce information like Coupons and Orders. The downside of this method is that you cannot select multiple types. So you have to repeat this process to grab the variations in addition to products.
- Click Download Export File. Save this file on your Desktop
- On the destination site go to Tools → Import
- Find the WordPress section and click Run importer
- On the next screen, click Browse and upload the file you downloaded in step 3
- You can choose to assign the content to an existing author on your site, or create a new user. If you want to bring in product images etc, click the box for Download and import file attachments.
- On the next screen you’ll see a summary of the process so you can make sure everything went well. If a product already exists, it won’t be duplicated, only new content will be imported.


WP All Import
WP All Import is a great suite of plugins for exporting and importing all kinds of data to your WordPress site, and it works well for WooCommerce products.
Depending on your specific needs, you may be able to accomplish this with the free versions of WP All Import, or you may need to opt for the premium version. If you use variations for your products, you’ll need the paid version of the plugin, but for simple products the free versions work very well.
Exporting the products
- On the site you’re exporting from, install WP All Export, and then install WP All Export – WooCommerce Product Export Add-On
- Go to the All Export menu → New Export
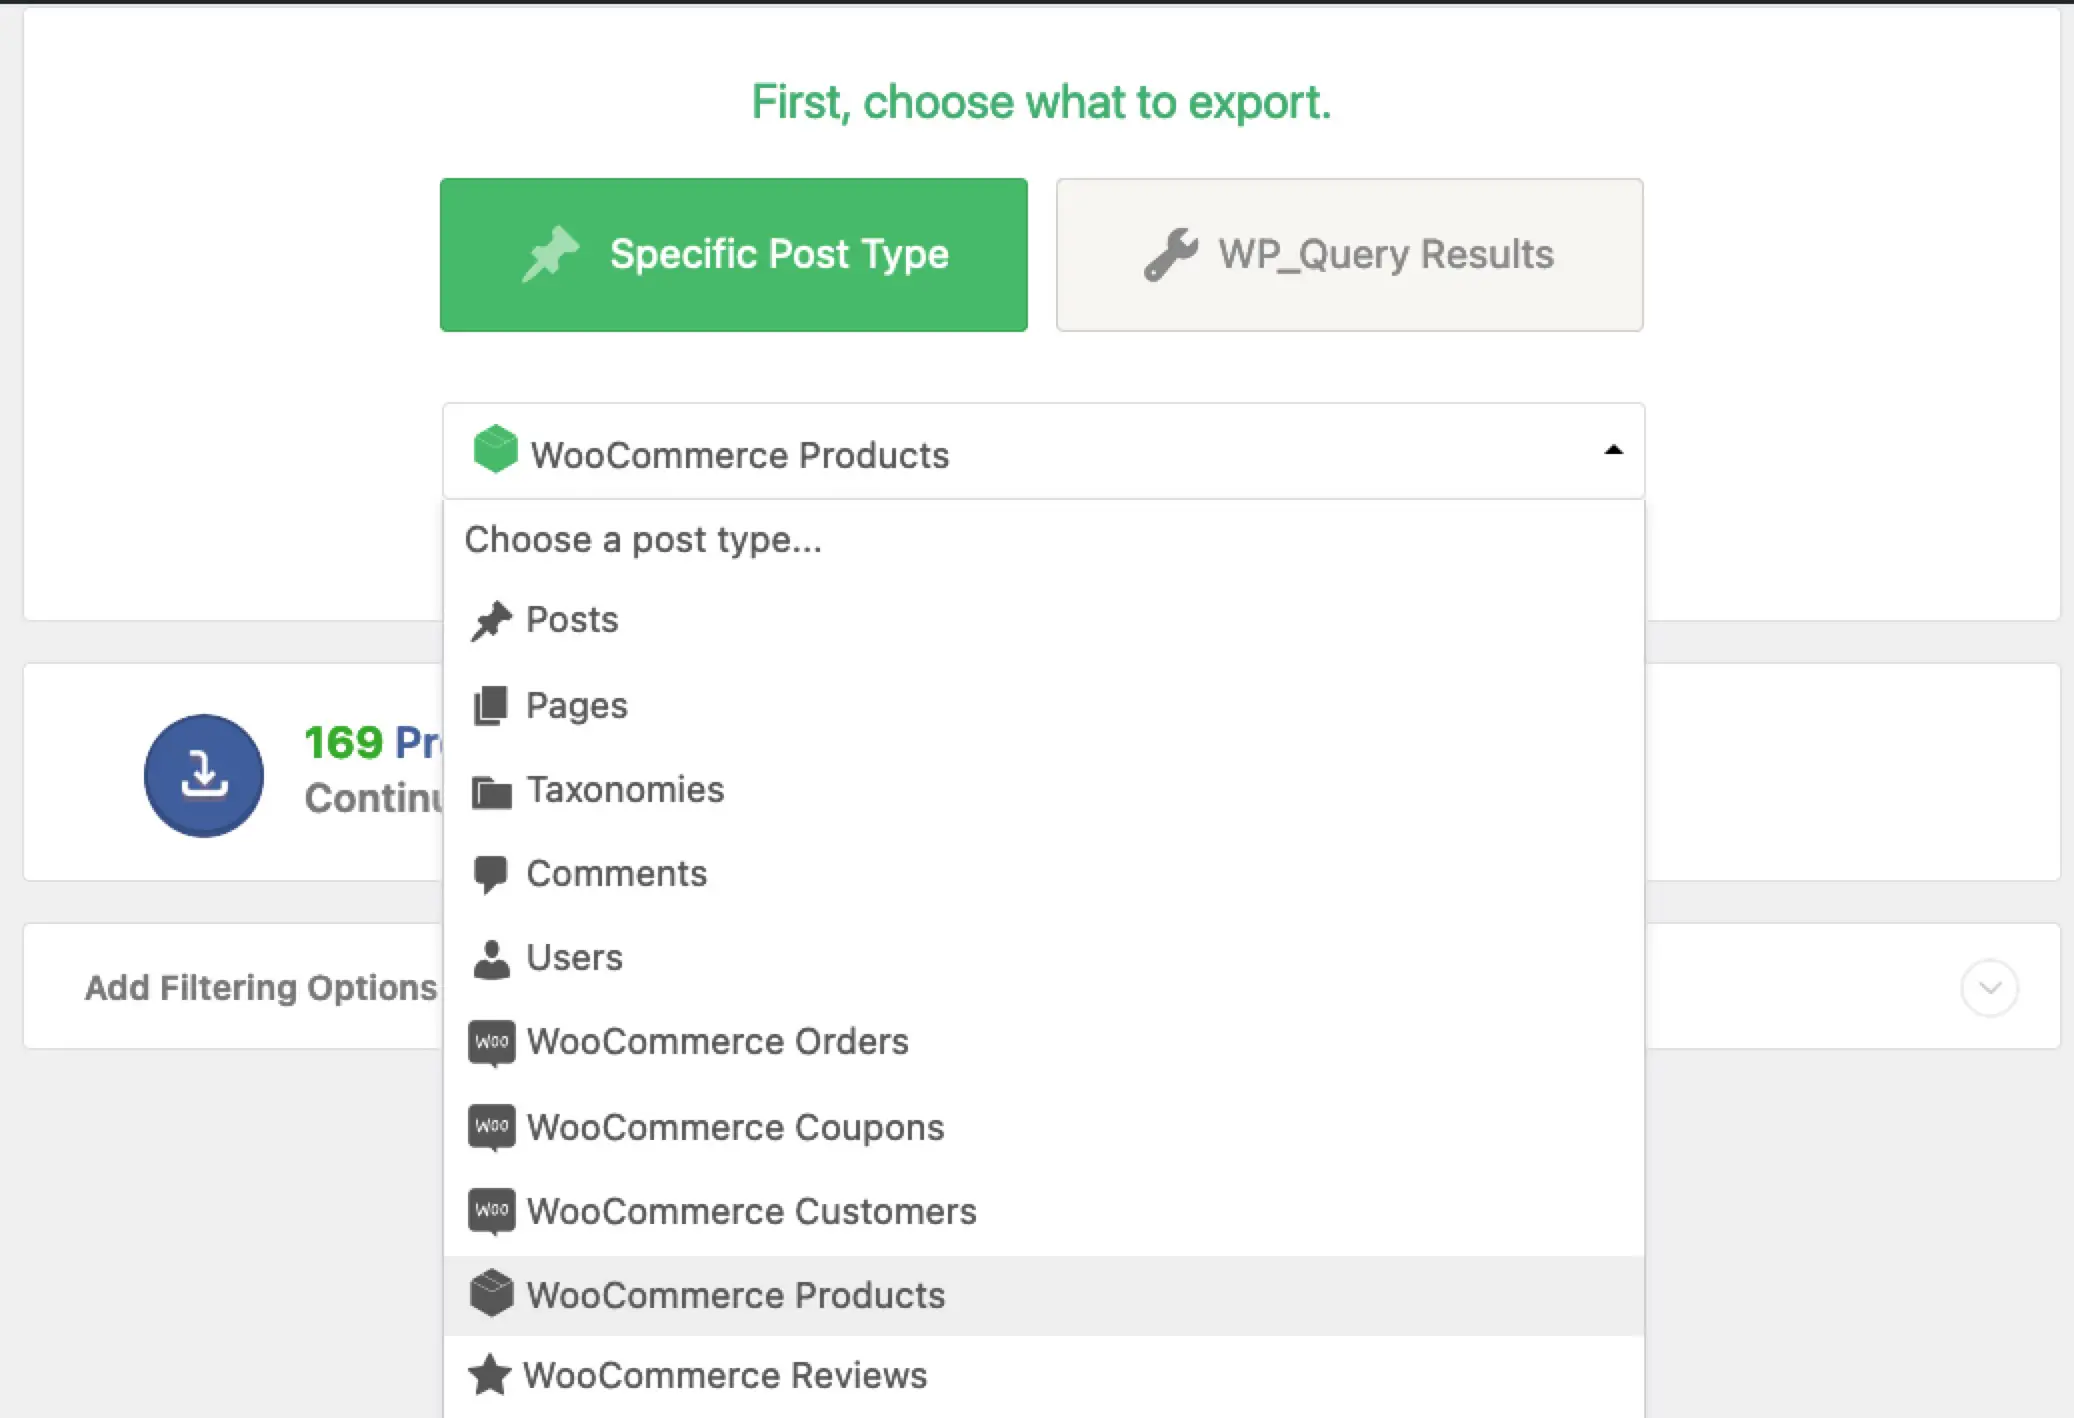
- Click on the Choose a post type dropdown menu and select WooCommerce Products. You will see a summary of how many products will be exported, then click Customize Export File.
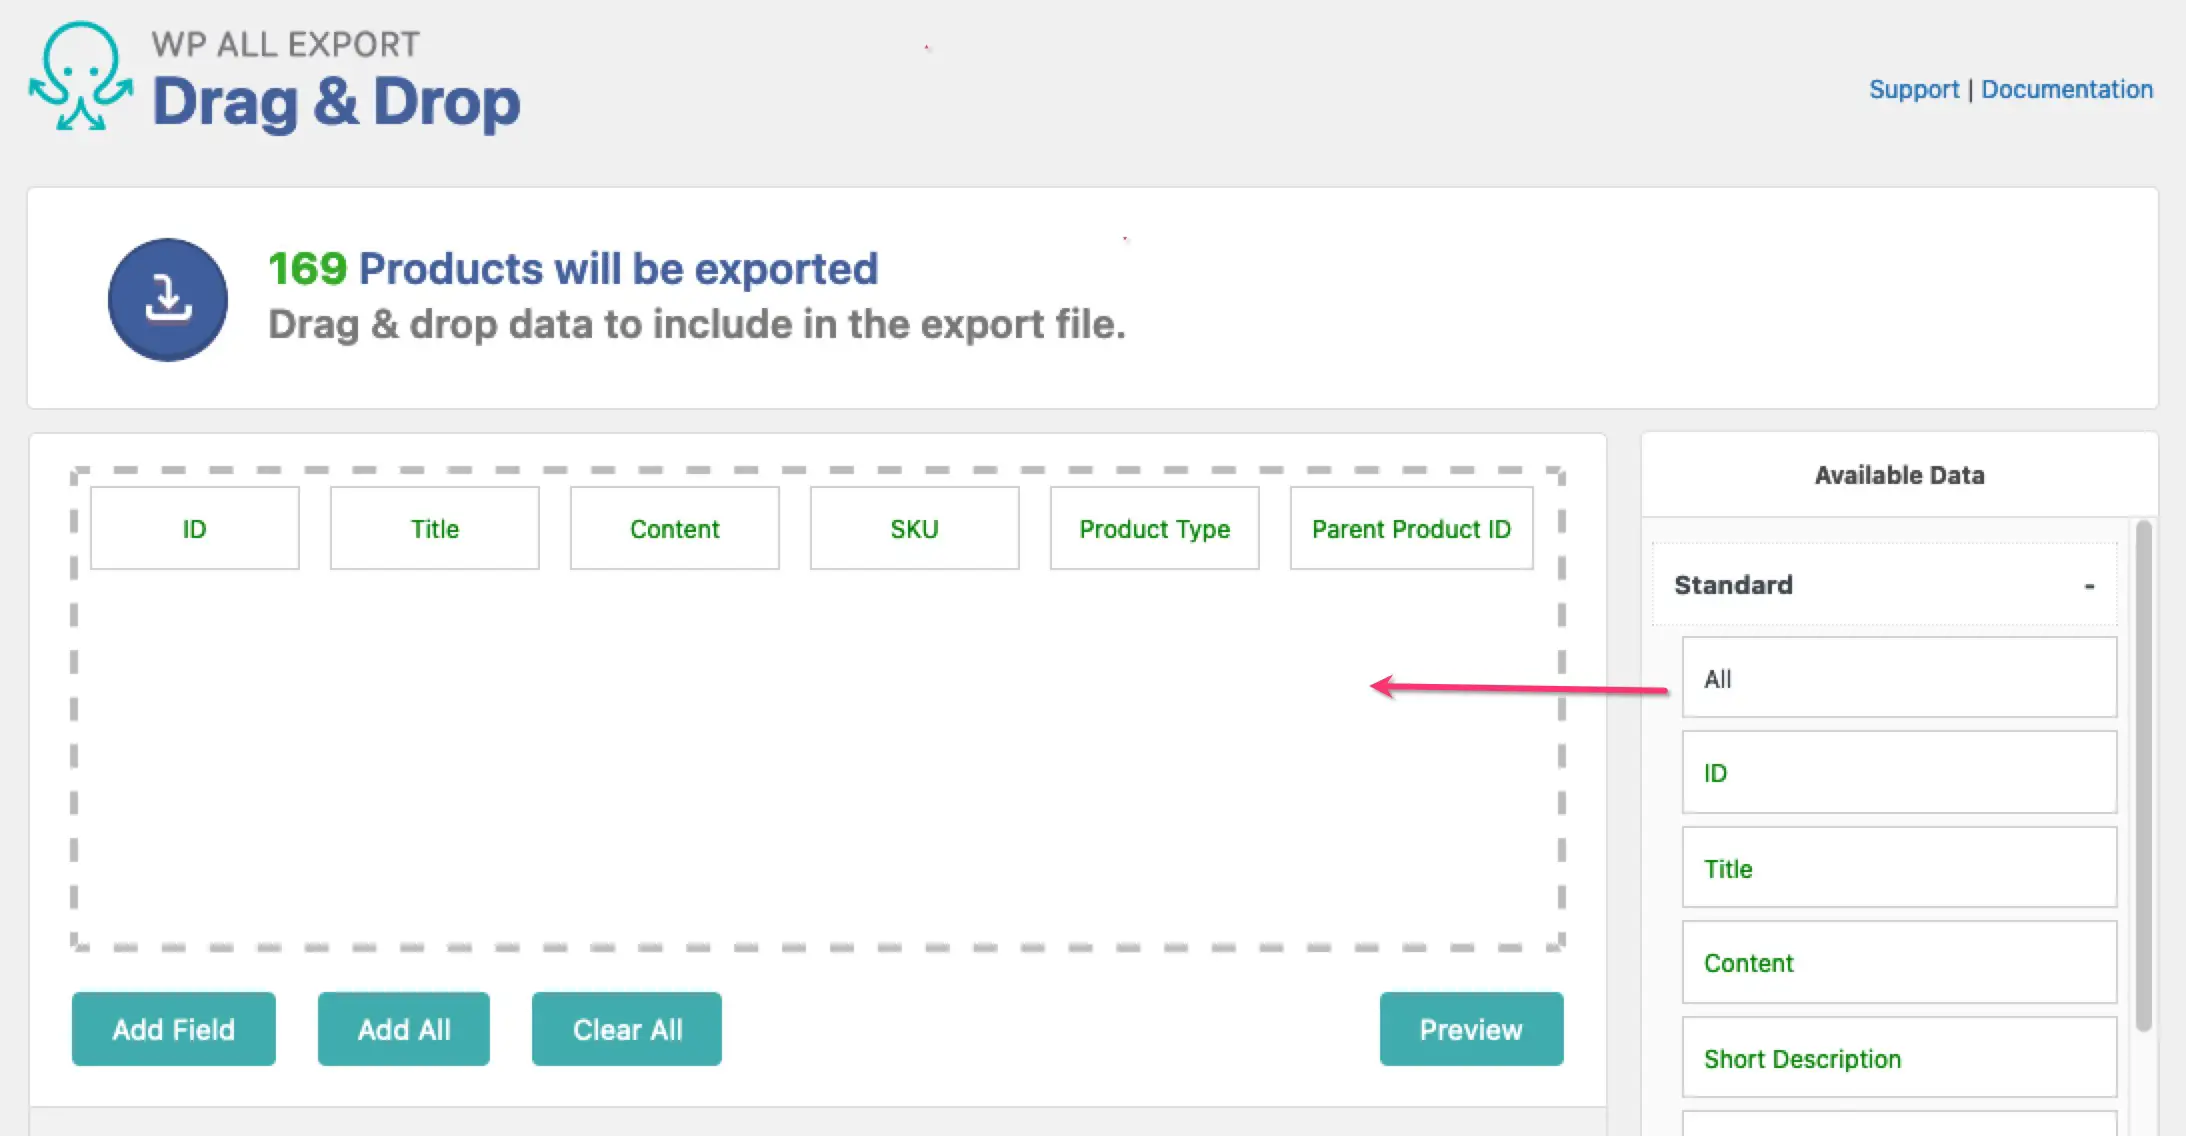
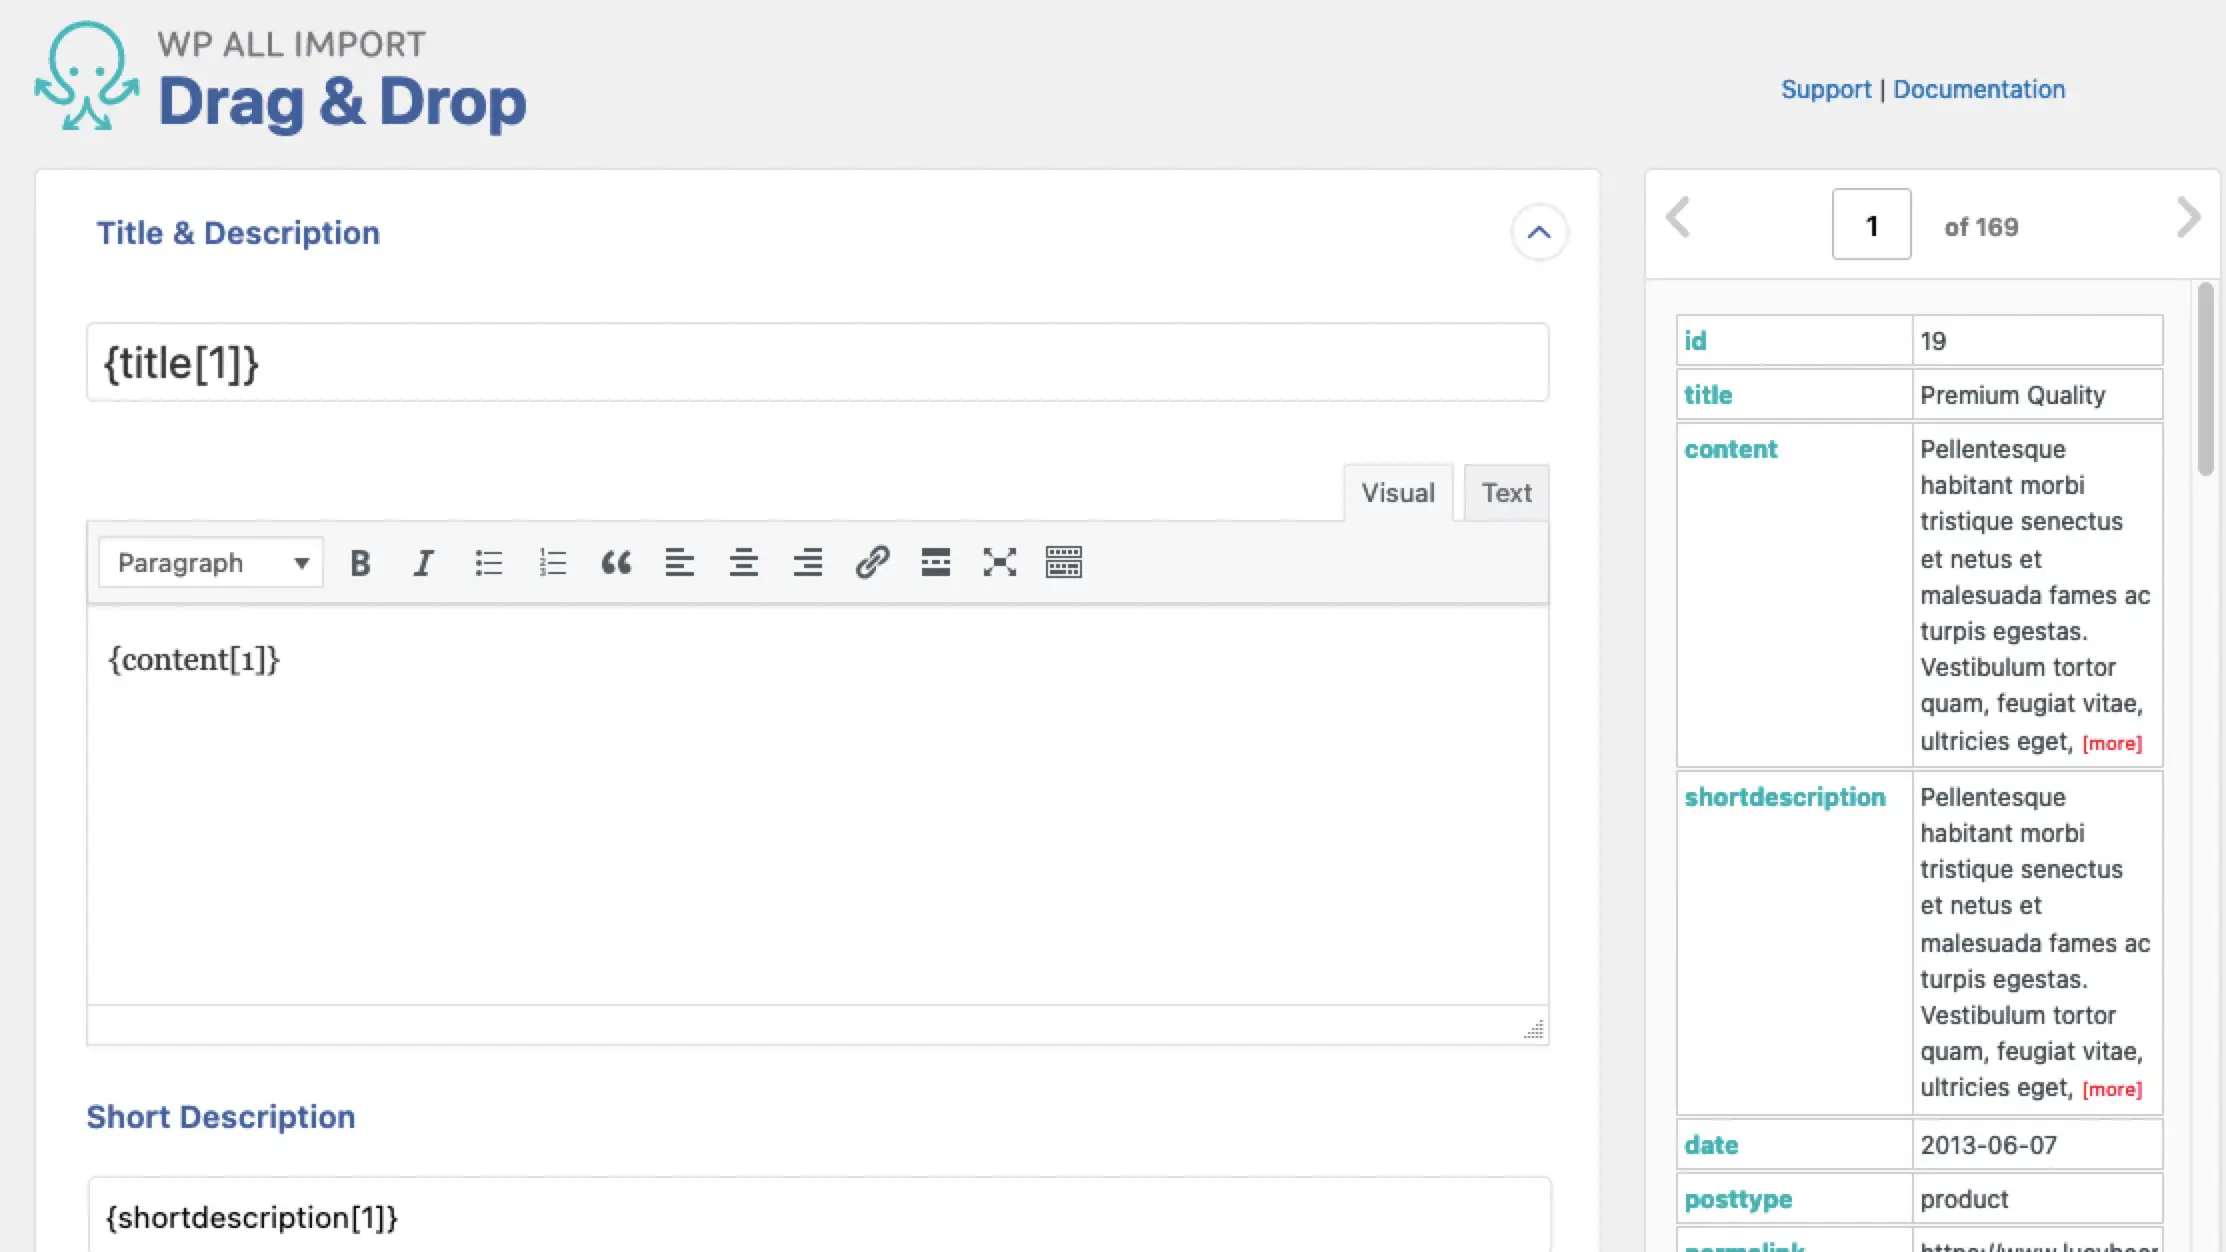
- On the next screen you can choose exactly which pieces of data you want to export. Available data is on the right and you drag and drop fields into the main box on the left.
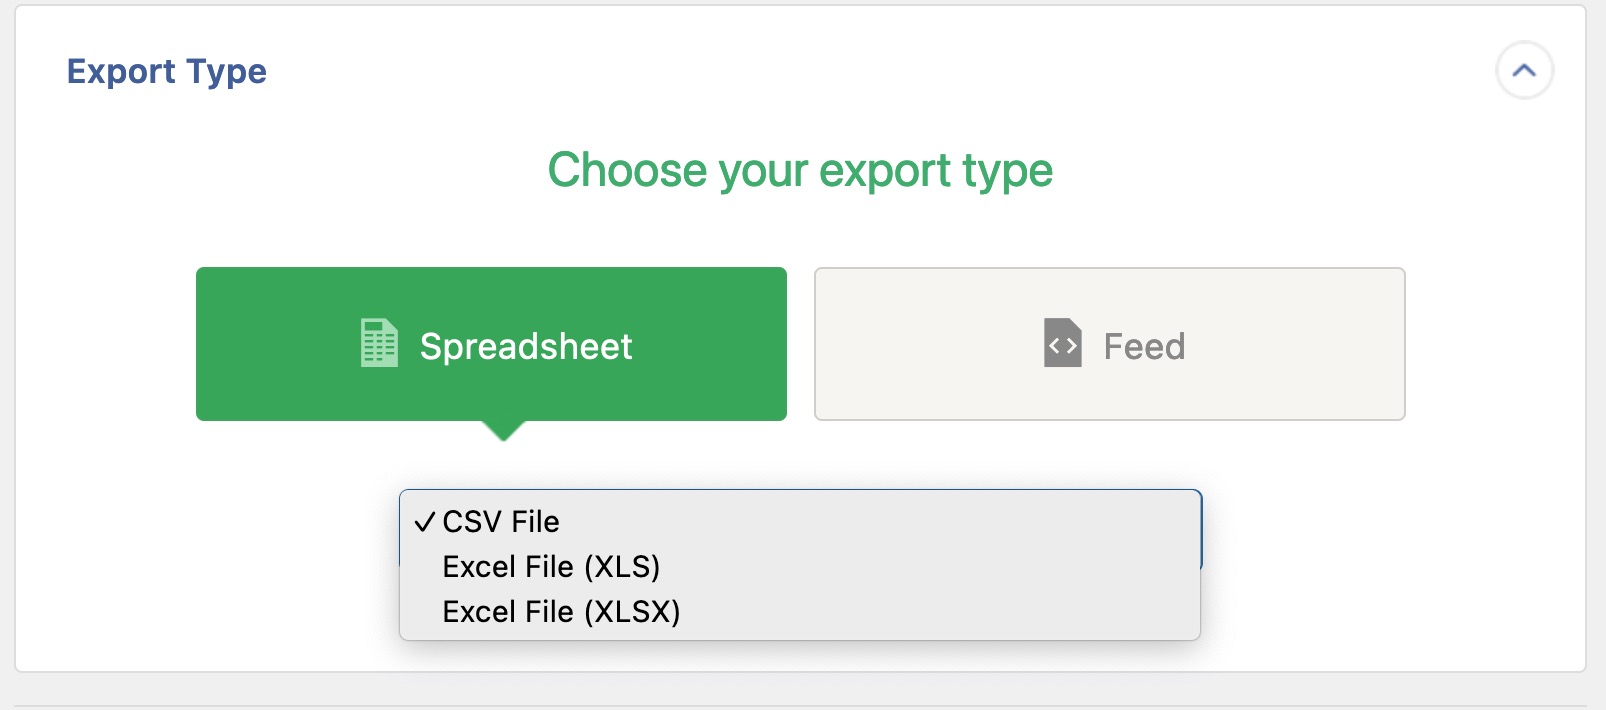
That’s useful if you need to be granular about it, or just need very specific data. But for most purposes, clicking the Add All button will be easier – it automatically adds all the data fields so you don’t have to do it manually. - Click Export type to choose which file type to download the export in. The default is .csv
- Click Continue. On the next screen click Confirm & Run Export. I don’t typically adjust the default settings there.
- On the completion screen you can download just the .csv or the bundle. I download the bundle for importing into another site.

Importing the products
- Now go to the site you want to import the products into. Install WP All Import and the add-on Import Products from any XML or CSV to WooCommerce
- Go to All Import → New import → Upload a file.
- Choose the zip file you just exported. Choose New Items if this is your first import. You can choose Existing items if you want to just update some data of existing products.
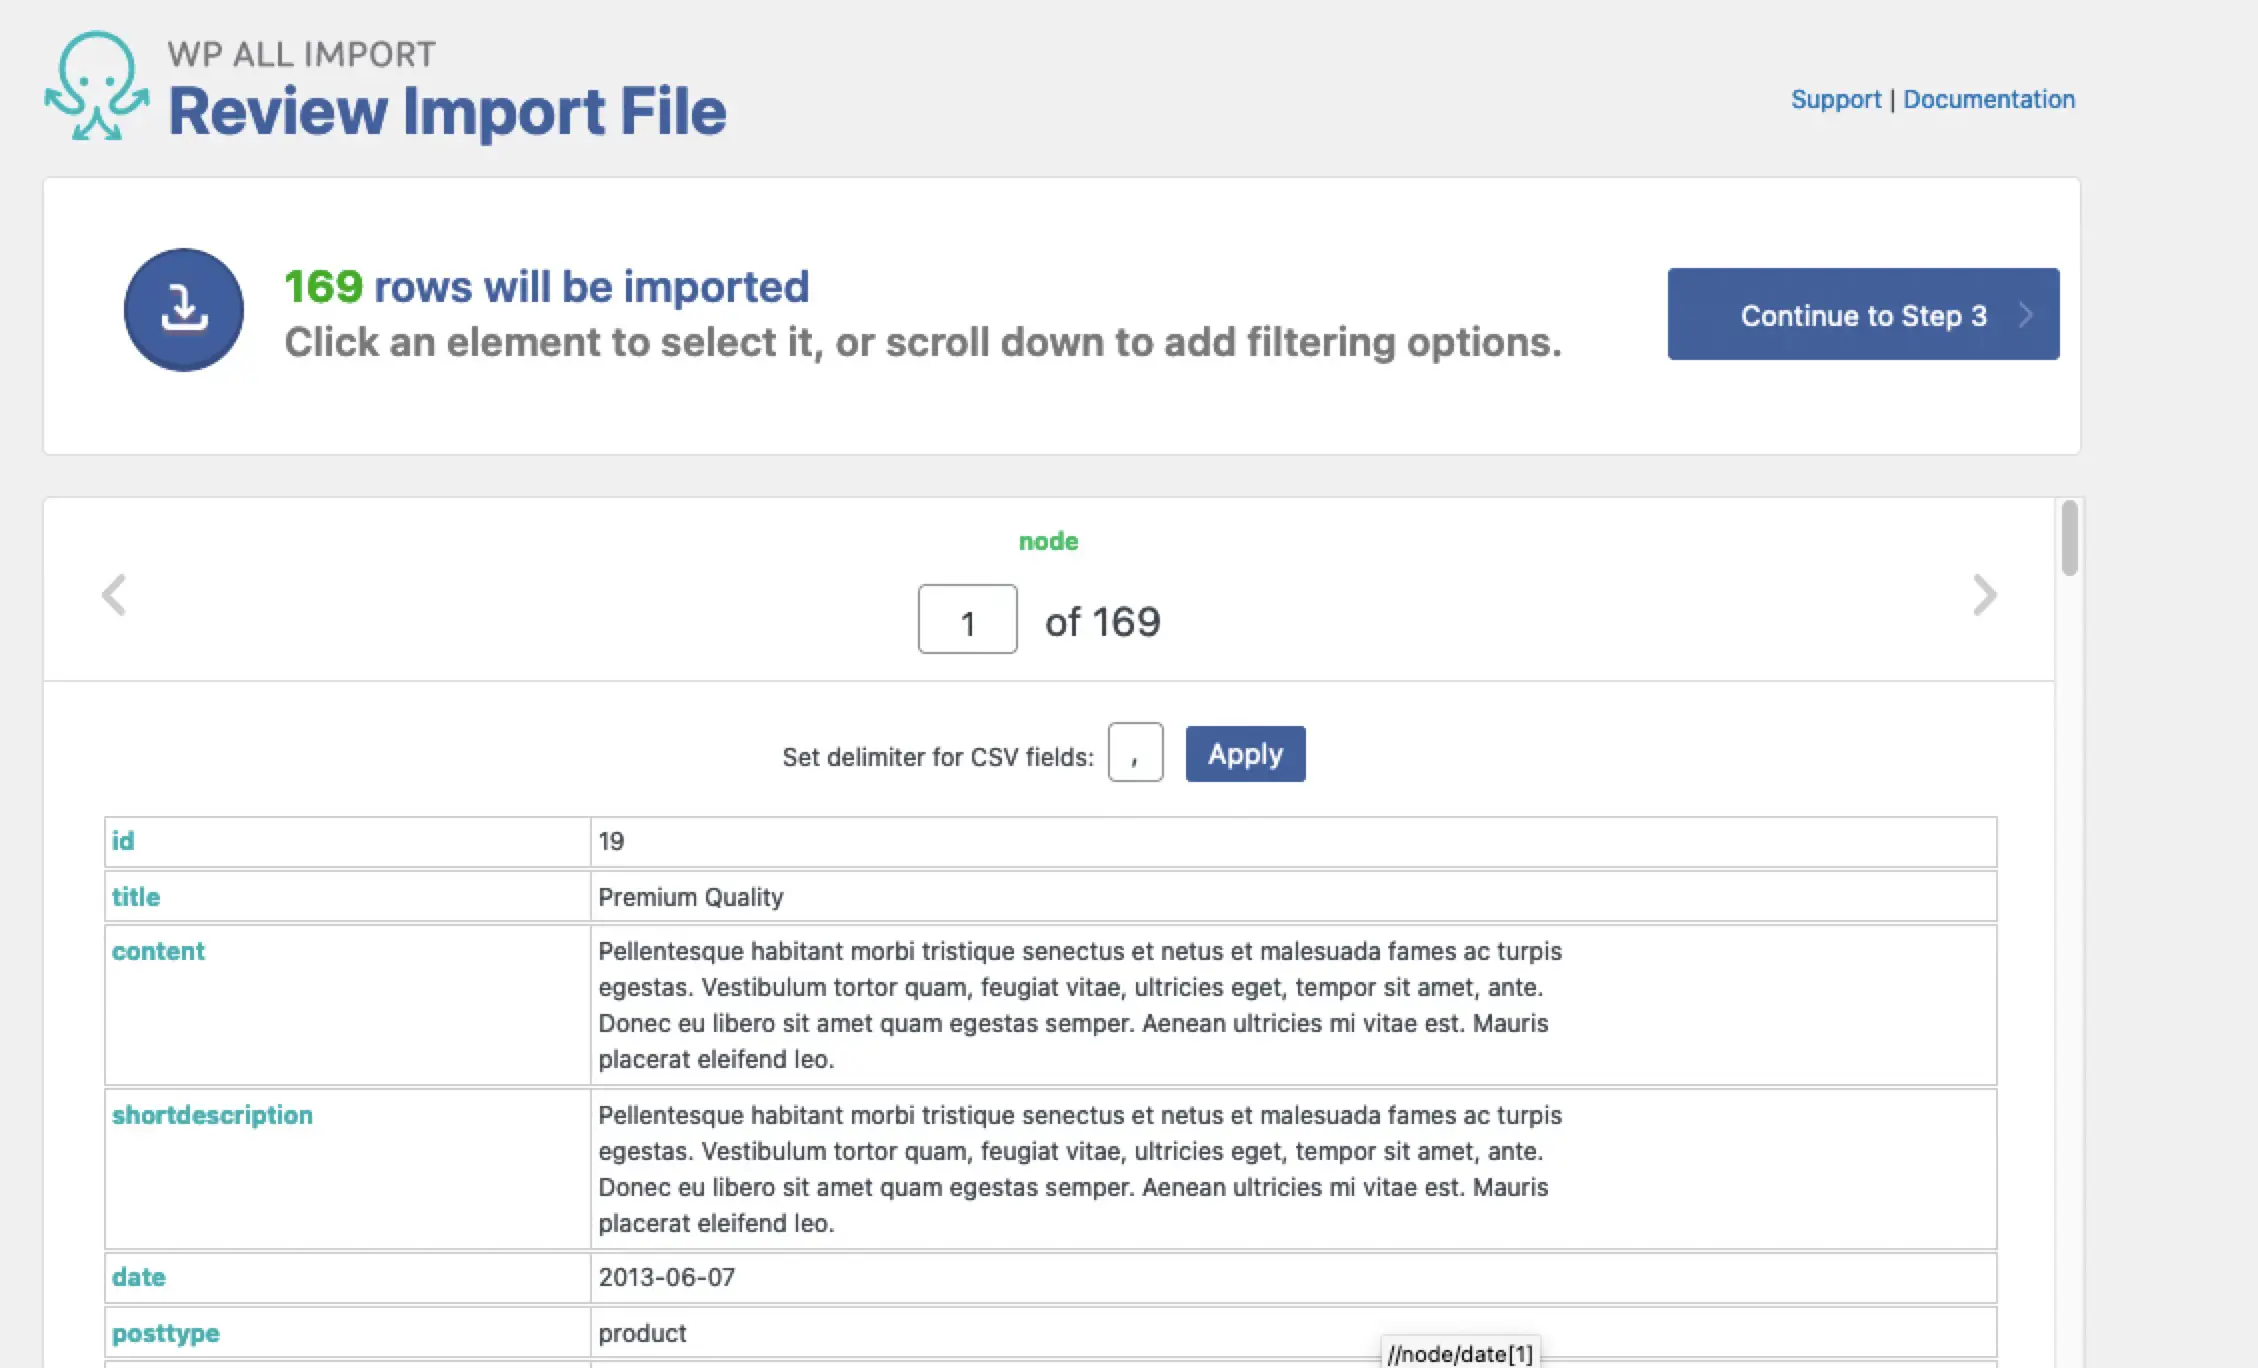
- In Step 2 you can review the data to be imported. I move straight to Step 3. Here you can map the data to specific WooCommerce fields. For a straight WooCommerce to WooCommerce import I don’t use this and I go to Step 4.
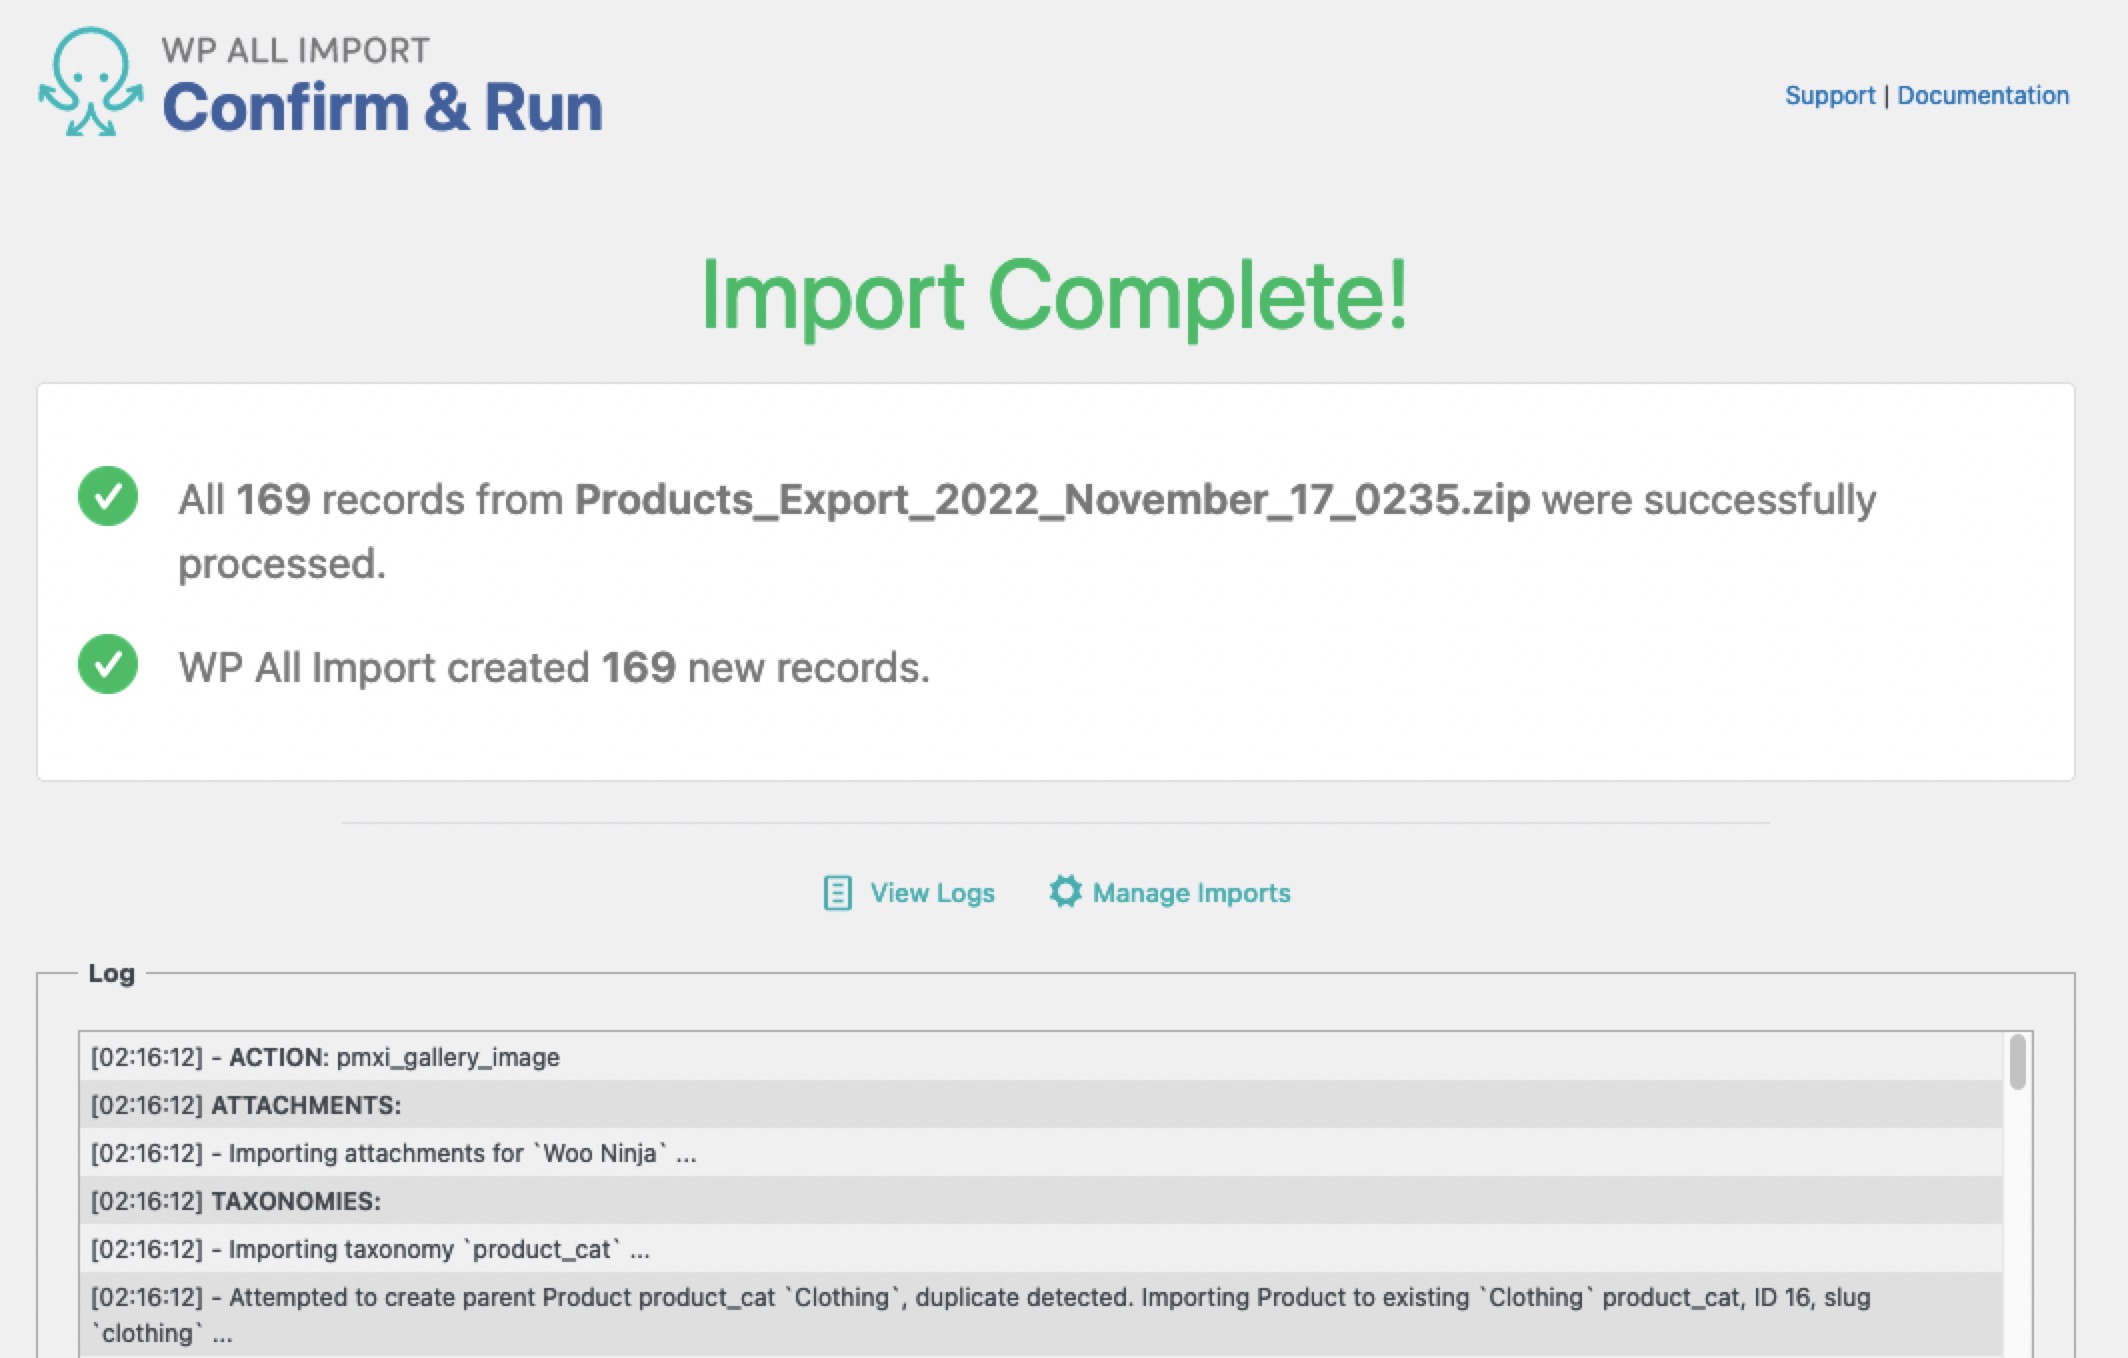
- I use the defaults here and then click Confirm & Run Import. The import may take a few minutes or more depending on how many products you have. You’ll see a confirmation screen with a summary of the import.
- Head over to Products to see everything that was imported!


For ease of use and real content syncing capabilities, Distributor plugin is the way to go.
And for all kinds of data importing/exporting, whether WooCommerce or anything else, WP All Import is the state of the art.