How to Set up GA4 (Google Analytics 4) in WordPress

Most WordPress site owners are already happily using Google Analytics to track traffic to their sites. But in July 2023, Analytics is changing significantly, and you need to take action sooner rather than later to keep gathering important data.
Table of Contents
What’s Changing in Google Analytics?
Google Analytics as we know it (also known as GA3 or Universal Analytics) is being retired in July 2023 and GA4 is taking its place.
The transition will not be seamless and if you don’t start tracking with GA4 now, you will lose some historical data. So to make sure you start gathering GA4 data you should install the new tracking code now.
You can keep running your current Universal Analytics tracking code alongside the new GA4 code. This is the best approach so that you will build a decent archive of data on the new GA4, before the old code is cut off. This will allow you to still do comparisons with historical data, for example.
GA4 is a bit difficult to get used to and some parts of it are not as easy as current Analytics.
In addition to installing the basic code you will also need to transfer your custom events and goal tracking if you have been using them.
You may also need to set up some custom items in the new reporting. Some customizations are not retroactive and will only apply from the moment you activate them.
Integrating your WordPress site with GA4
Set up your GA4 property
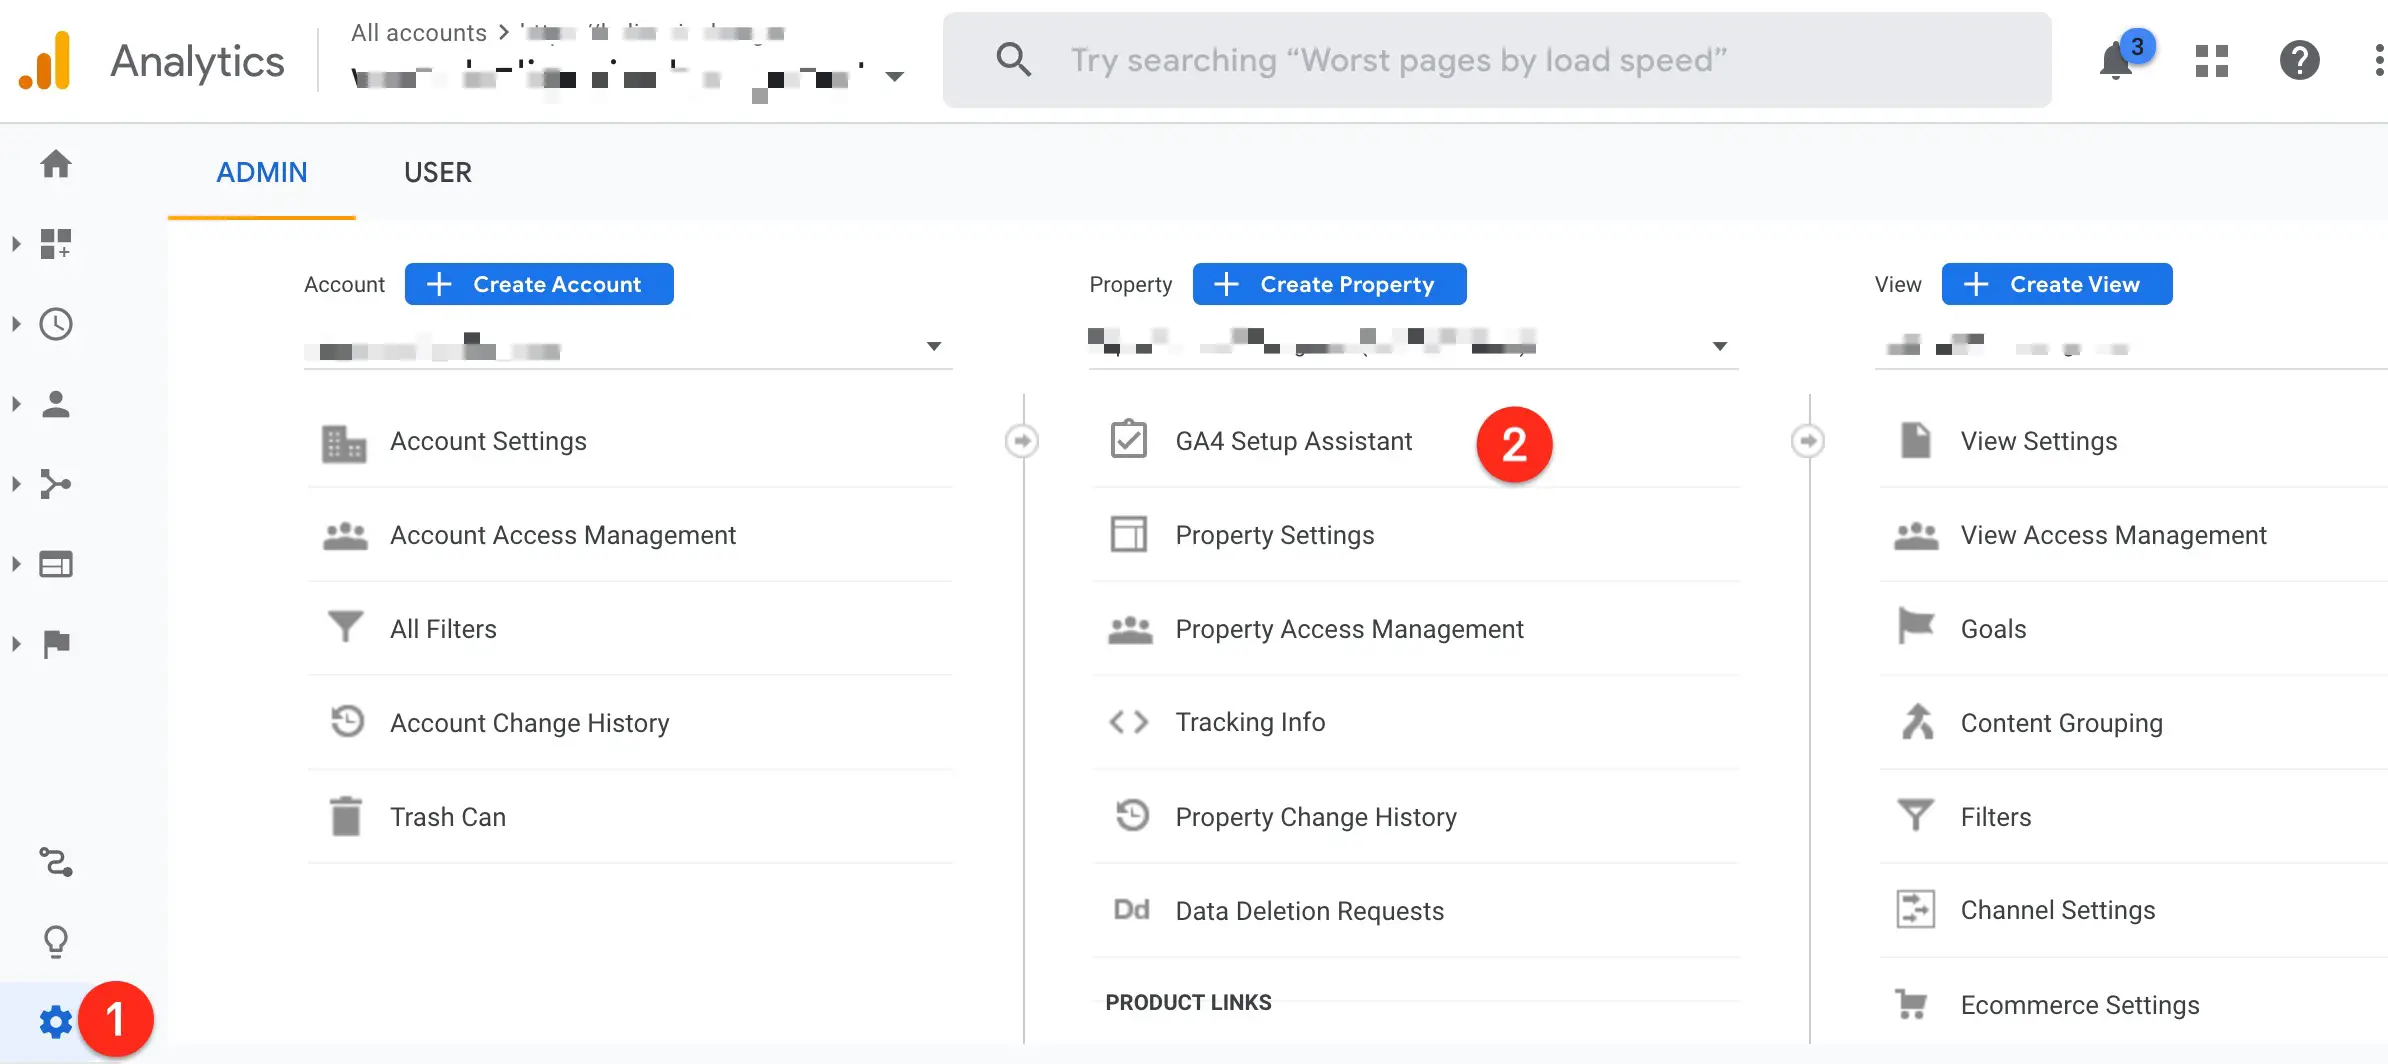
The first thing you need to do is go into your Analytics account and set up a GA4 property for your site.
- Go to the Admin page in Analytics.
- In the Property column click GA4 Setup assistant
- Choose “I want to create a new Google Analytics 4 property” and it will set it up for you.
Connect your WordPress site to Google Analytics
There are numerous plugins you can use to add Google Analytics tracking code to your site. The thing about GA4 is that it seems to require a bit more work to set it up in a useful way.
So I’m (begrudgingly) using the MonsterInsights plugin for integration. I don’t love it due to its aggressive marketing and upsells, but it gets the job done and has some useful features related to GA4 that makes things a bit easier.
For this article, I also tested the RankMath integration but it’s not as complete so I gave up and went back to Monster Insights.
If you don’t mind doing more manual setup you can also try GA Google Analytics. But, if you want to start tracking GA4 while keeping your existing UA code, which is recommended, then you will need their Pro version.
MonsterInsights integration
New installations
If you already use MonsterInsights for GA3/UA, skip to the next section, Existing MonsterInsights Users, for the recommended setup.
If you haven’t set up MonsterInsights on your site before, there are 2 ways you can connect your WordPress site with Google Analytics in MonsterInsights.
- Recommended: Use Google Authentication to directly connect your site with your Analytics account – this offers the most seamless and complete integration.
- Manually pasting your GA4 code in the settings. This will require extra steps to get the same level of reporting as number 1

1. Use Google authentication
This is very straightforward. By using this method, you will get automatic reporting on important information like outbound clicks, with the specific domain, text and URL, along with other custom dimensions. This gives you a lot more information in the reporting and deeper insight into your site’s performance.
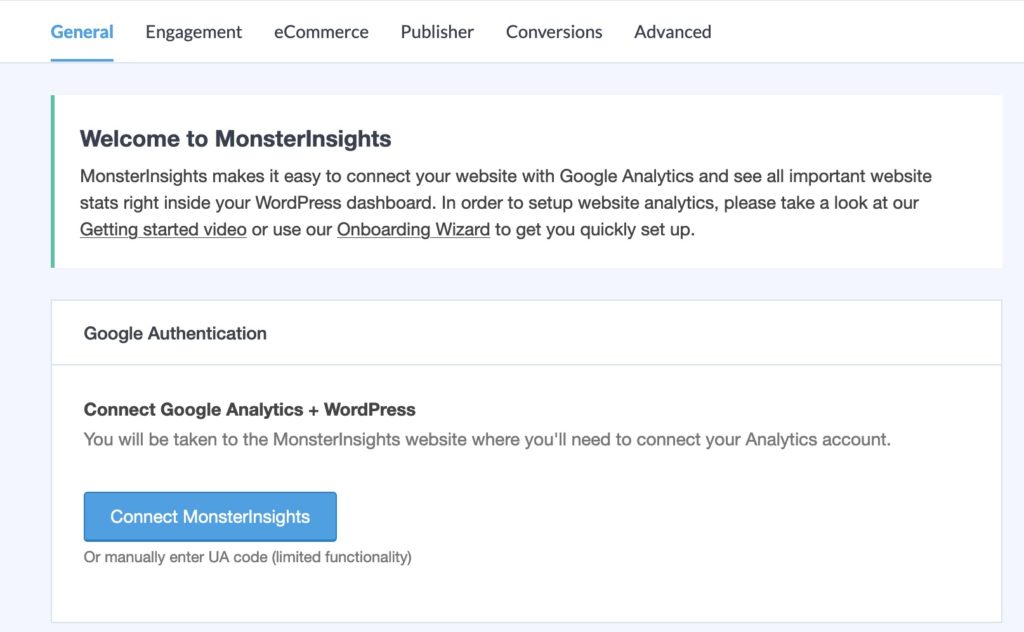
- In Monster Insights, Go to Settings → General → Google Authentication
- Click Connect MonsterInsights
- Follow the onscreen instructions and you will be set up in a couple of clicks.
2. Manual integration
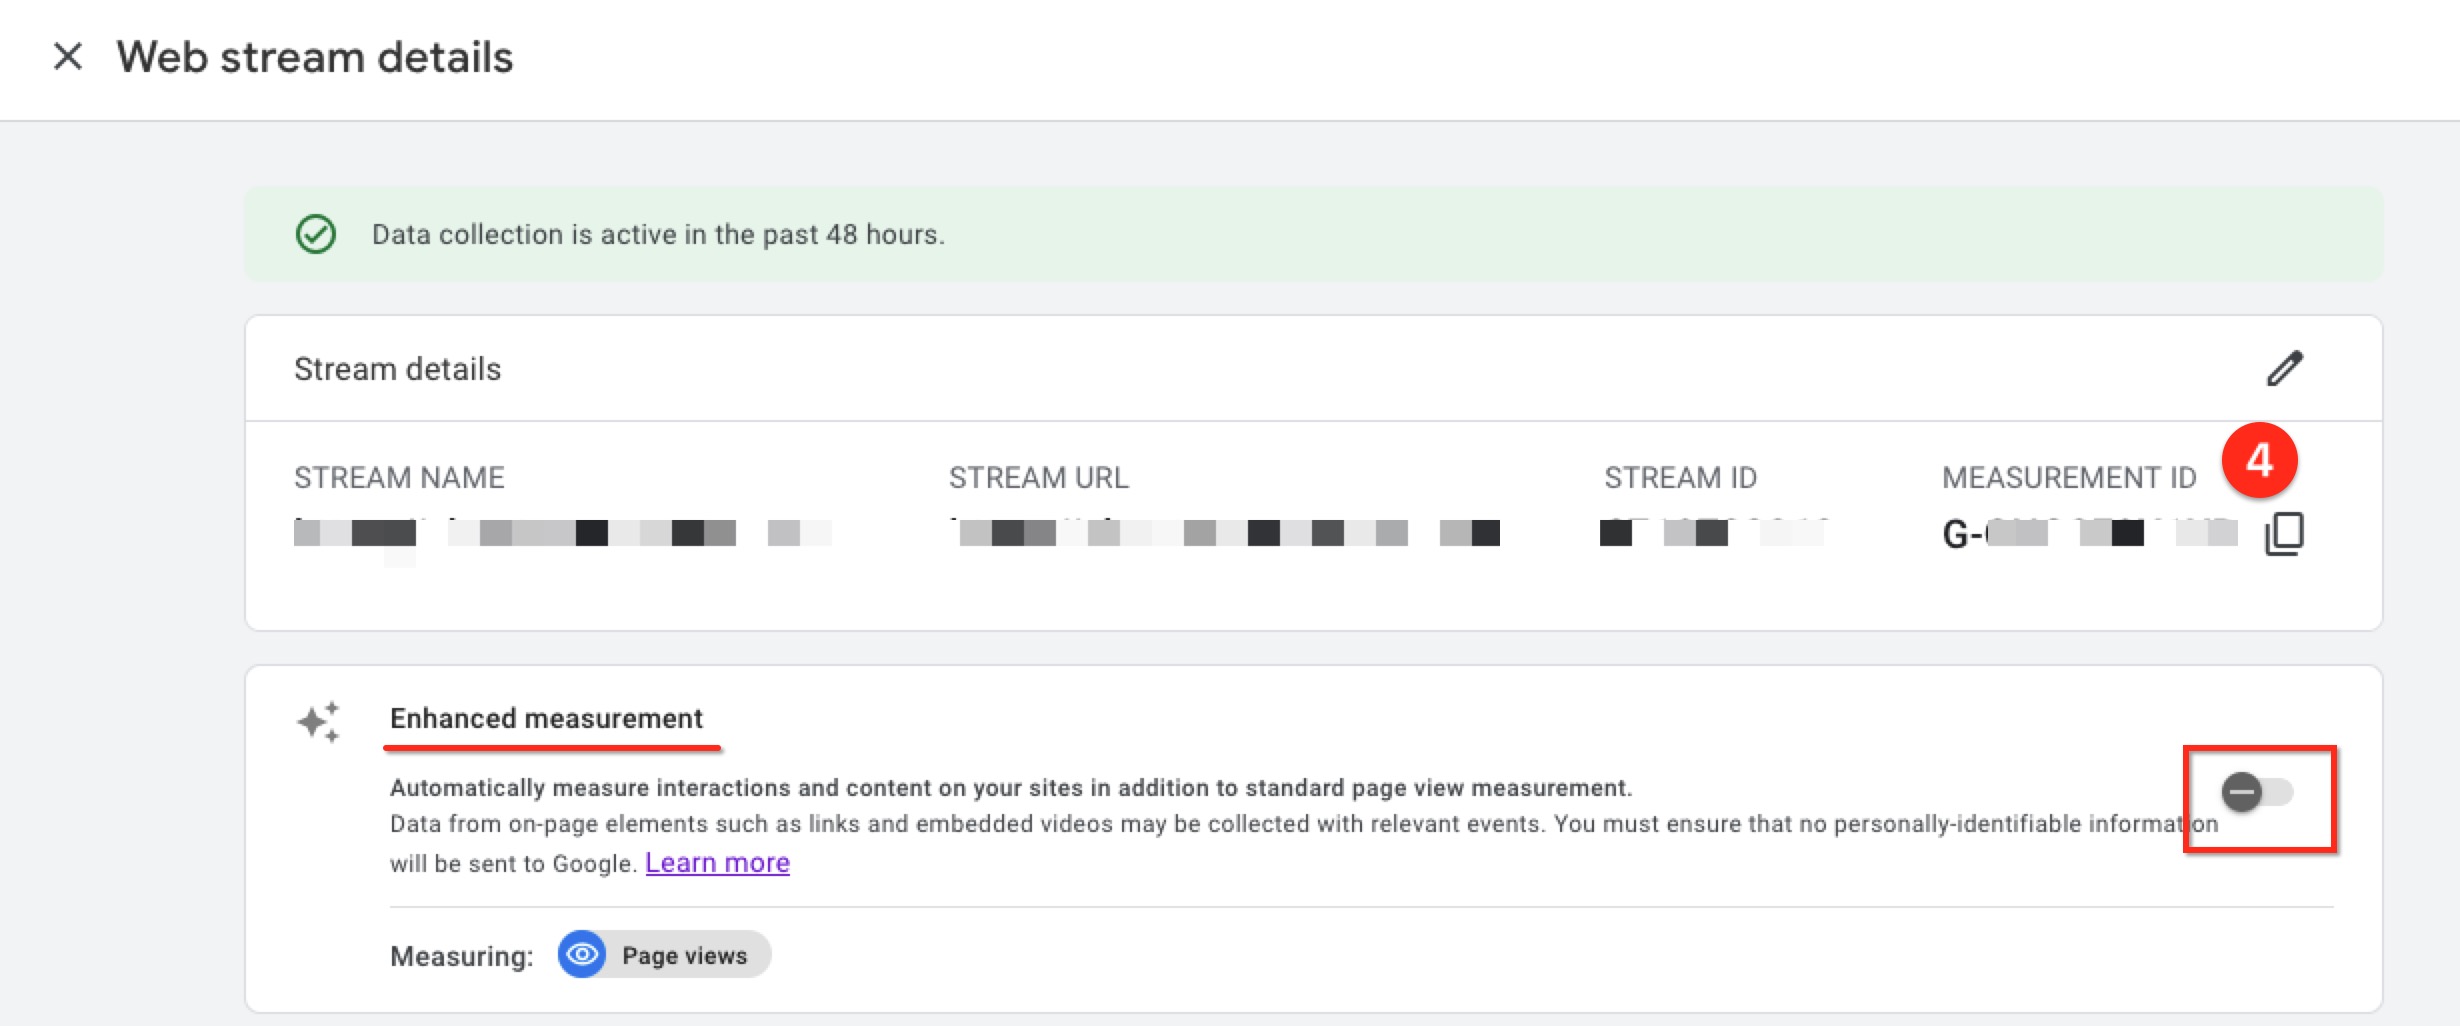
For this method you will need to retrieve the Measurement ID from your Analytics account.
- Click on the Admin icon in Analytics.
- In the Property column click on Data Streams
- Click your domain name.
- A panel will open and you’ll see the Measurement ID at the top right – copy it
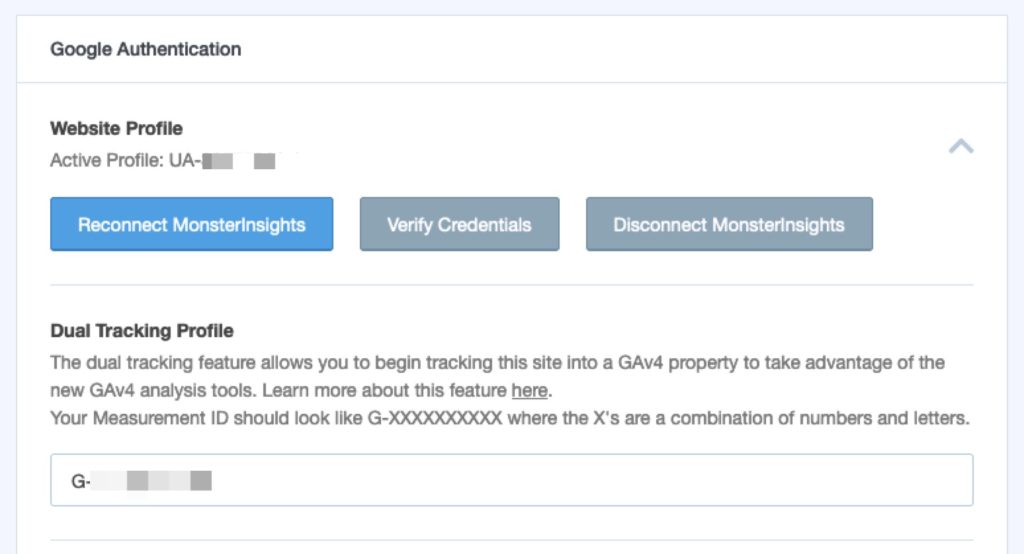
- Now go to your WordPress site and in MonsterInsights go to: Settings → General → Manually Enter Your GA4 Measurement ID
- Paste the Measurement ID and save the settings.
Warning: When using MonsterInsights make sure make sure that Enhanced Measurement in GA4 is toggled off, otherwise you will get duplicate data with some events being tracked twice.

Existing MonsterInsights Users
If you’re already using MonsterInsights and have already integrated your UA using Google Authentication, I recommend re-authenticating to connect to your GA4 property.
Click Disconnect MonsterInsights, then Connect but select your GA4 property.Then manually paste your UA code into the Dual Tracking field.
Reporting, Goals, Events, Conversions
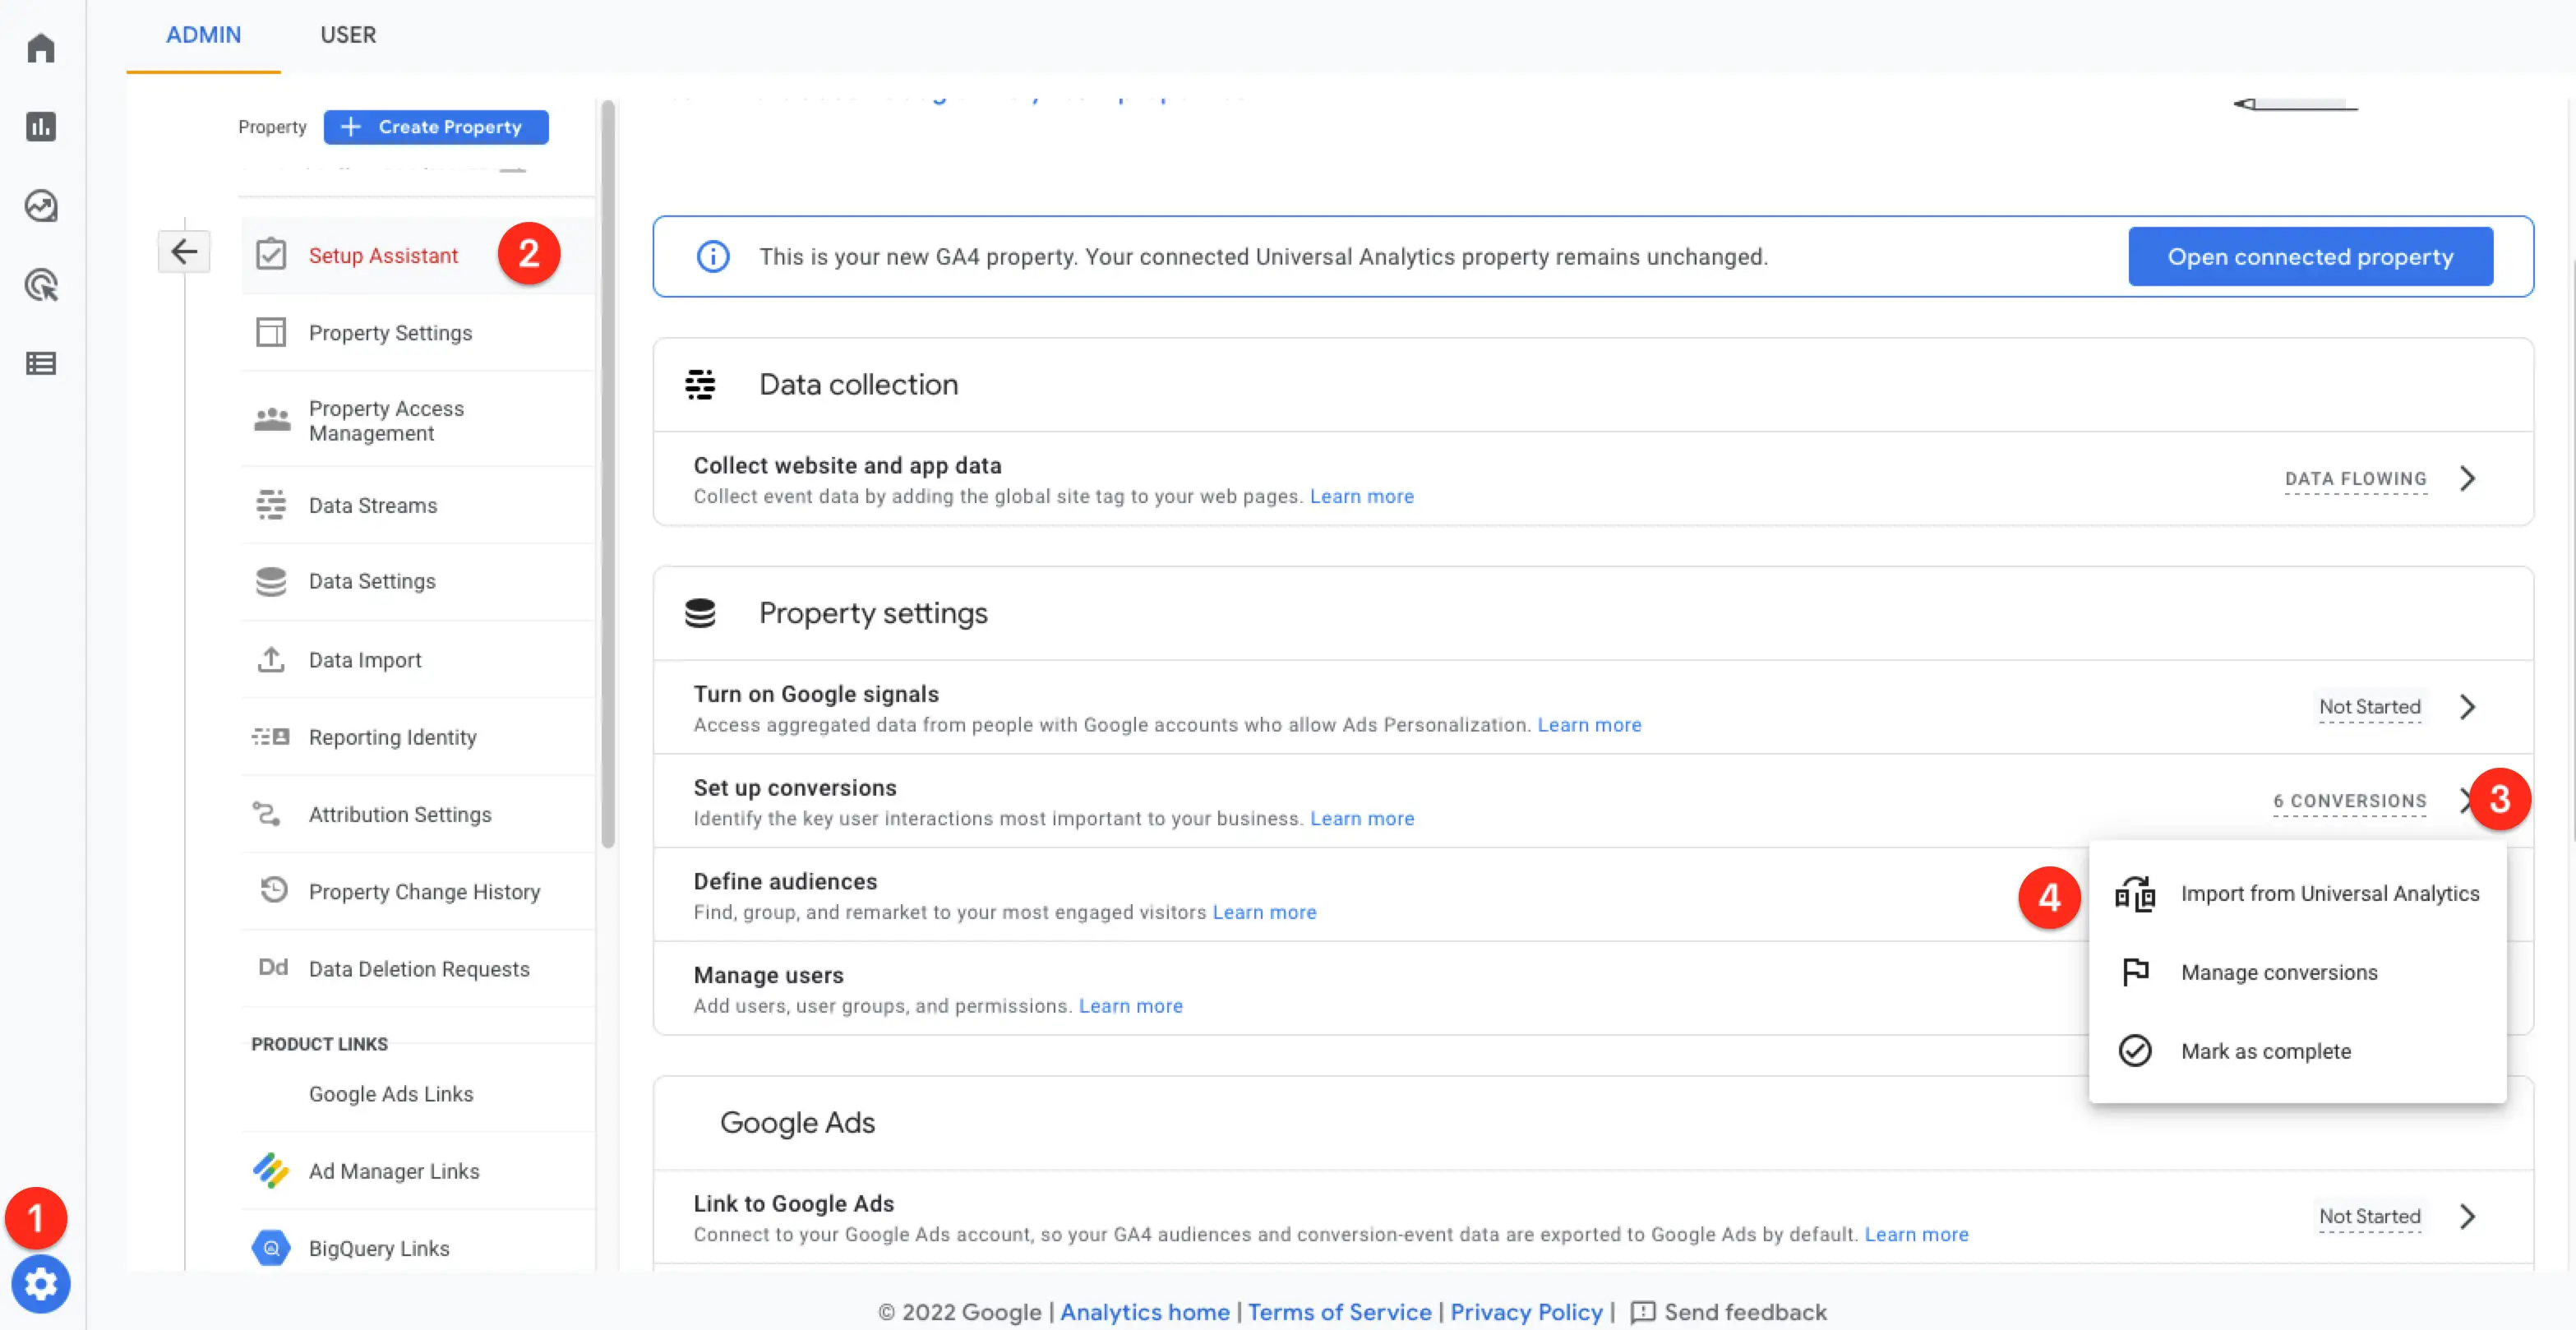
If you have been using Goals in Universal Analytics, these are now known as Conversions in GA4. You can attempt to transfer them over automatically:
- Go to Admin → Property → Setup Assistant, in your GA4 property.
- Scroll down to the conversion section and click “Import existing goals from your connected Universal Analytics property”.
- You will see eligible Goals that can become Conversions in GA4.
- Follow the onscreen instructions to import them.
In some cases you may not have eligible Goals and you will have to manually set up them up as Events and Conversions in GA4.
A common reason for prior goals becoming ineligible for automatic setup is that Regex is not supported in GA4, whereas it is in Universal Analytics. So all your Regex goals will have to be manually configured in GA4.
Set up reporting for events and conversions
A Conversion is a specific kind of Event that’s important for your business. Any Event can be marked as a Conversion.
To get granular reporting on any specific event on your site, it has to be registered as a custom dimensions in Analytics first.
For example, while outbound link tracking is done automatically by GA4, you won’t actually see specific reporting on it without additional configuration.
A benefit of using the Google Authentication in MonsterInsights is that they automatically send and configure many custom dimensions in GA4:
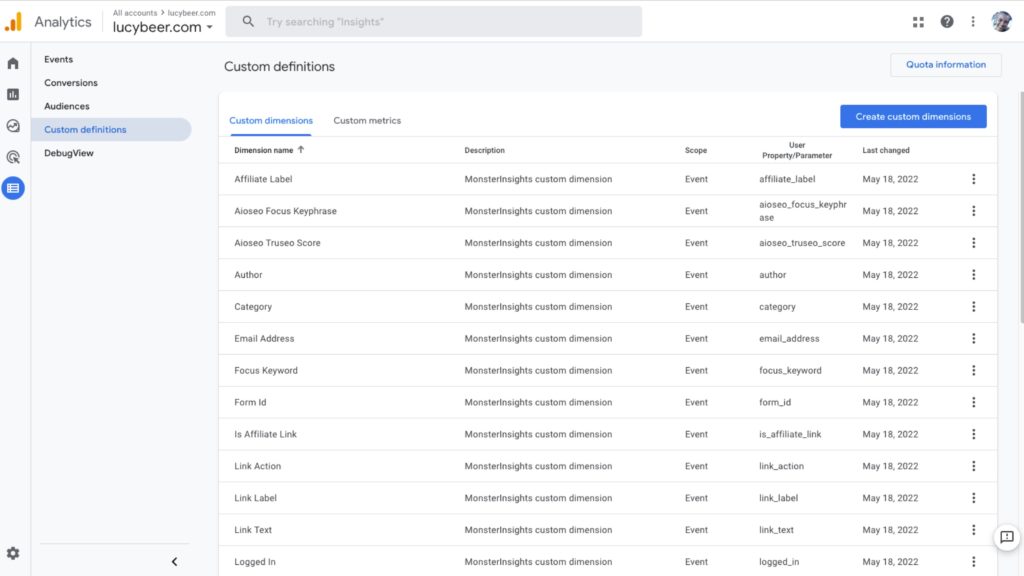
If you don’t see any custom dimensions, you can set them up manually.
Let’s use the example of tracking outbound links. To track these more precisely and get reports on the specific destinations, set the following custom dimensions:
- Go to Configure → Custom definitions
- Click Create custom dimensions
- Dimension name – this will show in reports and can be anything you want, but should obviously relevant eg. outbound link url
- Scope should be set to Event.
- Description is optional
- Event parameter – this will be pre-populated with any parameters that have already been triggered on your site. Otherwise you can type it in. For this example type: link_url
- Repeat the above for another custom definition for: link_domain
- After doing this, you will see that cards for these show up in your Reporting (as part of the “click” reports in this case) and they will be tracked going forward.
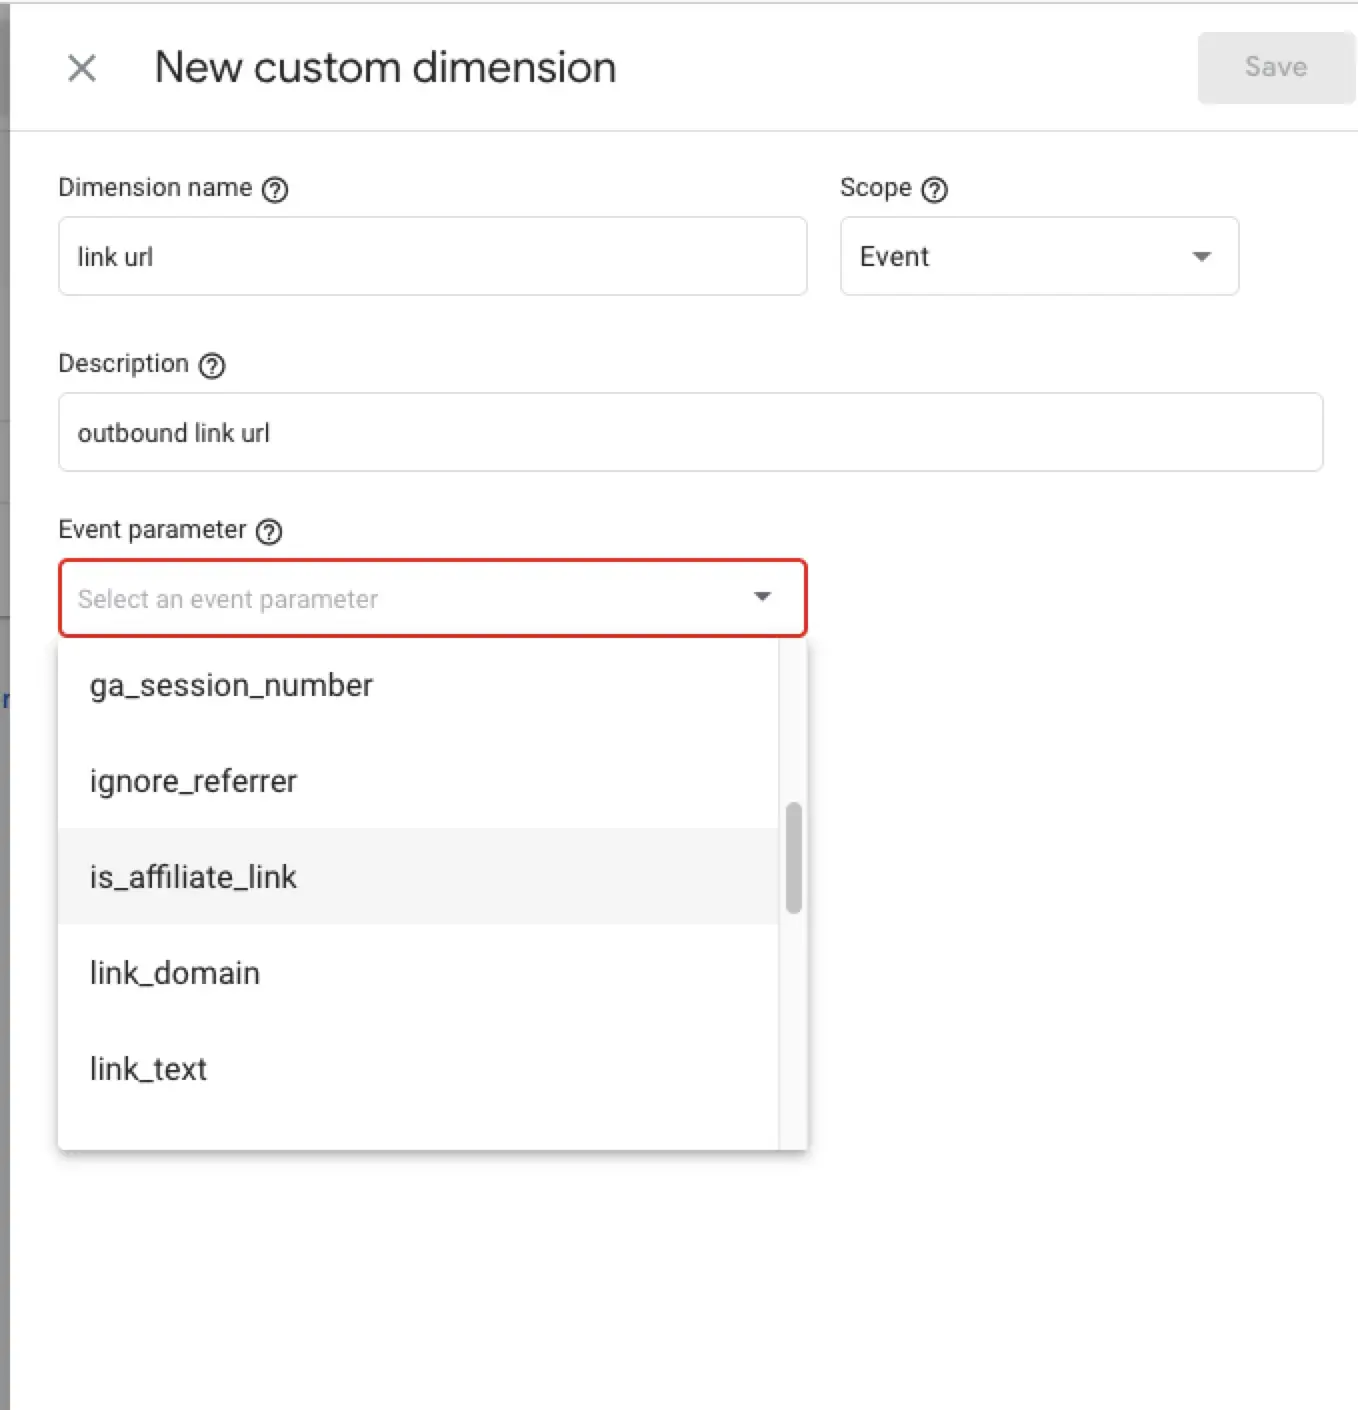
Unfortunately it’s not retroactive which is why you need to set up this stuff sooner rather than later.
Now if you also want to track these events as conversions, you must take another step.
Track Events as Conversions
Setting up important events as conversions will allow you to track them more effectively and understand more easily what’s moving the needle for your site.
Let’s say you want track specific affiliate domains more closely. So you would create a dedicated Event for each affiliate, then also set it as a conversion:
- Go to Configure → Events → Create event
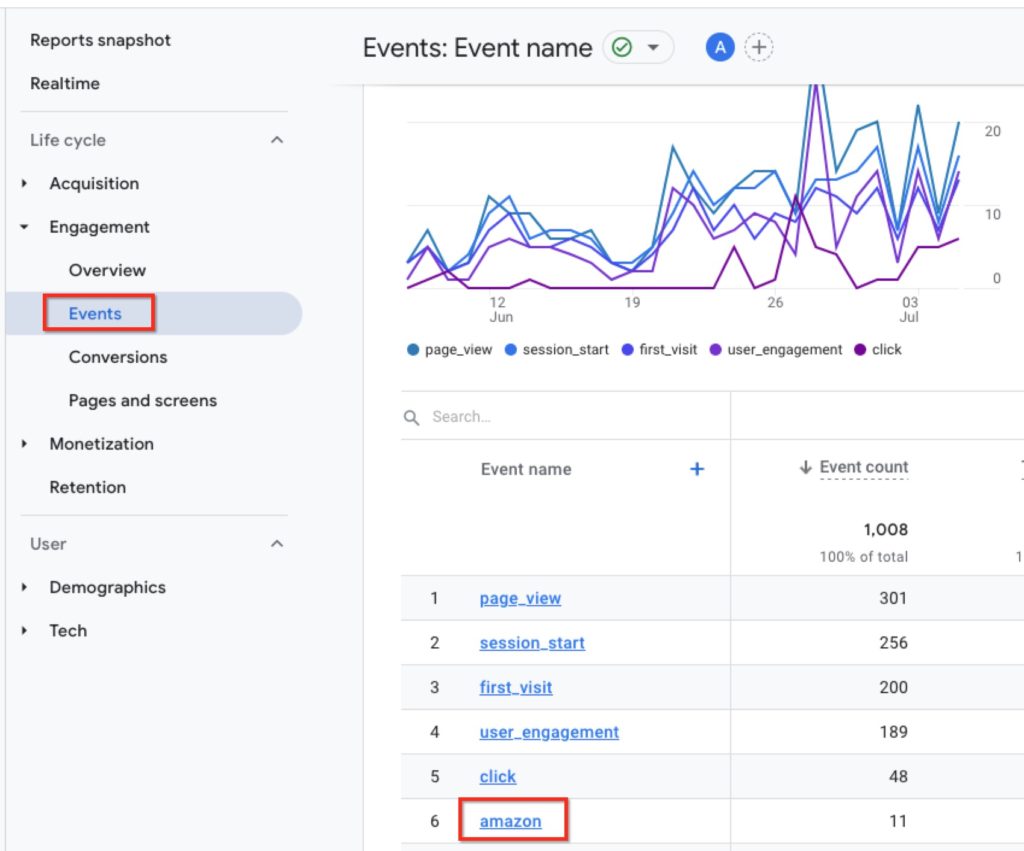
- Custom event name: give it a relevant name – this will show in your reports, eg. Amazon clicks
Set up the Matching Conditions as follows:
- In Parameter enter link_domain.
- Operator – choose “contains (ignore case)”
- Value – enter amazon (or whatever domain is relevant for you)
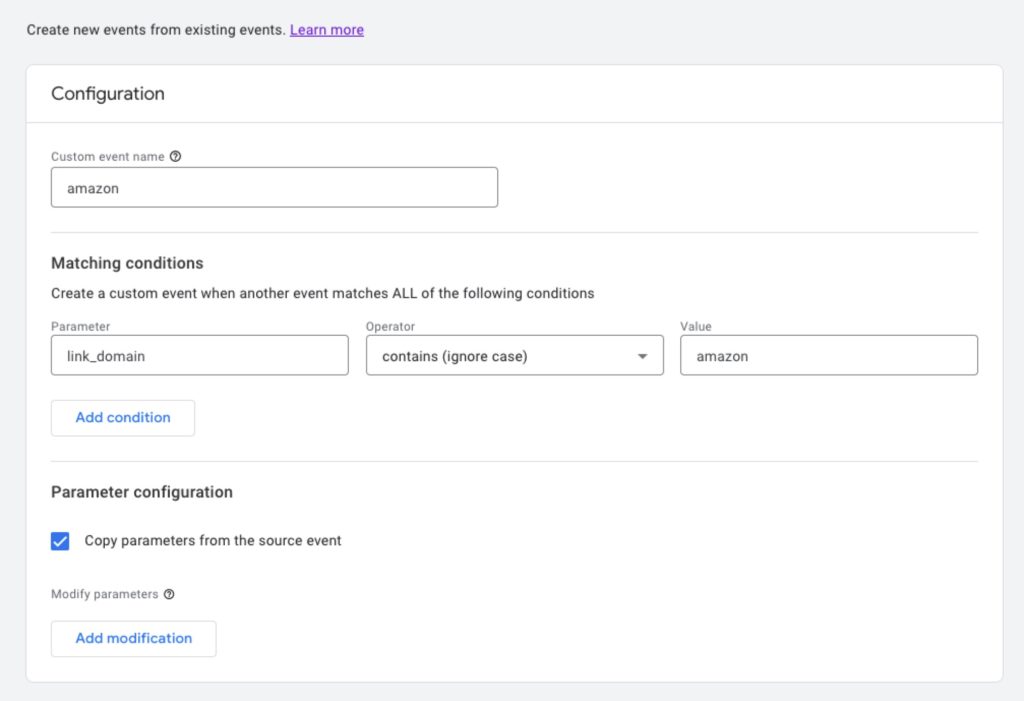
- Leave the box checked for parameter configuration
- Click the Create button
After creating the event, it may take up to 24 hours for them to actually show on the Existing Events page.
Once it’s showing in Existing Events, toggle the “mark as conversion” on.
If you have a lot of domains to track, it might be easier to use this Google Tag Manager implementation.
Your custom events will show in your reports by going to Engagement → Events
So now you have a good foundation for your GA4 setup and can start collecting relevant data. It’s a powerful tool and this guide doesn’t cover everything it can do.
Here are some additional resources that can help with getting the most out of GA4:
- The ultimate guide for setting up a Google Analytics 4 property
- Set up event tracking in Google Analytics 4
- Track conversions with Google Analytics 4
- Tracking affiliate clicks with Google Analytics 4
Be aware that it takes time to get used to GA4. You will probably hate it at first, but keep trying to use it and familiarize yourself with it and it will get easier with time.