7 Simple WordPress Performance Test Best Practices

These days it seems most WordPress users are aware of the need for speed on their websites: conversions, SEO, user experience etc. I won’t recycle all the usual stats here ;)
Maybe you’ve read some articles and seen that you need to speed test your site. So you click on whichever tool is mentioned, input your URL and proceed to freak out at the results.
But wait! Before freaking out, make sure you’re observing these rudimentary best practices when doing a performance test on your WordPress site.
1. Test the correct version of your URL
Most websites are available at several variations of their URL:
- Using http or https
- Including the www before the domain name, or without the www.
In most cases, there is a primary version of your URL, say https://example.com, and the desired behaviour is that no matter which version a user may type in, they will be redirected to the primary version.
However, for the purposes of speed testing, you should use the primary version of your URL to avoid lengthy redirects. This is what happens when you speed test a different version:
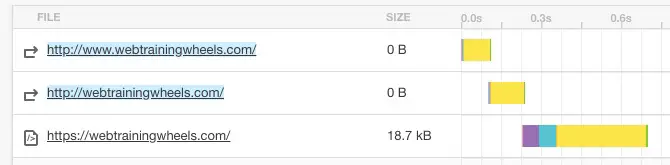
The first couple of lines represent redirects, each of which add some time to the overall load time.
2. Use the right server location
Geography is important! You may not often have reason to think about this, but your website actually lives on a computer – a physical server located somewhere in the world.
And that somewhere matters. If your website is hosted in London, England and you run a speed test from a server in Los Angeles, U.S.A, you will get a longer load time than if you ran a test from somewhere in England or Europe. Distance increases latency – that is the processing time to deliver that webpage.
Here’s an example. The site below is hosted in the US and does not use a CDN. I ran a couple of tests, the one on the left from a GTMetrix location in the US, and the one on the right used a server in Australia. It’s a lightweight site, but the speed difference is still significant – 2 seconds. On the average site which is a lot heavier, or with worse hosting the difference would be even more.
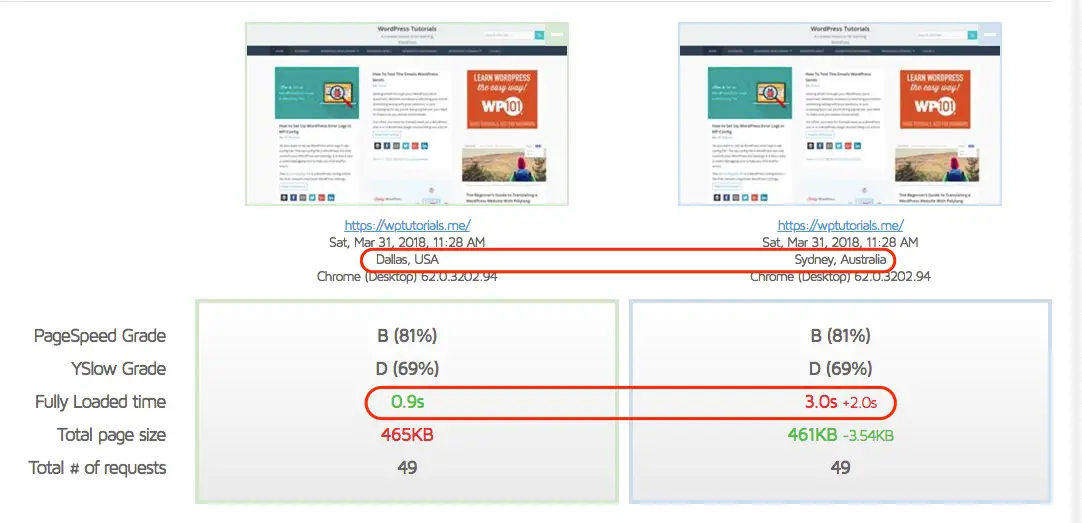
Generally speaking you should do a speed test from a server location closer to your host to get a better result.
There can be valid reasons to use other locations, for example, if you have website visitors from other parts of the world and want to see what their experience would be like.
In that case, however, you should either:
- Get your web host to move your site onto a server in a region closest to your target audience
- Or, if your audience is coming from diverse geographic locations, use a CDN
3. Look at the speed, not the grade
When using a performance testing tool, the goal is to find out how fast your site is.
The only metric that can tell you that is one that uses time-based units of measurements. That means milliseconds or seconds.
But. not. a. grade.
Usually the first thing you see in the analysis is some kind of a grade, or a score, which is typically highlighted in either red, orange or green. We’ve been socially conditioned to see green as “good” – everything’s A-OK and anything less than that as problematic and reason to worry. We then become blinded to everything else on the page and fixate on that score and color.
When speed testing, grades are only based on a set of generic rules which may or may not apply to your particular site. They do not tell you how fast your site is and in some cases there is no correlation. Here’s a perfect example:
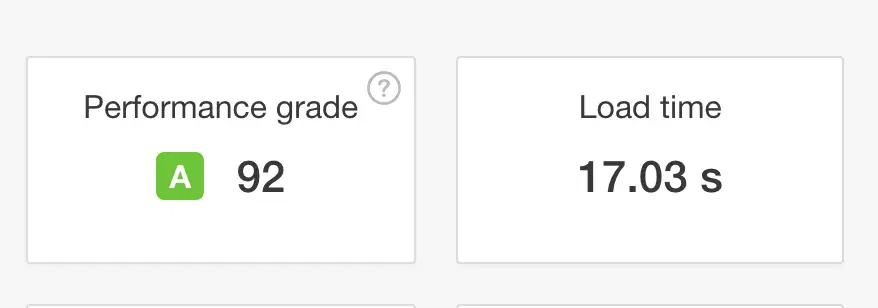
Nobody wants a 17 second load time, even if the score is 92!
4. Don’t try to implement all recommendations
Each tool has a predetermined checklist of items it’s looking for, and each one has a weight. It doesn’t matter what type of website you have, or its hosting environment, target audience etc – the checklist is always the same.
Imagine if every car maintenance manual, no matter what type, had the same set of instructions. They would be generic and some would certainly apply in all cases (change your oil regularly) , but they would miss a lot of specifics. Speed tools are a bit like that.
So you have to understand that not all recommendations are supposed to be followed, and if you do want to follow them, they may require expert help.
Not only that, but the recommendations don’t necessarily correlate to the impact they will have on load time. Some of them are actually useless, such as GTMetrix’s “remove query strings” rule – it’s outdated and makes no difference to load time. This would be like using an outdated maintenance manual for your car. For example, most tools don’t check if your site supports HTTP/2, where the best practices are different.
While some can be useful or indicate problems, following all of them is not a requirement to improve load time.
Always focus on the speed itself.
5. Always click the details
Each recommendation will come with more specific details, but usually that requires an extra click and many people don’t bother. But there’s important information hidden in those details.
The most common problem with this is that the recommendation could be suggesting impossible changes – the most common offender is related to 3rd party resources. 3rd party, meaning files that are coming from a server that you do not control.
A really common example is the “leverage browser caching” message.
If you just saw that you scored a “C” for a particular rule, you may think something is horribly wrong:
![]()
But to really understand what is being communicated you have to click that message to get to the details:
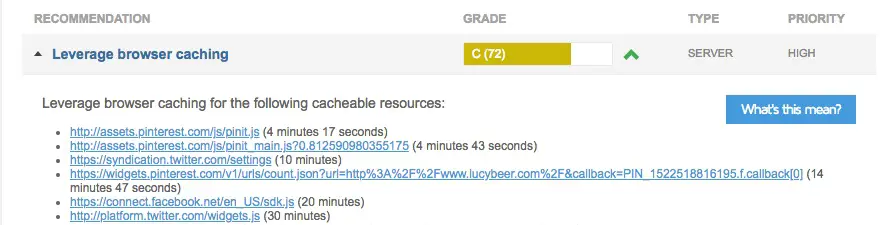
Once you review the list of files, you’ll see that they are all from external, 3rd party web services, therefore you cannot apply browser caching to them- you simply don’t control those files.
6. Know what you’re measuring
Google PageSpeed Insights does not measure your load time. Pingdom and GTMetrix do, but they each use different metrics, and will give you quite different results. You have to understand what you’re testing in order to put the results in context. See this guide for more info on the differences between various tools.
These tools generally default to testing the desktop version of your site, so if you want to see what the mobile experience is like, you may need to use a different tool or at least to adjust the settings.
7. Run multiple tests
One, single test is not representative of the overall performance. There will be natural variance in results due to network conditions, server performance and other factors – don’t expect exactly the same result every time.
If the variance is drastic it could indicate underlying issues. And the worse your web host is, the more variance you’re likely to have.
Run several tests at a time to get an overall picture of performance. Most people usually only test their homepage but you should also test other critical pages on your site. For example if you have an ecommerce store, make sure you test product pages as well.


good read. Choosing the location is the most important thing. I’m using CDN cuz my visitors are coming around the world
Great advice, smartly written, plus served with a smile and a bit of humanity.
Thanks Joel!! :)